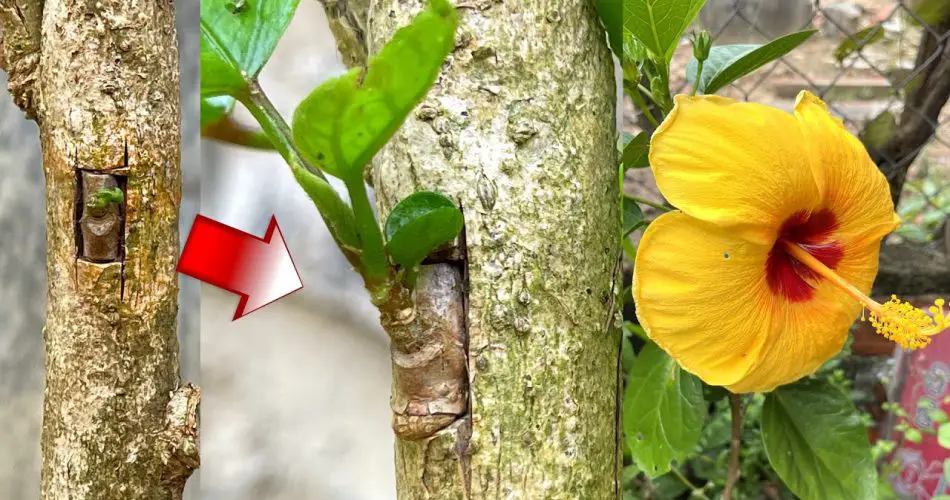
Grafting hibiscus onto a tree can be an exciting way to create a unique and beautiful display of hibiscus flowers. This technique not only allows you to combine different hibiscus varieties but also enhances the overall aesthetic of your garden or landscape. Here, we explore two popular types of hibiscus grafting methods and how they can be used to grow stunning hibiscus flowers on a tree.
Understanding Hibiscus Grafting
Grafting is a horticultural technique where parts of different plants are joined together to grow as one. When grafting hibiscus onto a tree, you essentially combine the rootstock (the tree) with the scion (the hibiscus variety you want to propagate). This method can lead to a more vibrant and varied display of hibiscus blooms.
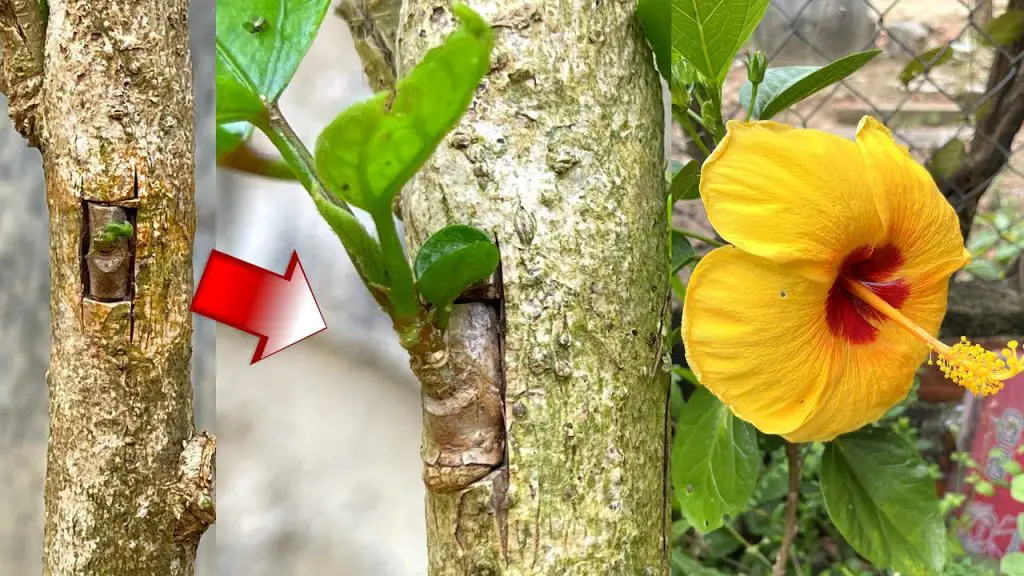
Type 1: Cleft Grafting
Cleft grafting is a common technique used to graft hibiscus onto a tree. It’s particularly effective for joining a single hibiscus variety to a tree trunk or a large branch.
Steps for Cleft Grafting:
- Prepare the Rootstock: Select a healthy tree with a trunk or branch that is about 1 to 2 inches in diameter. Make a clean, vertical cut down the center of the rootstock to create a cleft.
- Prepare the Scion: Choose a healthy hibiscus branch with several buds. Cut the scion at a slant to create a wedge shape that fits snugly into the cleft.
- Insert the Scion: Place the slanted end of the scion into the cleft of the rootstock. Ensure that the cambium layers (the green layer just under the bark) of both the scion and rootstock are aligned.
- Secure and Protect: Bind the graft with grafting tape or plastic wrap to hold it in place. Apply a layer of sealant to protect the graft from moisture and pests.
- Care and Maintenance: Keep the grafted area moist but not waterlogged. Ensure the tree receives adequate sunlight and nutrients to support the graft’s growth.
Type 2: Whip and Tongue Grafting
Whip and tongue grafting is another effective method, particularly useful when grafting multiple hibiscus varieties onto a single tree. This technique creates a more secure and stable graft union.
Steps for Whip and Tongue Grafting:
- Prepare the Rootstock and Scion: Select both the tree and hibiscus scion with matching diameters. Make a diagonal cut about 1 to 2 inches long on both the rootstock and scion.
- Make Tongue Cuts: On each diagonal cut, make a slight tongue cut (a small notch) to interlock the scion and rootstock. This provides a secure fit and improves the contact between the grafted parts.
- Join the Scion and Rootstock: Align the tongues of the scion and rootstock and press them together to form a tight seal. Ensure the cambium layers are in close contact for successful grafting.
- Secure the Graft: Wrap the graft union with grafting tape or elastic bands to hold the pieces together. Cover with a grafting wax or sealant to protect against pests and moisture.
- Ongoing Care: Monitor the graft for signs of growth and healing. Keep the area clean and well-watered to promote healthy development.
Benefits of Hibiscus Grafting
- Diverse Blooming: Grafting allows you to display multiple hibiscus varieties on a single tree, creating a vivid and colorful display of flowers.
- Enhanced Growth: The combination of a strong rootstock and varied hibiscus scions can result in vigorous growth and improved flowering.
- Unique Appearance: Grafted hibiscus trees offer a unique and attractive feature for gardens, landscapes, or indoor spaces.
Grafting hibiscus onto a tree is a fantastic way to enhance your garden’s beauty and enjoy a variety of hibiscus flowers. Whether you choose cleft grafting or whip and tongue grafting, these techniques can help you create a stunning and diverse display. With proper care and attention, your grafted hibiscus tree will become a centerpiece of vibrant blooms and a testament to your gardening skills.