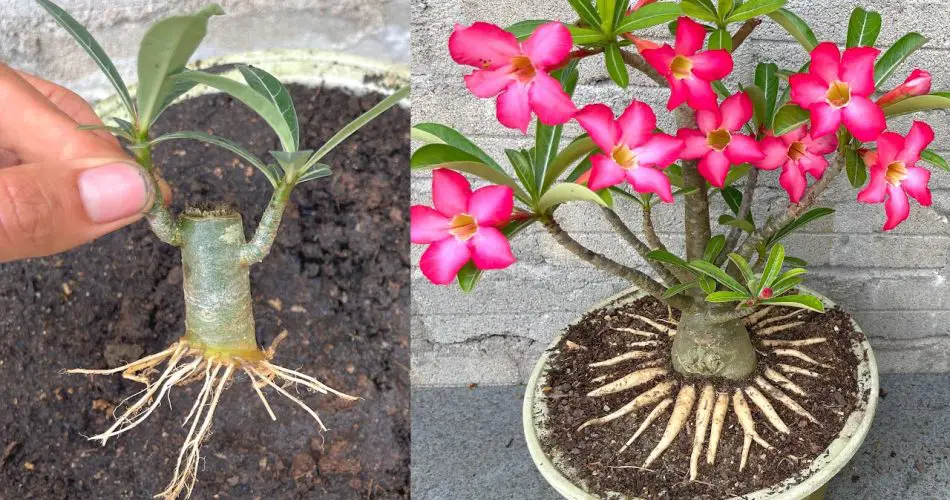
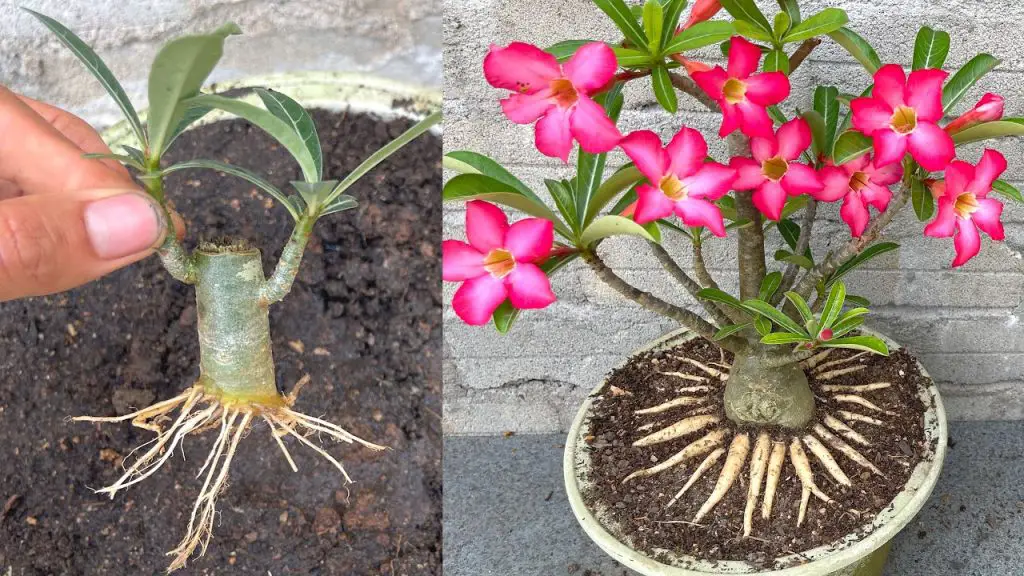
Adenium, commonly known as the Desert Rose, is a beautiful flowering plant that thrives in dry, sunny environments. It is a popular choice for bonsai enthusiasts due to its unique appearance, particularly its thick, swollen trunk and striking flowers. If you’re looking to create a beautiful Adenium bonsai with gorgeous roots, then this guide is for you. We’ll walk you through the process of growing and shaping your Adenium bonsai into a stunning piece of living art.
Why Choose Adenium for Bonsai?
The Adenium plant is famous for its swollen caudex (trunk) and beautiful funnel-shaped flowers that come in a variety of colors, including pink, white, and red. These attributes make it an ideal candidate for bonsai cultivation. The thick roots and unique shapes that can be formed give this plant a distinctive and eye-catching look.
What You Need to Create an Adenium Bonsai
Before you begin, gather the following materials:
- Adenium cutting or young plant: You can start with a cutting or a small, young Adenium plant.
- Well-draining soil: Adenium bonsai needs sandy, well-draining soil for proper growth.
- Bonsai pot: Choose a shallow bonsai pot that allows the roots to spread and form a beautiful root structure.
- Sharp scissors or pruning shears: For shaping and cutting.
- Wire for shaping: To help train the plant into your desired bonsai shape.
- Rooting hormone (optional): This can help stimulate root growth if starting from cuttings.
Step-by-Step Guide to Creating an Adenium Bonsai with Beautiful Roots
Step 1: Choose Your Adenium Plant
Start with a healthy Adenium plant or a cutting. If you’re using a cutting, make sure it’s at least 4-6 inches long and has a healthy base. The caudex (the swollen part of the stem) should be visible, as this is a key feature of bonsai plants.
Step 2: Prepare the Bonsai Pot
Choose a shallow bonsai pot that is suitable for your Adenium’s size. Make sure the pot has drainage holes to prevent waterlogging. Adenium thrives in a pot that allows its roots to spread but also constrains them slightly to create that iconic root formation.
Fill the pot with well-draining soil. A mix of cactus soil, perlite, and sand is ideal to provide good aeration for the roots. You can also add some gravel for extra drainage.
Step 3: Plant Your Adenium Cutting
If you are using a cutting, dip the base of the cutting in rooting hormone to encourage faster root development. Then, make a hole in the center of the soil in your bonsai pot and plant the cutting, ensuring the caudex (base) is partly visible above the soil. Gently pack the soil around the plant to keep it secure.
If you are using a young Adenium plant, make sure to prune the roots gently before planting it into the pot to encourage the development of a beautiful root system.
Step 4: Shaping the Roots and Trunk
As the plant grows, you’ll want to focus on shaping the roots and trunk to create the bonsai effect. Gently prune the roots as they grow, cutting away any dead or overly large roots that detract from the aesthetic appearance. Encourage lateral roots to develop by carefully trimming away any deep-rooted growth.
To give the caudex its signature swollen appearance, ensure that the base of the plant is exposed above the soil line. Over time, the trunk will thicken and form the distinct look of a bonsai plant.
Step 5: Training the Plant
Use bonsai wire to shape the trunk and branches. Wrap the wire around the plant gently, but firmly, to guide it into your desired shape. Avoid damaging the plant while shaping, and be patient—bonsai shaping is a gradual process that can take months or even years.
Step 6: Care for Your Adenium Bonsai
Adeniums need lots of sunlight, so place your bonsai in a sunny spot where it can receive direct sunlight for at least 4-6 hours each day. Water the plant thoroughly when the soil is dry, but avoid overwatering as Adeniums are susceptible to root rot.
During the growing season, fertilize your Adenium every 2-3 weeks with a balanced fertilizer to promote healthy growth. In the winter months, reduce watering and fertilizing, as the plant goes into a dormant phase.
Step 7: Pruning and Maintenance
Regular pruning is essential to maintain the bonsai shape. Trim any excess growth and remove leaves that are yellowing or dead. Also, check the roots periodically to ensure they are still healthy and that the root structure is developing as desired.
The Rewards of Growing Adenium Bonsai
With patience and proper care, your Adenium bonsai will reward you with a stunning root structure, a thick caudex, and vibrant flowers. Over time, your bonsai will become a work of living art, with beautiful, twisted branches and an impressive root system that showcases the unique beauty of this plant.
Conclusion
Creating a beautiful Adenium bonsai with stunning roots is a highly rewarding experience for any gardener. By following the steps outlined in this guide, you can craft a bonsai masterpiece that showcases the beauty of this striking plant, both in its roots and in its blossoms. Whether you’re a seasoned bonsai enthusiast or a beginner, this plant offers a fascinating and fulfilling journey into the art of bonsai cultivation.