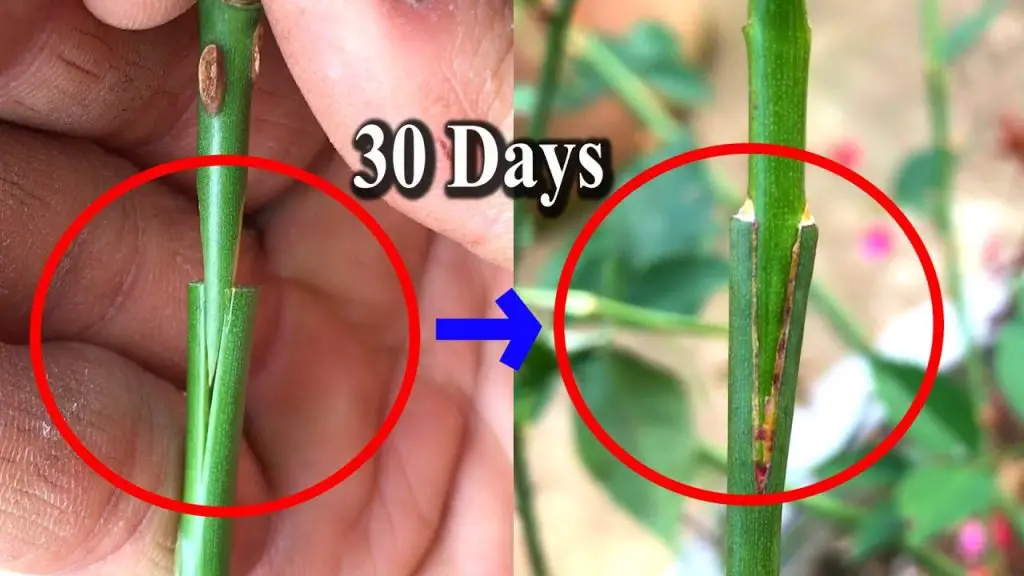
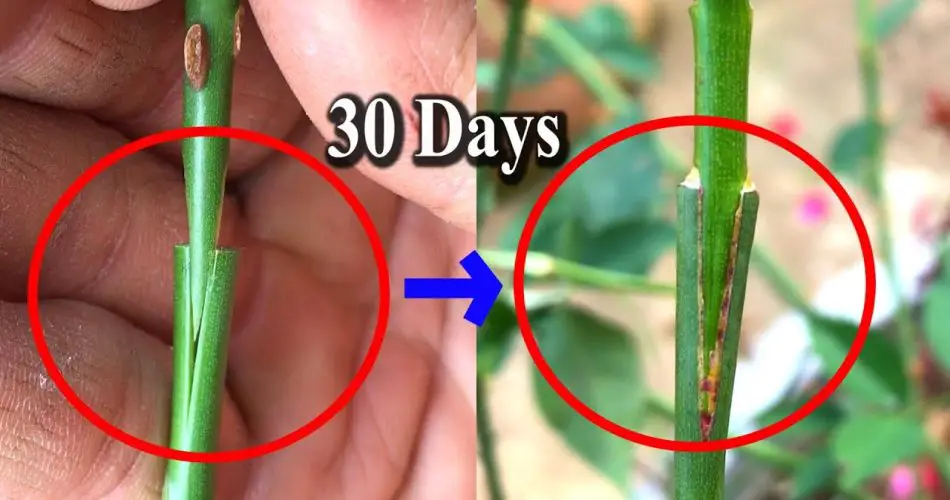
Grafting roses is a technique used to propagate and enhance the quality of rose plants. This method combines a scion (a stem or branch) from one rose variety with a rootstock (the base plant) to produce a plant with desirable traits from both. Grafting can help you create beautiful roses with unique characteristics, improved disease resistance, or better growth habits. Here’s a comprehensive guide on how to graft roses successfully.

1. Understanding Rose Grafting
A. What is Grafting?
- Grafting involves joining two different plant parts so they grow together as one. In roses, this means attaching a rose scion to a rose rootstock.
- Purpose: The goal is to combine the flowering characteristics of the scion with the hardiness and root system of the rootstock.
B. Why Graft Roses?
- Enhanced Traits: Grafting allows you to combine desirable traits, such as flower color, form, or fragrance, with a robust root system.
- Disease Resistance: Using a disease-resistant rootstock can help improve the overall health of the plant.
2. Choosing the Right Materials
A. Selecting the Scion
- Scion Choice: Choose a healthy, disease-free rose stem with strong growth and desirable traits (such as color or fragrance).
- Time to Collect: Collect scions during the dormant season, typically in late winter or early spring.
B. Selecting the Rootstock
- Rootstock Choice: Select a robust and disease-resistant rootstock suited to your climate. Common rootstocks include Rosa multiflora, Rosa canina, or Rosa rootstock.
- Condition: Ensure the rootstock is healthy with a well-developed root system.
3. Preparing for Grafting
A. Tools and Supplies
- Sharp Knife or Grafting Tool: Use a sterilized, sharp knife or specialized grafting tool for clean cuts.
- Grafting Tape or Rubber Bands: To secure the graft and prevent infection.
- Grafting Wax or Sealant: Optional, but can help seal the graft and prevent moisture loss.
B. Preparing the Scion
- Cutting the Scion: Cut a 6-8 inch long section of the rose stem with at least 2-3 buds. The cut should be made just below a bud.
- Preparing the Base: Trim the base of the scion to create a sloping cut or wedge shape, depending on the grafting method used.
C. Preparing the Rootstock
- Preparing the Rootstock: Make a matching cut on the rootstock. The type of cut depends on the grafting technique (e.g., cleft, whip and tongue, or side graft).
4. Grafting Techniques
A. Cleft Grafting
- Make the Cleft: Make a vertical cut down the center of the rootstock about 2-3 inches deep.
- Insert the Scion: Shape the base of the scion into a wedge and insert it into the cleft of the rootstock.
- Secure: Wrap the graft with grafting tape and seal any exposed areas with grafting wax.
B. Whip and Tongue Grafting
- Make the Cuts: Make matching sloping cuts on both the scion and rootstock. Create a tongue-like projection on both parts for a secure fit.
- Join the Pieces: Fit the scion and rootstock together, aligning the cuts precisely.
- Wrap and Seal: Wrap the graft with grafting tape and seal with grafting wax if needed.
C. Side Grafting
- Prepare the Rootstock: Make a horizontal cut on the rootstock to create a small flap.
- Prepare the Scion: Shape the scion base to match the cut on the rootstock.
- Insert and Secure: Insert the scion into the flap of the rootstock and wrap with grafting tape.
5. Post-Grafting Care
A. Watering and Humidity
- Watering: Keep the grafted area moist but not waterlogged. Water the graft thoroughly after planting.
- Humidity: Maintain a high humidity around the grafted area to prevent the scion from drying out. Use a plastic bag or humidity dome if necessary.
B. Light and Temperature
- Light: Place the grafted plant in a bright, indirect light location. Avoid direct sunlight, which can stress the plant.
- Temperature: Maintain a temperature range of 65-75°F (18-24°C). Avoid extreme temperature fluctuations.
6. Monitoring and Troubleshooting
A. Successful Graft Indicators
- New Growth: Look for new shoots or buds emerging from the grafted area. This indicates successful graft union and growth.
- Firm Attachment: Ensure that the scion and rootstock are securely joined. If the graft feels loose, re-wrap with grafting tape.
B. Common Issues
- Graft Failure: If the graft fails, check the compatibility of the scion and rootstock, and ensure that the grafting technique was correctly applied.
- Pests and Diseases: Monitor for pests like aphids or diseases like powdery mildew. Use appropriate treatments to address any issues.
7. Advanced Tips for Successful Grafting
A. Choosing Varieties
- Variety Selection: Experiment with different rose varieties to achieve unique combinations of flower color, form, and fragrance.
- Compatibility: Ensure that the chosen scion and rootstock are compatible for successful grafting.
B. Long-Term Care
- Fertilizing: Feed the grafted plant with a balanced fertilizer during the growing season to support healthy growth and blooming.
- Repotting: Repot the plant every 1-2 years to refresh the soil and provide more space for growth.
In Summary
Grafting roses is a rewarding process that allows you to create beautiful and unique rose plants by combining the best traits of different varieties. By following the detailed instructions provided and using the appropriate techniques, tools, and care, you can successfully graft roses and enjoy a stunning garden of your own creation. Experiment with different grafting methods and rose varieties to explore the full potential of this fascinating horticultural practice.


