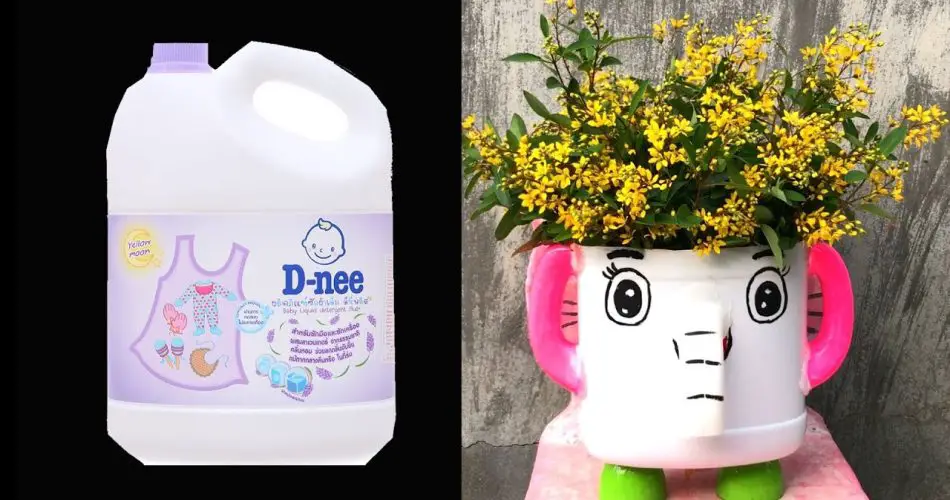
Are you looking for a creative and eco-friendly way to repurpose plastic bottles? Transforming them into flower pots is a simple and effective way to add greenery to your space while reducing waste. This DIY project is perfect for beginners and experienced gardeners alike. Not only does it help reuse plastic waste, but it also offers a budget-friendly way to beautify your home, garden, or balcony. Here’s how you can easily turn your plastic bottles into functional and attractive flower pots!

Why Choose Plastic Bottles for Flower Pots?
Plastic bottles are an excellent choice for flower pots due to their lightweight nature, easy availability, and versatility. You can use bottles of various shapes and sizes, such as soda bottles, water bottles, or juice bottles, to create unique and personalized plant containers. Plus, by upcycling plastic bottles, you’re helping to reduce environmental waste while enjoying a cost-effective gardening solution.
Materials You’ll Need:
- Plastic bottles (choose your preferred size and shape)
- Scissors or a craft knife
- Drill (for creating drainage holes)
- Acrylic paint or spray paint (optional for decoration)
- Decorative materials (such as fabric, rope, or stickers)
- Soil and plants (for planting)
- Marker or pen (for marking cutting lines)
Step-by-Step Guide to Making Flower Pots from Plastic Bottles
1. Choose the Right Plastic Bottles
Start by selecting plastic bottles that are clean and free from labels. You can use any size of bottle depending on the type of plant you want to grow. Larger bottles work well for bushier plants, while smaller ones are perfect for succulents or herbs.
2. Cut the Plastic Bottle
Use scissors or a craft knife to cut the plastic bottle in half or at a height that suits your plant. A good rule of thumb is to cut about two-thirds of the way up the bottle. This will give you a wide opening for planting. Keep the top part of the bottle for smaller plants, or you can create multiple pots from one bottle by cutting it into sections.
3. Make Drainage Holes
To prevent waterlogging, it’s important to add drainage holes at the bottom of the bottle. Use a drill or a heated nail to create several small holes. These will allow excess water to escape and prevent the plant roots from sitting in stagnant water, which can lead to root rot.
4. Optional: Decorate Your Flower Pot
If you want to give your new flower pot a personal touch, consider decorating it. You can paint the bottle with acrylic paints or spray paints to match your home decor or garden theme. For a rustic look, wrap the bottle in jute twine, colored rope, or fabric. Stickers, stencils, or markers can also be used to create patterns or designs on the surface.
5. Fill with Soil
After decorating, it’s time to prepare your pot for planting! Place a layer of small rocks or gravel at the bottom for extra drainage. Then, fill the bottle with potting soil, leaving some space at the top for your plant. Be sure to choose soil that is appropriate for your specific plant.
6. Plant Your Flowers
Now that your flower pot is ready, it’s time to plant your flowers or herbs. Gently place your plant into the soil and press the soil around it to ensure the plant is secure. Water it thoroughly to settle the soil and encourage root growth.
7. Find the Perfect Spot
Place your new flower pot in a location where your plants can thrive. Whether on a windowsill, balcony, or patio, make sure your flowers get the appropriate amount of sunlight and water to stay healthy. If you’re growing indoor plants, keep the pots in a spot with indirect sunlight.
Tips for Growing Healthy Plants in Plastic Bottle Flower Pots
- Choose the right plant: Opt for plants that don’t require deep roots, such as succulents, herbs, or small flowers.
- Keep an eye on water levels: Since plastic doesn’t breathe like clay, check your plants regularly to ensure they’re not overwatered or dehydrated.
- Replenish soil nutrients: If you’ve used the same soil for a while, refresh it with compost or organic fertilizer to provide your plants with essential nutrients.
- Monitor growth: As your plants grow, they might outgrow their plastic pot. Be ready to transplant them into a larger container if needed.
Benefits of DIY Plastic Bottle Flower Pots
- Eco-friendly: Reusing plastic bottles reduces waste and helps to protect the environment.
- Budget-friendly: Plastic bottles are a cost-effective alternative to purchasing new flower pots, making it ideal for gardeners on a budget.
- Customizable: You can create flower pots in any size, shape, or design, allowing you to express your personal style in your garden or home.
- Space-saving: Plastic bottles are lightweight and compact, making them perfect for small spaces like apartments, balconies, or windowsills.
Conclusion
Transforming plastic bottles into flower pots is a fantastic DIY project that helps you repurpose waste while creating a beautiful, eco-friendly garden. Whether you’re looking to add vibrant flowers or herbs to your space, this simple gardening hack can give your plants a stylish home. Not only does it save money, but it also makes for a fun and creative way to bring a touch of nature into your life. Get started on your DIY project today, and enjoy the beauty of homemade flower pots! 🌿🌸


