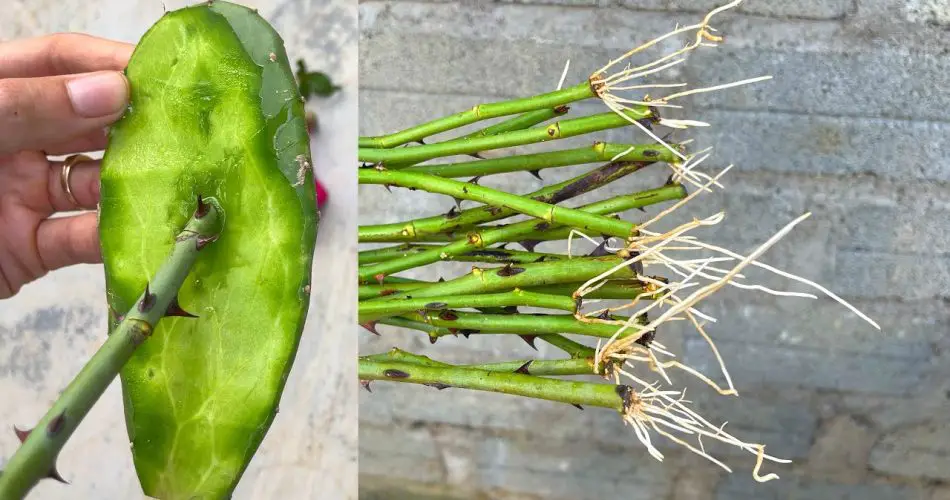
Roses are among the most beautiful and popular flowers worldwide, celebrated for their stunning colors and delightful fragrances. However, did you know that you can cut roses without soil and still successfully plant them? This method of growing roses allows you to propagate new plants without the need for traditional soil-based planting.

In this article, we’ll walk you through the process of cutting and planting roses without soil, using innovative techniques like water propagation to encourage growth and new blooms. If you’re ready to get creative with your gardening, read on!
Why Plant Roses Without Soil?
There are several reasons why gardeners opt for planting roses without soil:
- Space-Saving: Growing roses without soil can be perfect for those with limited space, like apartment dwellers or urban gardeners.
- Faster Rooting: Some gardeners find that roses root more quickly when placed in water or other medium-based methods.
- Environmentally Friendly: Growing roses without soil is a more eco-conscious option, especially when you use recycled containers and reduce the need for potting soil.
Materials You’ll Need:
- Healthy Rose Cuttings (choose fresh stems from an existing rose plant)
- A Glass Jar or Vase (to hold water)
- Sharp Scissors or Pruning Shears
- Water (preferably filtered or distilled)
- Rooting Hormone (optional)
- Plastic Wrap or a Plastic Bag (for humidity control)
- Natural Light (indirect sunlight)
Step-by-Step Guide to Cutting and Planting Roses Without Soil
1. Select Healthy Rose Cuttings
The first step in propagating roses without soil is to choose the right cuttings. When selecting rose stems, make sure they are healthy, free from diseases, and have a few leaves on them.
- Cut the Stems: Using sharp scissors or pruning shears, cut a healthy stem that’s about 6-8 inches long, just below a node (the small bump on the stem where leaves emerge).
- Remove Excess Leaves: Trim the lower leaves off, leaving only a few leaves at the top to help the cutting produce energy.
2. Apply Rooting Hormone (Optional)
To encourage root growth, you can dip the cut end of the rose stem into rooting hormone before placing it in water. Rooting hormone helps speed up the process of rooting and improves the chances of success.
3. Place the Rose Cuttings in Water
Place the cut end of your rose stem into a glass jar or vase filled with water. Make sure the cutting is submerged at least 1-2 inches below the waterline to promote root development.
- Change the Water Regularly: Keep the water fresh by changing it every few days, especially if you see any signs of algae or debris forming in the container.
4. Create a Humid Environment
To increase the chances of your rose cutting rooting successfully, create a humid environment around the cutting. You can do this by covering the jar or vase with a plastic wrap or a plastic bag.
- This will trap moisture and create a mini-greenhouse effect, which is ideal for encouraging root growth.
- Be sure to leave a small opening to allow for air circulation to prevent mold growth.
5. Place in Indirect Light
Roses need natural light to grow, but direct sunlight can be too harsh for new cuttings. Place the jar in a location with bright, indirect sunlight, such as near a window where the light isn’t too intense.
- Over time, you will notice small roots beginning to grow from the cut end of the rose stem. This process can take anywhere from 2 to 4 weeks depending on the variety of rose and environmental conditions.
6. Transplanting the Rose Cuttings
Once your rose cutting has developed a strong root system (usually about 1-2 inches of root growth), it’s time to transplant it. Even though the cutting was propagated without soil, it will still need to be transferred to a soil-based container for continued growth.
- Transplanting Tip: Choose a well-draining potting mix and a pot with drainage holes to ensure proper water flow.
- Water the Plant: After planting the rooted rose cutting in the pot, water it well and keep it in a location with indirect sunlight.
Benefits of Planting Roses Without Soil
- Easy Maintenance: Water propagation requires minimal effort and doesn’t need the constant care that soil plants demand.
- Faster Results: Roses rooted in water tend to grow faster, which can be a rewarding experience for gardeners.
- Great for Beginners: This method is beginner-friendly and perfect for those new to plant propagation.
Common Mistakes to Avoid
While propagating roses without soil is simple, there are a few common mistakes to avoid:
- Not Changing the Water Regularly: Stagnant water can lead to mold or bacterial growth, which could harm your cuttings. Keep the water clean and fresh.
- Using Poor Quality Cuttings: Always choose healthy, disease-free stems to ensure the best chance of success.
- Placing in Direct Sunlight: Roses need sunlight, but direct exposure can cause the cutting to wilt or dry out. Stick to indirect sunlight for the best results.
Conclusion
Growing roses without soil is a fun and rewarding way to propagate these beautiful flowers right from the comfort of your home. Whether you’re creating new plants for your garden or simply enjoy experimenting with new gardening techniques, propagating roses in water is an easy and effective method.
By following the steps in this guide, you can enjoy vibrant, healthy rose plants without the need for soil. It’s a wonderful way to expand your collection of roses and bring more beauty into your home. Happy gardening! 🌹


