
The Adenium plant, commonly known as the Desert Rose, is beloved for its stunning flowers and unique, swollen stems. One fascinating aspect of caring for this plant is learning how to extract its roots effectively. Whether you’re looking to propagate new plants or rejuvenate an existing one, here’s a detailed guide on how to extract abundant roots from your Adenium.
Why Extract Adenium Roots?
- Propagation: Extracting roots allows you to create new plants.
- Health: A well-managed root system promotes overall plant health and vitality.
- Aesthetic Appeal: Enhancing the root structure can improve the visual interest of your Adenium.
When to Extract Roots
The best time to extract roots from your Adenium plant is during the spring or early summer when the plant is actively growing. This ensures that the plant can recover quickly from the root extraction process.
Materials Needed
- Adenium Plant: The plant you wish to extract roots from.
- Shovel or Hand Trowel: For digging up the roots.
- Pruning Shears: To trim any damaged roots.
- Container: For potting the extracted roots.
- Potting Mix: A well-draining soil mix suitable for Adeniums.
- Water: For watering the plant after replanting.
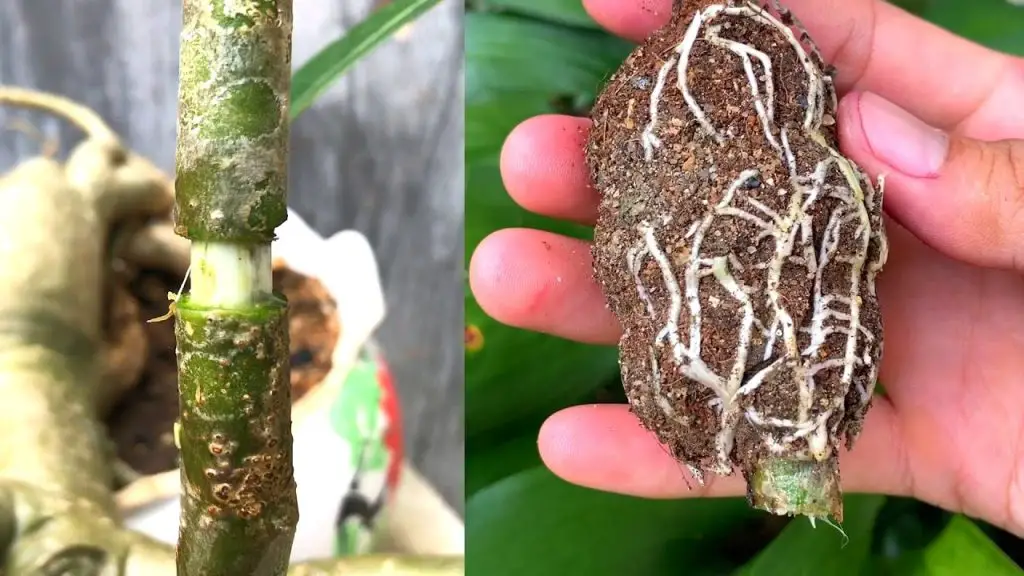
Steps to Extract Roots from Adenium
1. Prepare Your Workspace
Choose a clean and spacious area to work in. Lay down some newspapers or a tarp to keep the area tidy.
2. Water the Plant
Water your Adenium thoroughly a day before extraction. This helps to soften the soil and makes it easier to dig up the roots.
3. Remove the Plant from Its Pot
- Carefully tip the pot on its side and gently pull the Adenium out. You may need to tap the sides of the pot to loosen the root ball.
- Handle the plant by the base of the stem to avoid damaging the plant.
4. Inspect the Roots
- Once out of the pot, inspect the root system for any damaged or rotting roots. Healthy roots should be firm and white.
- If you see any unhealthy roots, use pruning shears to trim them away.
5. Separate the Roots
- Gently shake off excess soil from the root system. This allows you to see the roots more clearly.
- If you are propagating, carefully separate any smaller roots from the main root system. Each segment should have a healthy root.
6. Replanting
- Prepare a new pot with a well-draining potting mix. Fill the pot halfway.
- Position the extracted roots in the pot, spreading them out gently.
- Fill in around the roots with potting mix, ensuring there are no air pockets.
- Water the plant lightly to help settle the soil around the roots.
Care After Extraction
- Placement: Keep the newly potted Adenium in a bright, indirect light area for the first few weeks.
- Watering: Water sparingly; let the soil dry out between waterings to prevent root rot.
- Fertilization: After a month, begin fertilizing with a balanced fertilizer to encourage growth.
Conclusion
Extracting abundant roots from your Adenium plant can lead to successful propagation and healthier plants. By following these simple steps, you can ensure that your Adenium thrives and continues to produce its beautiful flowers. Happy gardening!


