Rose grafting is an incredible technique that allows gardeners to grow multiple types of roses on a single branch, creating stunning visual effects with a variety of colors. If you’re fascinated by the idea of having 3-color roses on 1 branch, this guide will walk you through the process of rose grafting, enabling you to create your own vibrant rose masterpiece. With the right tools, patience, and a little practice, you can achieve a beautiful grafted rose that showcases an array of colors.
What is Rose Grafting?
Rose grafting is the process of joining a stem (the scion) from one rose variety onto the rootstock of another. The scion is the part of the plant that will produce the flowers, while the rootstock provides the root system, helping the plant thrive and grow. The beauty of rose grafting is that you can combine different rose varieties onto a single plant, allowing the grafted rose to bloom with multiple colors, fragrances, and characteristics.
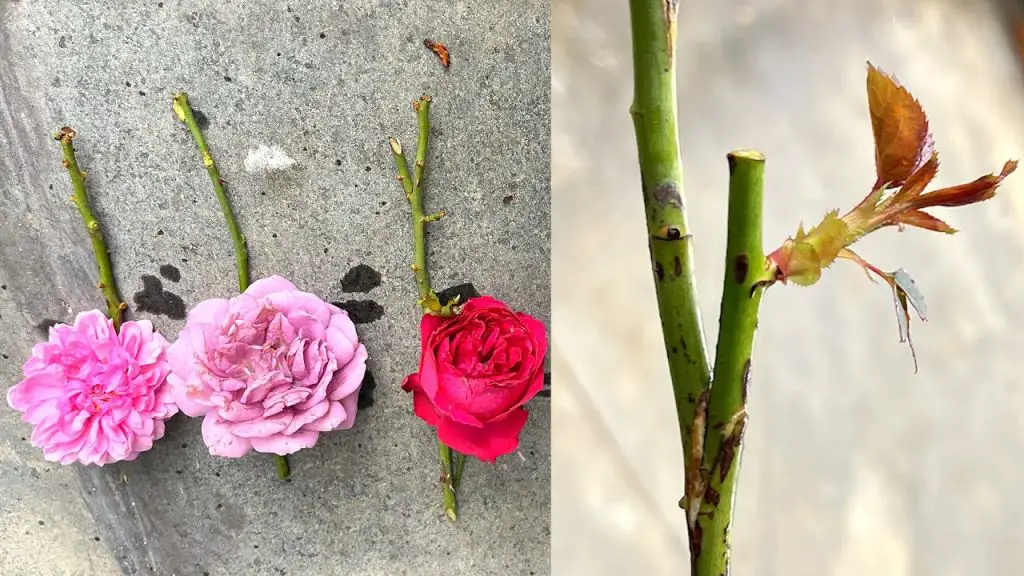
When grafting 3-color roses on 1 branch, you can achieve a visually stunning result, with each scion producing a different rose color. This technique not only enhances the aesthetic appeal of your garden but also enables you to enjoy the unique qualities of several rose varieties in one plant.
Why Choose Rose Grafting?
There are several reasons why rose grafting is a popular choice for gardeners:
- Diverse Blooms: Grafting allows you to combine several rose varieties on a single plant, enabling you to enjoy multiple colors and flower types. If you’re looking to create a rainbow of roses, this is the perfect method to achieve it.
- Compact Growth: Grafting multiple roses onto one branch can help manage the growth of the plant, especially if you’re working with limited space. Instead of having several individual rose bushes, you can combine them into one, saving room in your garden.
- Improved Disease Resistance: By grafting roses onto a disease-resistant rootstock, you can enhance the plant’s ability to withstand pests and diseases. This is particularly beneficial for keeping your roses healthy and strong.
- Unique Landscaping: Having a multi-colored rose plant in your garden can serve as a stunning centerpiece or focal point. It’s a perfect way to make a statement in your outdoor space.
How to Graft 3-Color Roses on 1 Branch
Here is a step-by-step guide to help you successfully graft 3-color roses onto one branch:
1. Select Your Rootstock and Scions
The first step in rose grafting is to choose your rootstock and scions. The rootstock will provide the root system for the grafted rose, while the scions will be the varieties that produce the flowers. Here are some considerations for choosing both:
- Rootstock: Select a disease-resistant rootstock suitable for the climate and soil conditions in your area. Common rootstocks for roses include Dr. Huey, R. multiflora, and R. laxa. The rootstock should be healthy and strong, as it will support the growth of multiple scions.
- Scions: For a 3-color rose, select three different rose varieties with the colors and qualities you desire. Each scion should be a healthy, disease-free stem from a mature rose plant.
2. Prepare Your Tools
Before starting, ensure you have the following tools ready for grafting:
- Sharp knife or pruning shears for making clean cuts.
- Grafting tape or grafting clips to secure the scions onto the rootstock.
- Grafting wax or sealant to protect the graft union from moisture and pests.
- Rooting hormone (optional) to encourage the scion to take root.
3. Cut the Rootstock
Start by preparing the rootstock. Using your sharp knife, make a clean, slanted cut at the top of the rootstock. The cut should be around 4-6 inches above the soil level to give enough space for the grafts. This cut will serve as the grafting surface for the scions.
4. Prepare the Scions
Next, take your chosen rose scions and cut them to about 4-6 inches in length. Each scion should have at least one bud or node. Trim the base of each scion at a 45-degree angle to match the shape of the cut on the rootstock.
5. Make the Graft
Now, it’s time to graft. You will use a cleft grafting method, which is the most common technique for rose grafting. Here’s how to do it:
- Cleft the Rootstock: Using your knife, carefully make a vertical slit in the center of the cut surface of the rootstock. The slit should be about 1-2 inches deep and wide enough to accommodate the scion.
- Insert the Scions: Take the first scion and insert its angled base into the slit in the rootstock. Make sure the cambium layer (the green tissue just beneath the bark) of the scion aligns with the cambium layer of the rootstock. The cambium layers must be in contact for the graft to successfully heal.
- Repeat for Additional Scions: Insert the second and third scions in the same manner, ensuring they are spaced evenly around the rootstock. The slits should be wide enough to accommodate all three scions without crowding.
6. Secure the Graft
Once all three scions are in place, secure them to the rootstock with grafting tape or grafting clips. This will help hold the scions firmly in place while the grafts take and the tissue begins to heal. You can also apply a thin layer of grafting wax or sealant over the graft union to prevent moisture loss and protect the graft from pests.
7. Care for the Grafted Rose
After grafting, it’s important to provide the proper care for your new plant:
- Watering: Keep the soil around the grafted rose moist but not soggy. Grafted plants require consistent moisture to encourage root development.
- Sunlight: Place the grafted rose in a location that receives full sunlight, as roses thrive in bright conditions.
- Monitor Growth: Over the next few weeks, check the graft union to ensure that the scions are healing properly and that there are no signs of disease or infection. As the scions take root, they will begin to grow and produce flowers.
8. Pruning and Shaping
Once the scions have rooted and the plant is established, you can begin to prune and shape your multi-colored rose bush. Regular pruning will help encourage healthy growth and allow each scion to flourish.
Tips for Success in Rose Grafting
- Patience is Key: Grafting can take several weeks or even months to show successful results. Be patient and give the grafts time to heal and establish roots.
- Choose Compatible Roses: Ensure that the rose varieties you choose for grafting are compatible with each other. Generally, it’s best to graft roses of the same species to ensure compatibility.
- Graft in the Right Season: The best time for grafting roses is in early spring or late winter, when the plant is dormant and the weather is mild.
Conclusion
Grafting 3-color roses on 1 branch is a rewarding and creative way to grow a stunning collection of roses with multiple colors. By carefully selecting your rootstock and scions, using the right grafting techniques, and providing proper care, you can create a beautiful, vibrant rose plant that will bloom in a variety of hues. Whether you’re looking to add uniqueness to your garden or simply enjoy a colorful display of roses, rose grafting is an excellent technique to try!