
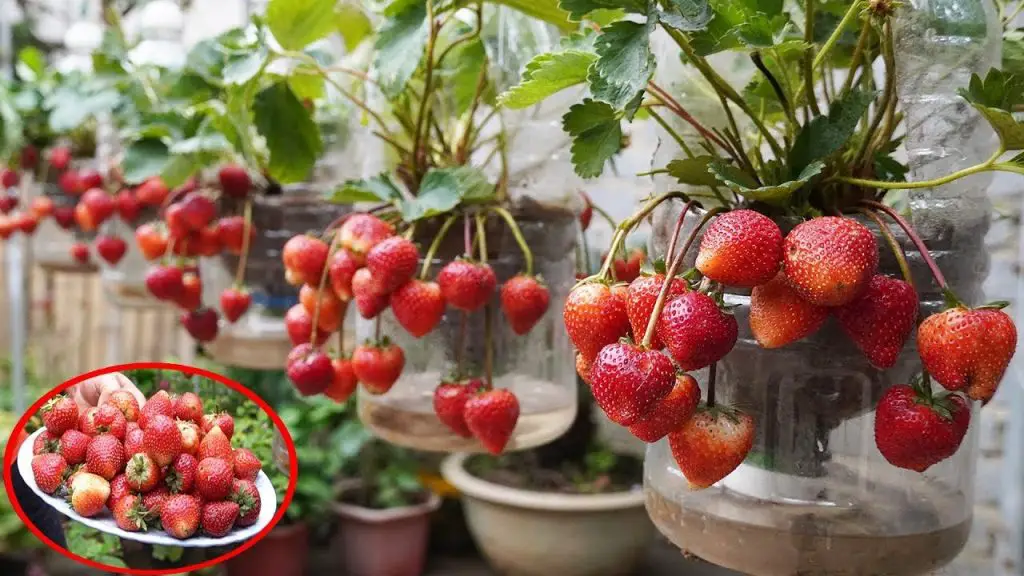
Growing strawberries at home is easier than you think! With a simple plastic bottle setup, you can cultivate tons of fresh, juicy strawberries in a small space. This method is perfect for those with limited garden space and ensures a huge harvest with minimal effort.
Why Use Plastic Bottles?
Recycling plastic bottles for gardening is an eco-friendly, cost-effective, and space-saving way to grow strawberries. Some key benefits include:
✅ Saves space – Ideal for small gardens, balconies, and apartments.
✅ Reduces waste – Reuses plastic bottles instead of throwing them away.
✅ Efficient watering – The setup retains moisture while preventing root rot.
✅ Pest control – Elevating the plants reduces exposure to soil-borne pests.
Step-by-Step Guide to Growing Strawberries in Plastic Bottles
Step 1: Prepare the Plastic Bottles
To create your strawberry planters:
- Choose large plastic bottles (2-liter soda bottles work best).
- Cut a rectangular opening on the side for planting.
- Poke small drainage holes at the bottom to prevent waterlogging.
💡 Pro Tip: If using multiple bottles, you can hang them vertically to create a strawberry tower and maximize space.
Step 2: Select the Right Strawberry Variety
For container gardening, choose everbearing or day-neutral strawberries, as they:
✔ Produce fruit throughout the season
✔ Thrive in limited soil
✔ Are low-maintenance
Step 3: Prepare the Soil Mix
Strawberries need nutrient-rich, well-draining soil. The ideal mix includes:
🌱 50% potting soil
🌱 30% compost or organic matter
🌱 20% sand or perlite (for better drainage)
Adding a slow-release organic fertilizer will give your strawberries a great start.
Step 4: Plant the Strawberries
- Fill the plastic bottle planters with the prepared soil.
- Gently place strawberry seedlings into the cut openings.
- Cover the roots with soil, leaving the crown (top of the root system) above the surface.
Step 5: Watering and Sunlight Needs
Strawberries require 6-8 hours of sunlight daily for optimal growth.
- Water regularly, ensuring the soil remains moist but not soggy.
- If growing indoors, place them near a sunny window or under grow lights.
💧 Pro Tip: Using a drip irrigation system (a slow water release through the bottle cap) helps maintain consistent moisture.
Step 6: Fertilizing for Maximum Growth
To encourage faster growth and more fruit production, use:
✅ Organic compost or liquid fertilizer every 2-3 weeks
✅ Banana peel or eggshell tea for extra nutrients
✅ Mulch (straw or coconut husk) to retain moisture and regulate soil temperature
Step 7: Pollination and Pest Control
If growing indoors, hand pollinate using a small brush to transfer pollen between flowers.
🐞 To prevent pests, use:
- Neem oil spray for aphids
- Diatomaceous earth to deter slugs and snails
- Marigolds or basil as companion plants for natural pest control
Step 8: Harvesting Your Strawberries
Your first strawberries will be ready in about 4-6 weeks after flowering.
✔ Pick strawberries when fully red for the best flavor.
✔ Harvest early in the morning for the freshest taste.
✔ The more you pick ripe strawberries, the more the plant will produce!
Final Thoughts
Growing tons of strawberries in plastic bottles is a fun, sustainable, and rewarding way to enjoy fresh fruit at home. With the right care, you’ll have a massive harvest in no time!
💡 Want more gardening tips? Don’t forget to like, share, and subscribe for more easy and creative ways to grow your own food! 🍓✨


