Orchid propagation can be a rewarding endeavor, especially when rejuvenating orchids from withered stems. While it may seem daunting, with the right techniques and care, you can successfully propagate orchids and witness them thrive once again. Here’s a comprehensive guide on how to propagate orchids from withered stems effectively:
1. Assessing the Orchid:
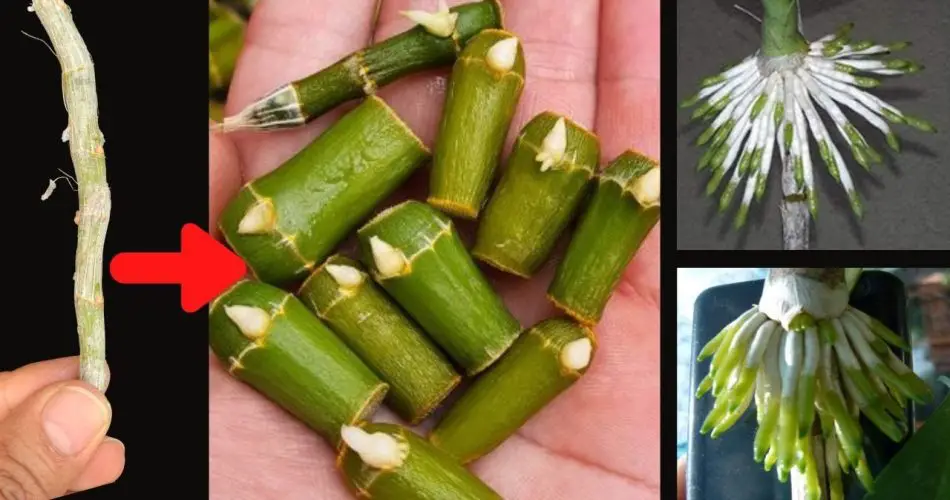
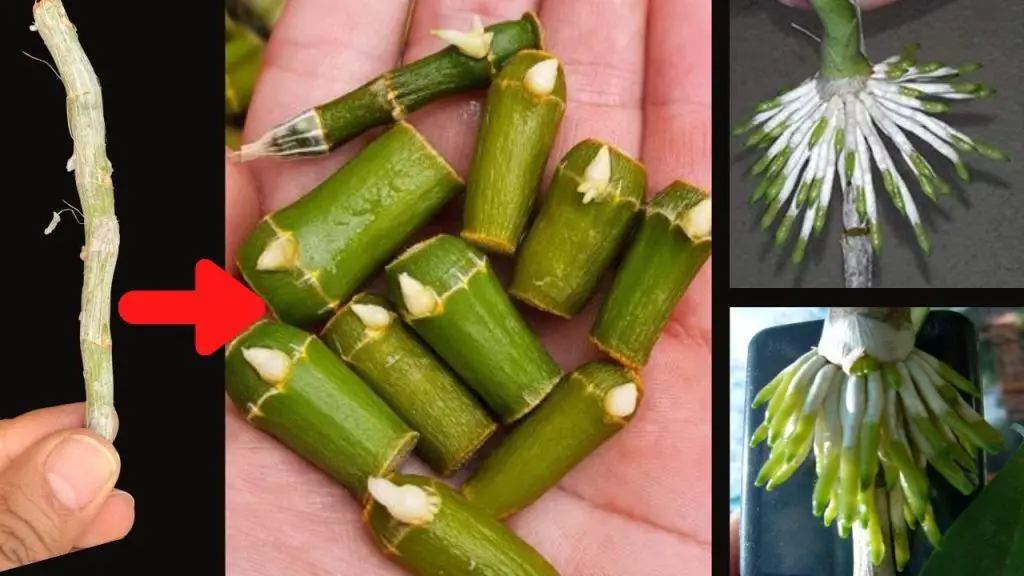
Before beginning the propagation process, carefully assess the orchid. Look for viable withered stems that still have nodes or aerial roots. Nodes are critical as they are potential points for new growth and root formation.
2. Prepare the Tools:
Gather your tools, including sterilized pruning shears or a sharp knife, orchid potting mix, small pots or containers, and optional rooting hormone (like cinnamon powder or aloe vera gel).
3. Pruning Withered Stems:
Identify healthy nodes on the withered stems. Using sterilized pruning shears or a sharp knife, make clean cuts just below a node. Ensure each cutting has at least one node and a portion of the stem attached.
4. Applying Rooting Hormone (Optional):
Dip the cut end of each orchid cutting into rooting hormone, such as cinnamon powder or aloe vera gel. This step helps stimulate root growth and aids in preventing infections.
5. Potting the Cuttings:
Fill small pots or containers with orchid potting mix formulated for epiphytic orchids like Phalaenopsis. Insert each cutting into the potting mix, ensuring the node and lower portion of the stem are covered.
6. Providing Ideal Conditions:
Place the potted orchid cuttings in a location with bright, indirect light. Avoid direct sunlight, as it can scorch the cuttings. Maintain a warm, humid environment, ideally around 70-80°F (21-27°C).
7. Watering and Care:
Water the orchid cuttings thoroughly after potting, ensuring the potting mix is moist but not waterlogged. Mist the cuttings daily to maintain humidity and prevent dehydration.
8. Monitoring Growth:
Monitor the orchid cuttings regularly for signs of new root growth and leaf development. This process may take several weeks to months, depending on the orchid species and environmental conditions.
9. Transplanting and Maintenance:
Once the orchid cuttings have established roots and new growth, transplant them into larger pots with regular orchid care. Continue to provide optimal light, water, humidity, and fertilization as needed.
10. Celebrate Success:
Celebrate your success as your propagated orchids grow and thrive. With patience and proper care, orchids propagated from withered stems can quickly revive and become healthy, flowering plants once again.
Final Thoughts
In conclusion, propagating orchids from withered stems is a gratifying process that allows you to expand your orchid collection and rejuvenate older plants. By following these steps and providing attentive care, you can successfully propagate orchids and enjoy their beauty in your home or garden. Remember, each orchid cutting holds the potential for new growth and blooms, making orchid propagation a rewarding journey for any enthusiast.