Roses are some of the most beloved and beautiful flowers to grow, known for their stunning blooms and fragrant aroma. If you’re passionate about expanding your rose garden or want to share your favorite rose varieties with friends and family, propagating roses by cuttings is a simple and rewarding way to do so. Unlike buying new plants, propagating by cuttings allows you to replicate the exact rose variety you already love.
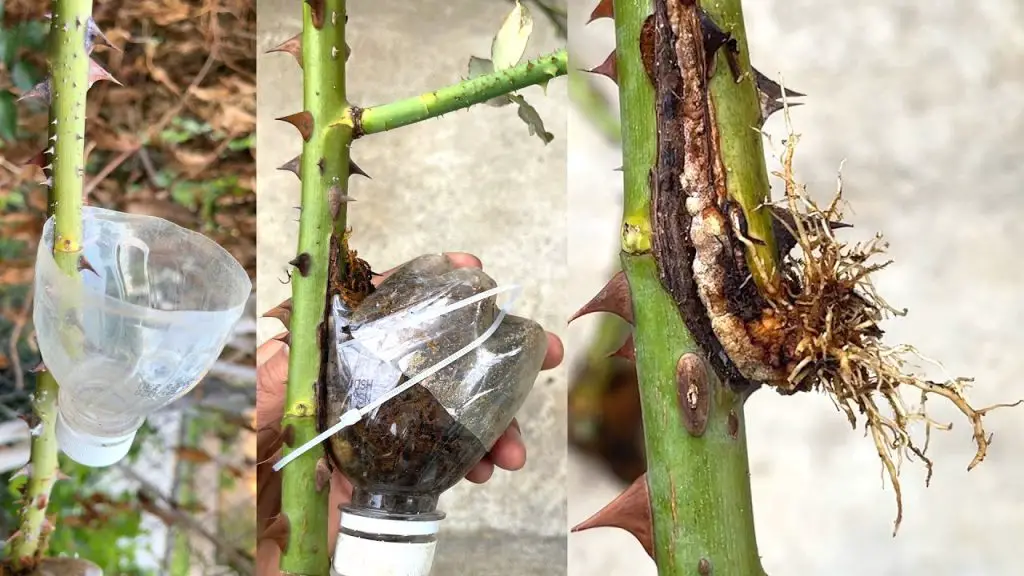
In this guide, we’ll walk you through the process of propagating roses by cuttings and share essential tips for taking care of your new rose plants, ensuring they grow into strong, healthy bushes that thrive in your garden.
Why Propagate Roses by Cuttings?
Propagation by cuttings offers several advantages:
- Exact Replication: The new rose plant will be genetically identical to the parent plant, meaning you’ll get the same flower color, fragrance, and growth habit.
- Cost-Effective: Growing roses from cuttings is an inexpensive way to expand your garden without buying new plants.
- Sentimental Value: If you have a rose that has special meaning (e.g., a gifted plant or heirloom rose), propagating it allows you to preserve its legacy.
Best Time to Take Rose Cuttings
The best time to take rose cuttings depends on the type of rose you want to propagate, but in general, the best times are:
- Late Spring to Early Summer: This is when most rose varieties are actively growing, and the wood (stem) is mature enough to produce roots. Take cuttings from new growth that is firm but not too woody.
- Autumn: Some gardeners also successfully propagate roses from softwood cuttings taken in early fall.
Step-by-Step Guide to Propagating Roses by Cuttings
Here’s a detailed step-by-step process on how to propagate roses by cuttings:
1. Choose the Right Rose Stem
Look for a healthy, non-flowering stem. Ideally, it should be about 6-8 inches long and have a few sets of leaves. The stem should be firm, but not fully woody—this is known as semi-hardwood.
- Avoid using stems that are too young (green and soft) or too old (woody), as they are less likely to root successfully.
2. Cut the Stem Properly
Using a sharp, sterilized pair of pruning shears, cut the stem just below a node (the point where leaves attach to the stem). Make the cut at a 45-degree angle to increase surface area for rooting.
- Tip: Always sterilize your cutting tools before use to avoid introducing disease or pathogens to the plant.
3. Remove Lower Leaves and Thorns
Remove the lower leaves from the cutting, leaving only two or three leaves at the top. This reduces the amount of moisture the cutting will lose through transpiration. Be careful not to damage the top leaves.
- Optional: If there are any thorns on the stem, gently scrape them off with a knife or pruning tool to avoid injury during handling.
4. Optional: Dip in Rooting Hormone
While roses can root without rooting hormone, using a powdered rooting hormone can speed up the process and increase the likelihood of success. Simply dip the bottom inch of the cutting into the hormone powder.
- Tip: Shake off excess hormone before planting the cutting to prevent clumping and possible fungal issues.
5. Prepare the Planting Medium
Fill a small pot with a well-draining potting mix, such as a mix of perlite and peat moss, or use a specialized seed-starting mix. You can also use sand or a cactus mix for better drainage. Make a small hole in the center of the soil using a pencil or stick.
- Tip: Ensure the pot has drainage holes to prevent waterlogging.
6. Plant the Cutting
Insert the bottom end of the cutting into the hole in the soil, burying it about 1-2 inches deep. Gently press the soil around the cutting to stabilize it. Water lightly to settle the soil, making sure not to over-saturate it.
- Tip: If you’re planting multiple cuttings, space them at least 2-3 inches apart to prevent overcrowding and promote good air circulation.
7. Create a Humid Environment
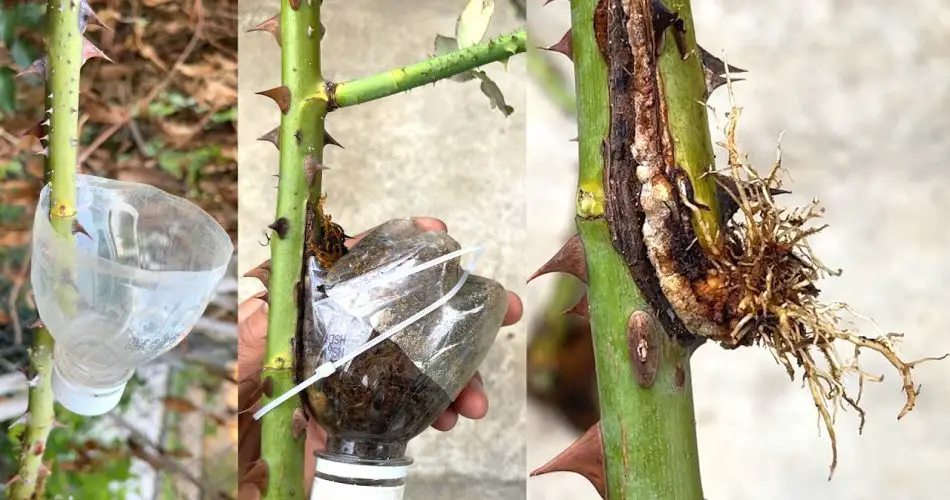
Cover the cutting with a plastic bag or place it in a clear plastic dome to create a greenhouse effect that helps retain moisture and heat. Make sure the plastic does not touch the cutting directly, as it can lead to mold or rot.
- Tip: You can also use a plastic bottle with the bottom cut off, or a small plastic cup to create a humidity dome.
8. Place the Cutting in a Warm, Bright Location
Place the potted cutting in a warm, bright location with indirect light. Avoid direct sunlight, as this can cause the cutting to overheat. The ideal temperature for rooting is between 65°F and 75°F (18°C to 24°C).
- Tip: A grow light or a south-facing window can provide optimal conditions for rooting.
9. Keep the Soil Moist
Check the soil regularly and keep it lightly moist. Water when the top inch feels dry, but avoid overwatering, as this can lead to rot.
- Tip: Mist the cutting with water to help maintain humidity around the leaves, but avoid getting the cutting too wet.
10. Wait for Roots to Form
It can take anywhere from 4 to 8 weeks for roots to form, depending on the variety of rose and the environmental conditions. You can gently tug on the cutting to check if it’s rooted. If there’s resistance, the cutting is beginning to form roots.
11. Transplant the Rooted Cutting
Once the cutting has developed a strong root system (usually when roots are about 1-2 inches long), it’s time to transplant it into a larger pot with regular potting mix, or directly into your rose garden.
- Tip: Gradually acclimate the new rose to outdoor conditions by placing it outside for a few hours each day, increasing the exposure over a week or two.
Care Tips for Your New Rose Plants
Whether you’re propagating a single cutting or a whole batch, here’s how to take care of your new roses after they’re established:
- Watering: Keep the soil evenly moist but not waterlogged. Roses need a consistent supply of water, especially when they are establishing their root systems.
- Fertilizing: Once your rose starts to grow, feed it with a balanced, slow-release fertilizer or a rose-specific fertilizer to encourage healthy growth and flowering.
- Pruning: As the rose grows, pinch back any weak stems or dead growth to encourage bushier, stronger growth. Regularly prune your rose bush in early spring to remove any dead or damaged wood.
- Sunlight: Ensure your rose gets at least 6 hours of sunlight each day for optimal growth and flowering.
- Mulching: Apply a layer of mulch around the base of the plant to help retain moisture, regulate soil temperature, and reduce weed growth.
Common Problems to Watch For
- Root Rot: If your cutting shows signs of yellowing leaves, soft, mushy stems, or a foul smell, it may be suffering from root rot. Ensure your cutting has good drainage and avoid overwatering.
- Pests: Watch for aphids, spider mites, and other common rose pests. You can use insecticidal soap or introduce natural predators like ladybugs to control pests organically.
Conclusion
Propagating roses by cuttings is a simple and effective way to expand your garden, replicate your favorite rose varieties, and share them with others. By following the steps outlined in this guide and providing the proper care, you’ll be well on your way to growing a thriving rose garden full of beautiful, fragrant blooms. Whether you’re a seasoned gardener or a beginner, taking the time to propagate roses from cuttings is a rewarding experience that can bring new life and beauty to your outdoor space.