The Chlorophytum comosum, commonly known as the spider plant, is a popular houseplant known for its easy care and air-purifying qualities. If you have a healthy spider plant and want to propagate it, you’re in luck! This plant propagates effortlessly, and you can easily grow new plants to share with friends or expand your indoor garden. Here’s a simple step-by-step guide to help you propagate your Chlorophytum comosum successfully.
Why Propagate a Spider Plant?
- Easy Propagation: The spider plant is incredibly easy to propagate, even for beginner gardeners.
- Low Maintenance: Spider plants are hardy and require minimal care, making them perfect for anyone looking to expand their plant collection without much effort.
- Air Purification: These plants are known for their ability to purify the air, making them a healthy addition to any home.
- Propagation via Offsets: Spider plants naturally produce offsets (baby plants) that can be easily rooted to grow new plants.
Best Time to Propagate Spider Plants
The best time to propagate your Chlorophytum comosum is during the growing season in the spring or summer. During these warmer months, the plant is actively growing, which promotes healthy root development for the new plantlets.
How to Propagate Chlorophytum Comosum (Spider Plant)
There are a few different methods to propagate your spider plant, but the most popular and easiest way is through its offsets or pups.
Materials Needed:
- Healthy spider plant with offsets (baby plants)
- Clean, sharp scissors or pruning shears
- A small container with potting soil or a glass of water
- Water for rooting (if propagating in water)
- Rooting hormone (optional)
Step-by-Step Instructions:
- Identify the Offsets (Pups)
The first step in propagating your spider plant is to locate the offsets. These are the small, baby plants that grow on long, arching stems that extend out from the mother plant. The offsets will have their own roots and can easily be separated to grow new plants. - Cut the Offsets
Using a clean, sharp pair of scissors or pruning shears, cut the offsets from the main plant. Make sure to cut as close to the base of the baby plant as possible, ensuring you don’t damage the roots. If the offset already has visible roots, it will be even easier to root it into new soil or water. - Propagation in Water
If you prefer to propagate in water, place the offset into a glass of water, making sure the roots are submerged but the rest of the plant remains above the waterline. Change the water every couple of days to keep it fresh and clear. This method allows you to monitor the root growth and transfer the plant into soil once roots are established, usually within a few weeks. - Propagation in Soil
Alternatively, you can plant the offsets directly into a small container of potting soil. Simply make a small hole in the soil, place the offset in the hole, and gently press the soil around the base to hold the plant in place. Water the newly potted plant thoroughly to help settle the soil. - Provide Ideal Growing Conditions
Whether propagating in soil or water, place the newly rooted offset in a bright, indirect light spot to encourage healthy growth. Avoid direct sunlight, as it can scorch the tender new plant. Keep the soil moist but not soggy, as spider plants prefer to dry out slightly between waterings. - Wait for New Growth
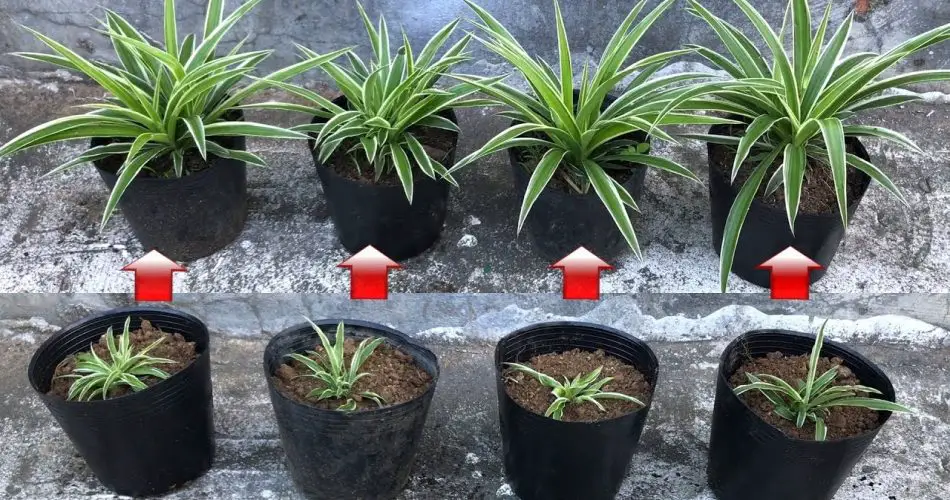
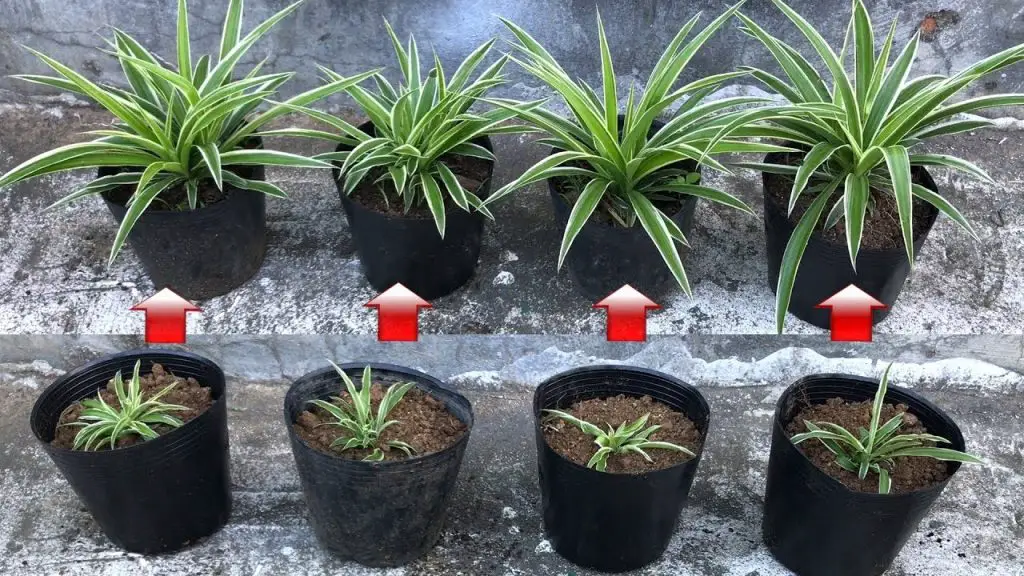
After a few weeks, you should begin to see new roots developing if you propagated in water, or new shoots growing if you propagated in soil. Once the plant is well-established with a good root system, you can move it into a larger pot if necessary.
Additional Tips for Successful Spider Plant Propagation:
- Use Rooting Hormone: While not necessary, you can dip the cut end of the offset in rooting hormone to encourage faster root growth, especially if you’re propagating in soil.
- Regular Watering: Keep the soil consistently moist during the first few weeks of growth, but avoid over-watering. Spider plants are susceptible to root rot if left in waterlogged soil.
- Create a Humid Environment: Spider plants like a bit of humidity. If you’re propagating in soil, consider placing a clear plastic bag over the pot to maintain humidity until the roots are well-established.
- Separate Multiple Offsets: If your spider plant has multiple offsets, you can propagate several at once. Just make sure each baby plant has its own space to grow.
How to Care for Your New Spider Plant:
Once your new Chlorophytum comosum is established, here’s how to care for it:
- Light: Provide bright, indirect light for your spider plant. Too much direct sunlight can cause the leaves to burn.
- Watering: Water your spider plant when the top inch of soil feels dry. Be sure to water thoroughly but avoid letting the plant sit in water.
- Temperature: Spider plants thrive in temperatures between 60-80°F (15-27°C), so avoid placing them in cold drafts or near heating vents.
- Fertilization: Feed your spider plant with a balanced liquid fertilizer every 4-6 weeks during the growing season to promote healthy growth.
Conclusion
Propagating Chlorophytum comosum (spider plant) is a fun and rewarding way to expand your plant collection. With its easy care and ability to propagate through offsets, you can grow a thriving new plant in no time. Whether you choose to propagate in water or soil, spider plants are sure to bring a touch of greenery and fresh air to your home. Happy gardening! 🌿🌱


