Did you know that cactus can help stimulate hydrangea roots and make them grow stronger? Many gardeners struggle with propagating hydrangeas, but using a simple cactus technique, you can boost root development and successfully breed new plants.
Hydrangeas are beautiful flowering plants that thrive in gardens, but they require strong root systems to flourish. By using cactus extract, you can encourage faster root growth and improve the success rate of propagation.
Here’s how you can stimulate hydrangea root growth using cactus and effectively breed new hydrangea plants!
Step 1: Gather Your Materials 🛠
Before you begin, you’ll need:
✔ A healthy hydrangea cutting – Choose a young, green branch with at least 2–3 leaves.
✔ A piece of cactus – You can use Aloe Vera, Opuntia, or any other succulent cactus.
✔ Sharp pruning shears – To cut the hydrangea stem and cactus cleanly.
✔ A container with water – For soaking and extracting the cactus gel.
✔ A pot with soil – Prepared with a mix of peat, compost, and sand for good drainage.
Step 2: Extract the Cactus Gel 🌵
Cactus contains natural growth stimulants that help hydrangea roots develop more efficiently. To extract the gel:
✔ Cut a fresh piece of cactus and slice it open.
✔ Scoop out the gel using a spoon or knife.
✔ Dilute the gel in a small amount of water (about 1–2 tablespoons).
💡 Tip: Cactus gel is rich in auxins, which help promote root growth and prevent fungal infections in cuttings.
Step 3: Prepare the Hydrangea Cutting ✂
To ensure successful propagation, follow these steps:
✔ Trim the hydrangea cutting about 5–6 inches long.
✔ Remove lower leaves to expose the nodes, which will develop roots.
✔ Dip the cut end into the cactus gel solution for about 10–15 minutes.
This step allows the hydrangea cutting to absorb the root-stimulating nutrients from the cactus.
Step 4: Plant the Hydrangea Cutting 🌱
Once your cutting has been treated with cactus gel, it’s time to plant it:
✔ Fill a pot with well-draining soil to prevent waterlogging.
✔ Make a small hole in the soil and insert the hydrangea cutting.
✔ Firmly press the soil around the stem to keep it stable.
✔ Water lightly to keep the soil moist but not soggy.
Step 5: Create the Perfect Growing Environment ☀💦
Hydrangea cuttings need the right conditions to grow strong roots:
✔ Place the pot in indirect sunlight – Avoid harsh, direct sunlight.
✔ Keep the soil consistently moist – Hydrangeas thrive with adequate water.
✔ Cover with a plastic bag – This creates a mini greenhouse effect to retain moisture.
💡 Tip: Mist the leaves daily to keep the cutting hydrated while it develops roots.
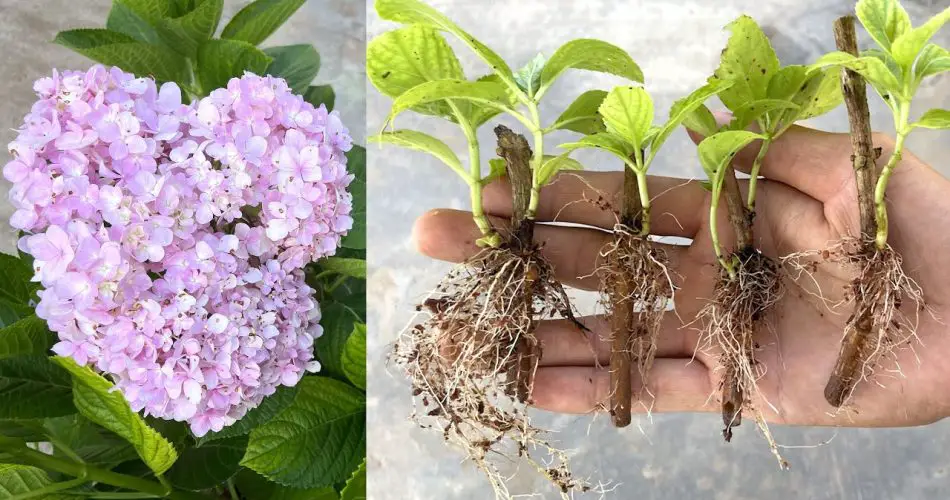
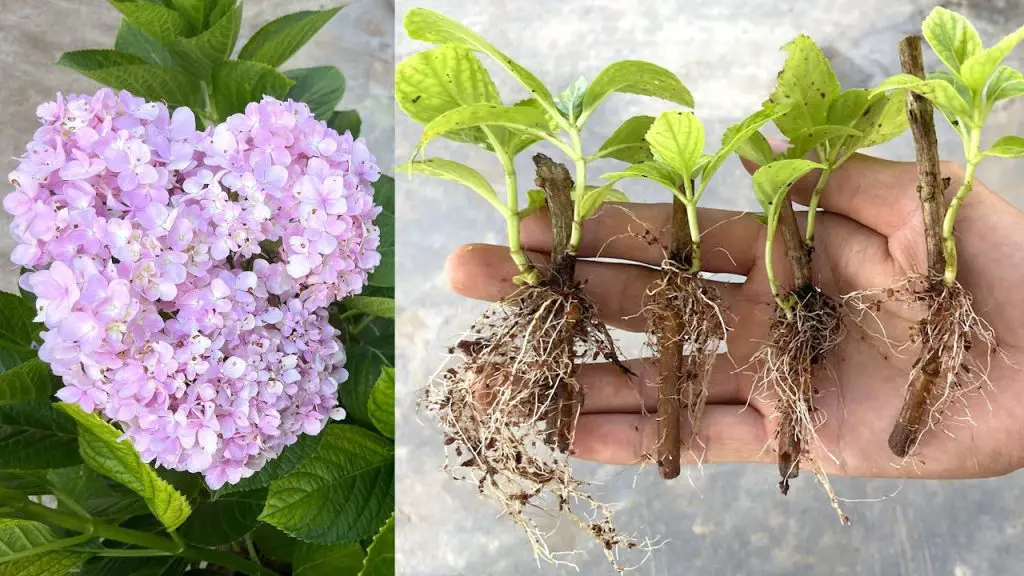
Step 6: Monitor Root Growth and Transplant 🌸
Within 2–4 weeks, you should start to see new root development. To check:
✔ Gently tug on the cutting – If there’s resistance, roots are growing!
✔ Once roots are 2–3 inches long, transplant the hydrangea into a larger pot or garden bed.
✔ Continue to water and care for the plant as it establishes itself.
Final Results: Stronger, Healthier Hydrangeas! ✨
By using cactus gel, the hydrangea cutting grows stronger roots faster, making it easier to breed new plants successfully. This natural method enhances root development while protecting the cutting from infections.
Now, you can propagate beautiful hydrangeas in your garden using this simple, eco-friendly technique! 🌿🌸
Would you try this cactus root stimulation method for your hydrangeas? Let us know in the comments! 😊


