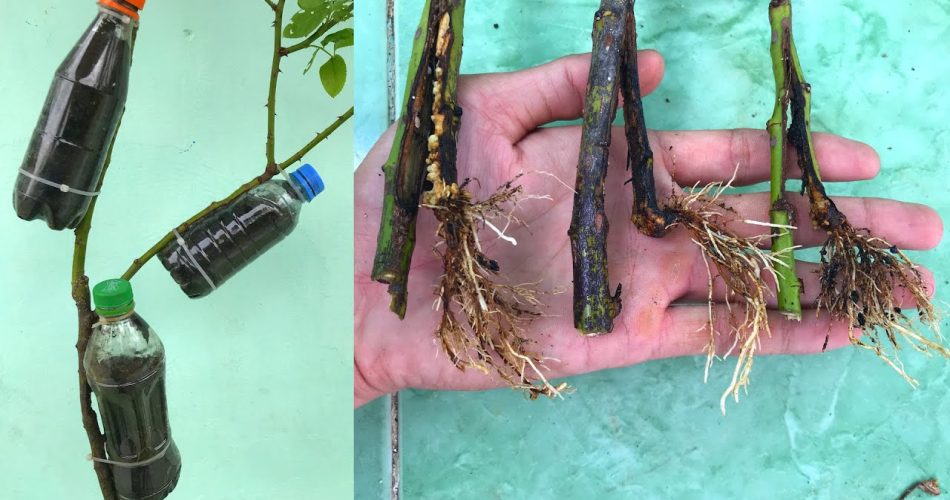
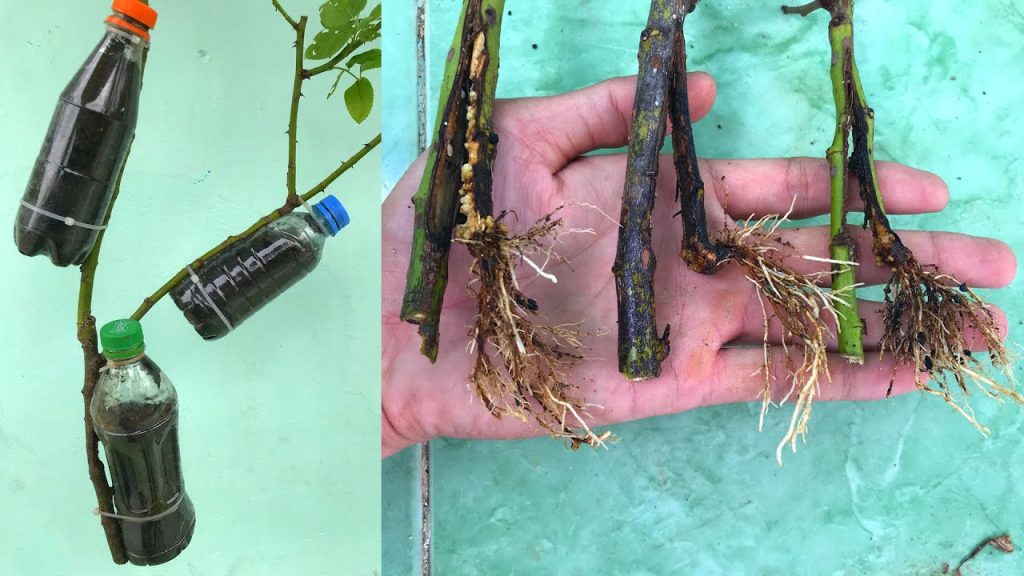
Roses are known for their timeless beauty and elegance, making them a favorite in gardens around the world. Whether you’re looking to expand your garden or preserve your favorite varieties, propagating roses can be a rewarding experience. One simple and effective method is propagating roses using plastic bottles. In this article, we’ll guide you through the steps on how to propagate roses and encourage strong root growth using plastic bottles.
Why Propagate Roses?
Rose propagation allows you to clone your existing plants, giving you the chance to create multiple new rose bushes from a single parent plant. This method not only helps you grow roses at little cost but also preserves the genetic traits of your favorite roses, such as their color, fragrance, and growth habits.
Propagating roses through cuttings is a fantastic way to expand your garden or share your beloved roses with others. While it can be done in various ways, using a plastic bottle is an easy, cost-effective solution that promotes the growth of strong roots and healthy plants.
Materials You Will Need for Rose Propagation Using Plastic Bottles
Before starting, gather the following materials:
- Healthy rose cutting (from a mature rose plant)
- Plastic bottle (a 2-liter bottle works well)
- Sharp scissors or pruners
- Rooting hormone (optional, but recommended)
- Potting soil or a well-draining rooting mix
- Water
- Clear plastic wrap or a clear bag (optional, for humidity)
Step-by-Step Guide to Propagate Roses Using Plastic Bottles
Step 1: Select and Prepare the Rose Cutting
Begin by choosing a healthy, disease-free stem from your rose bush. The ideal cutting should be about 6-8 inches long and taken from a non-flowering part of the plant. Use sharp scissors or pruners to make a clean cut just below a leaf node (the small bump where leaves grow from the stem). Remove the lower leaves from the cutting, leaving only a few leaves at the top.
If desired, you can dip the cut end of the rose cutting into rooting hormone, which encourages faster root development and helps protect the cutting from diseases.
Step 2: Prepare the Plastic Bottle
Take the plastic bottle and carefully cut off the bottom part using scissors. The remaining top portion of the bottle will act as a mini greenhouse. Make sure to create an opening large enough for your cutting to fit inside comfortably.
To ensure proper air circulation and prevent mold, you can poke a few holes in the top lid or along the side of the bottle. These holes will allow for ventilation while still keeping the humidity high inside.
Step 3: Plant the Cutting in the Bottle
Fill the bottom of the bottle with a well-draining rooting mix or potting soil. Gently insert the rose cutting into the soil, burying the bottom of the cutting about 1-2 inches deep. Firm the soil around the base of the cutting to hold it upright.
Step 4: Create the Ideal Humidity Environment
Place the cut top part of the plastic bottle over the cutting to create a greenhouse effect. This will help maintain high humidity around the cutting, which is essential for root formation. If your bottle doesn’t have a lid, you can cover the top with clear plastic wrap or a clear bag to trap moisture inside.
Step 5: Place the Bottle in the Right Location
Position the bottle in a warm, bright spot where it will receive indirect sunlight. Avoid placing it in direct sunlight, as the bottle can trap heat and harm the cutting. The ideal temperature for rose cuttings to root is between 65°F and 75°F (18°C to 24°C).
Step 6: Water and Monitor the Cutting
Water the soil gently to keep it moist, but not soggy. Overwatering can lead to rot, so it’s important to maintain a balance. Check the cutting every few days to ensure the soil remains damp. You can also periodically open the bottle to allow fresh air to circulate, preventing mold buildup.
How Long Does It Take for Rose Cuttings to Root?
It usually takes about 4-6 weeks for rose cuttings to establish roots. During this time, you may start to see new growth at the top of the cutting. Once the roots are well-established and you notice significant growth, the cutting can be moved to a larger pot or directly planted in the garden.
Advantages of Propagating Roses with Plastic Bottles
- Low-cost and accessible: Plastic bottles are readily available and free, making this method budget-friendly.
- Creates a controlled environment: The bottle acts as a greenhouse, retaining moisture and warmth to speed up root development.
- Space-efficient: You can propagate multiple cuttings in separate bottles, making it ideal for small spaces or indoor gardening.
- Minimal maintenance: Once set up, the cutting requires little care other than occasional watering and checking for mold.
Conclusion
Propagating roses using plastic bottles is an easy, cost-effective way to grow new rose plants from cuttings. By following the simple steps outlined above, you can encourage your rose cuttings to grow strong, healthy roots and develop into beautiful, blooming plants. Whether you’re expanding your garden or sharing roses with friends, this propagation method is a fun and rewarding gardening project that anyone can try.
