When it comes to propagating roses, many gardeners rely on traditional methods like cuttings or grafting. However, there’s an intriguing and lesser-known technique that involves using potatoes to help extract roses and promote root growth. This method is not only easy but also surprisingly effective, and it’s something that many gardeners swear by! In this article, we will explore how potatoes can be used in rose propagation and why this method works so well.
How Does Potatoes Help in Rose Propagation?
Potatoes are not just for cooking—they can also be an excellent tool for rooting rose cuttings. The idea behind using potatoes for rose propagation is rooted in their ability to provide the right amount of moisture, nutrients, and stability for the cutting to grow roots. Potatoes are naturally rich in starch and moisture, both of which are beneficial for developing healthy rose roots. The key to this method lies in how the potato serves as a nourishing medium for the rose cutting.
Here’s how potatoes help with rooting roses:
- Moisture Retention: Potatoes naturally retain moisture, which can prevent the rose cutting from drying out during the rooting process. This is crucial, especially in warmer climates where cuttings can dry out quickly.
- Nutrients: Potatoes contain natural sugars and starches that can feed the rose cutting, promoting root development and overall growth.
- Stability: Potatoes provide stability to the cutting, keeping it upright and in the right position as it begins to root. This reduces the risk of the cutting tilting or shifting, which can interfere with proper root growth.
- Preventing Disease: The high moisture content of potatoes can help the rose cutting stay hydrated, and the natural antimicrobial properties in potatoes can protect the cutting from fungal infections during the rooting process.
Step-by-Step Guide to Propagate Roses Using Potatoes
What You Will Need:
- Fresh, healthy rose cuttings (approximately 6-8 inches long)
- 1 large potato (big enough to fit the cutting)
- Sharp knife or pruning shears
- A pot or container (to plant the potato and cutting)
- Rooting hormone (optional but recommended for quicker rooting)
- Watering can or spray bottle
Step 1: Prepare the Rose Cutting
- Select a Healthy Cutting: Choose a healthy rose stem, preferably from a softwood or semi-hardwood variety. Cut the stem just below a node (the bump from which leaves grow).
- Remove Leaves: Strip off any leaves from the bottom 2-3 inches of the stem. This helps prevent rot and ensures the cutting focuses on root development rather than sustaining leaves.
- Optional: Dip the cutting’s base into rooting hormone to stimulate quicker root growth.
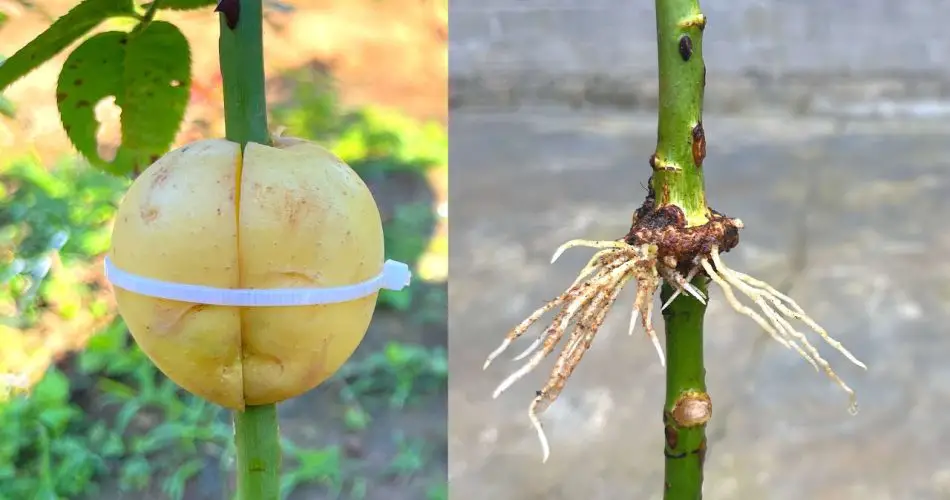
Step 2: Prepare the Potato
- Choose a Firm Potato: Select a large, firm potato that will hold the cutting securely. The potato should have no visible signs of rot or damage.
- Cut a Hole: Use a knife to make a hole in the center of the potato where the rose cutting will sit. The hole should be just wide enough to hold the cutting firmly but not too large.
- Insert the Cutting: Place the rose cutting in the hole, ensuring that the base of the cutting touches the center of the potato. The stem should stand upright with the bottom submerged slightly into the potato.
Step 3: Plant the Potato with the Cutting
- Place in a Pot: Take the potato with the inserted rose cutting and place it in a small pot or container filled with soil. Make sure the potato sits at the top, with the cutting extending slightly above the soil.
- Watering: Gently water the soil around the potato, ensuring it is moist but not waterlogged. Keep the environment humid, as this will encourage the cutting to develop roots. You can place a clear plastic bag or plastic dome over the pot to create a mini greenhouse effect.
Step 4: Care for the Rose Cutting
- Keep in a Warm Spot: Place the pot in a warm, bright location, but avoid direct sunlight, as this can overheat the cutting. A spot with indirect light is ideal.
- Monitor Moisture: Ensure the soil stays moist, and periodically check the potato for signs of rot. Replace the potato if it begins to decompose.
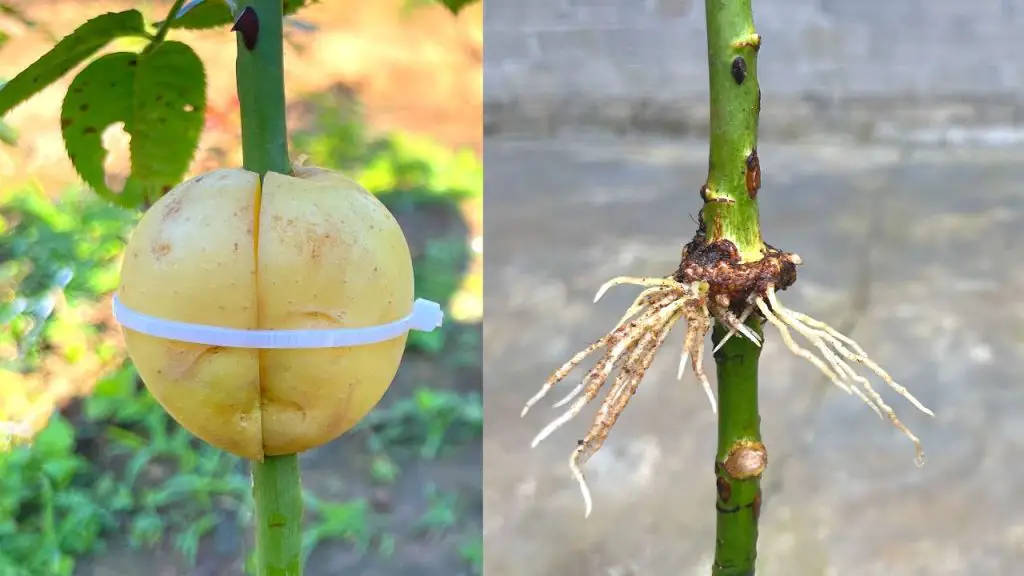
- Check for Rooting: After about 4-6 weeks, check the cutting for signs of new roots by gently tugging on the cutting. If resistance is felt, it means the roots are forming.
Step 5: Transplant the Rooted Cutting
Once the rose cutting has developed sufficient roots, it is ready to be transplanted into a larger pot or directly into your garden. Be sure to continue regular care and maintenance, including watering, to help the new plant settle in.
Why the Potato Method Works So Well
- Nutrient-Rich Environment: The potato provides sustenance to the rose cutting, which helps it focus energy on root growth. The moisture and starch present in the potato also create an environment conducive to root development.
- Simplifies Rooting: For beginners, this method is simple and eliminates the need for fancy rooting setups or propagating pots. All you need is a potato, some cuttings, and a little patience!
- Prevents Rot: The potato helps to protect the cutting from drying out, which is a common problem in traditional rose propagation methods.
Benefits of Using Potatoes for Rose Propagation
- Increased Success Rate: Using potatoes can increase the success rate of rooting rose cuttings, especially for those new to rose propagation.
- Convenient and Inexpensive: It’s a low-cost method that uses items you likely already have at home, such as potatoes.
- No Need for Complex Equipment: Unlike some other propagation methods, you won’t need rooting chambers, misting systems, or specialized tools.
- Encourages Healthy Root Growth: The moisture and nutrients from the potato help encourage the cutting to root and grow strong, healthy roots.
Conclusion
Using potatoes to propagate roses is a unique and effective technique that can help boost your chances of success when extracting and rooting rose cuttings. By providing moisture, nutrients, and a stable environment for the cutting, potatoes create an ideal situation for the rose to develop new roots and grow. If you’re looking to propagate roses in a simple, cost-effective way, give this potato method a try and see how well it works for your plants. You’ll be amazed at how easy it is to get your own roses blooming in no time!


