Roses are one of the most beloved flowers, admired for their stunning colors, fragrant blooms, and versatility in gardens. Whether you’re a seasoned gardener or a beginner, propagating roses by cuttings is an easy and rewarding way to expand your collection without the cost of buying new plants. In this article, we’ll explore two effective ways to propagate roses by cuttings and reveal how planting roses in the sand can yield fantastic results!
Why Propagate Roses by Cuttings?
Propagation allows you to grow new rose plants that are genetically identical to the parent plant. This means that the color, scent, and characteristics of the original rose will be preserved in the new plants. Whether you’re looking to create a rose garden or share beautiful blooms with friends, propagating roses from cuttings is a fantastic method.
Cutting propagation also allows you to experiment with different techniques to see which works best for you. Let’s dive into two popular methods!
Method 1: Traditional Rose Cutting Propagation
This classic technique has been used by gardeners for generations. It’s straightforward and requires minimal tools.
What You’ll Need:
- Healthy rose stem (6-8 inches long)
- Sharp scissors or pruning shears
- Rooting hormone (optional but recommended for faster rooting)
- Small pot with drainage holes
- Well-draining soil (a mix of potting soil and sand works great)
- Plastic bag or plastic wrap for humidity
- Water
Step-by-Step Process:
- Select the Right Cutting: Choose a healthy rose stem from a mature rose plant. Look for a stem that has flowered recently but is still firm. Avoid stems with flower buds or flowers.
- Cut the Stem: Using sharp scissors or pruning shears, cut the rose stem just below a leaf node. The cutting should be about 6-8 inches long, with a couple of leaves at the top. Make the cut at a 45-degree angle to increase the surface area for rooting.
- Remove Excess Leaves: Strip the leaves from the lower half of the cutting, leaving only a couple of leaves at the top. This helps prevent excess moisture loss and reduces the risk of rot.
- Apply Rooting Hormone: Dip the cut end of the stem in rooting hormone. This will encourage root growth and speed up the process.
- Plant the Cutting: Place the cutting in a pot filled with well-draining soil. Gently insert the cutting into the soil, ensuring the cut end is buried about 2-3 inches deep. Water the cutting lightly to settle the soil around the base.
- Create a Humid Environment: Cover the cutting with a plastic bag or plastic wrap to create a greenhouse effect. This helps maintain the humidity around the cutting and promotes faster rooting.
- Wait for Roots: Place the pot in a warm, bright location, but out of direct sunlight. After about 4-6 weeks, you should see new growth, indicating that roots have formed. Once the cutting has developed a strong root system, you can transplant it into a larger pot or into your garden.
Method 2: Propagating Roses Using Sand
Planting roses in sand is another excellent propagation method, especially if you’re looking for a natural rooting medium that provides good drainage. The sand method is particularly effective for roses that might struggle with overly moist conditions.
What You’ll Need:
- Healthy rose stem (6-8 inches long)
- Sharp scissors or pruning shears
- Coarse sand (such as builder’s sand or horticultural sand)
- Container or shallow tray with drainage holes
- Water
Step-by-Step Process:
- Select and Prepare the Cutting: Just like the traditional method, start by selecting a healthy rose stem, 6-8 inches long, and cut it just below a leaf node. Strip off the lower leaves and leave a couple at the top.
- Prepare the Sand: Fill a shallow container or tray with coarse sand, leaving some space at the top. Make sure the sand is well-draining. You can also slightly moisten the sand, but avoid soaking it.
- Insert the Cutting into the Sand: Make a hole in the sand with a pencil or stick and gently insert the rose cutting, ensuring that the cut end is buried in the sand about 2-3 inches deep. Pack the sand gently around the base to hold the cutting upright.
- Water and Create Humidity: Mist the cutting lightly with water and cover the container with a clear plastic bag or plastic wrap to help maintain humidity. Keep the container in a bright, warm spot, but out of direct sunlight.
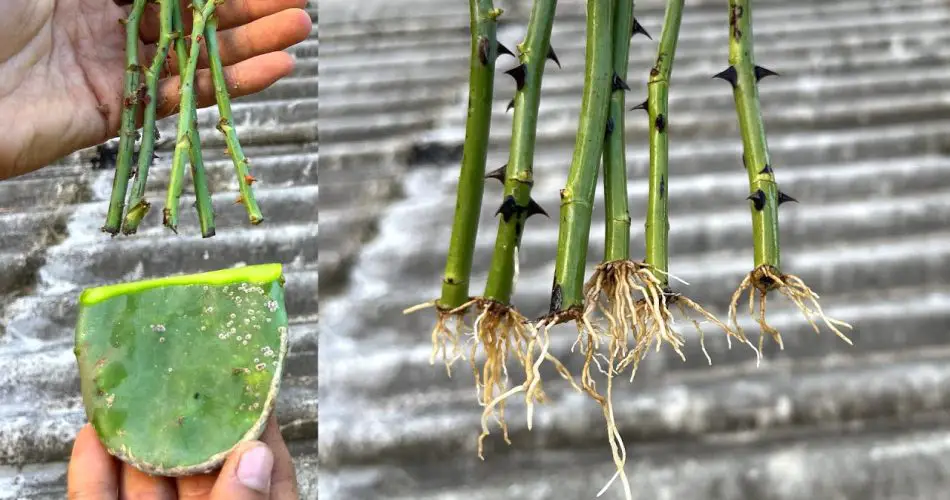
- Roots Formation: After 3-5 weeks, check for roots. The cutting should begin to root in the sand, and you may start to see small new growth at the top of the cutting. Once you notice significant root development, carefully transplant the cutting into a larger pot with regular potting soil.
Results: What You Can Expect
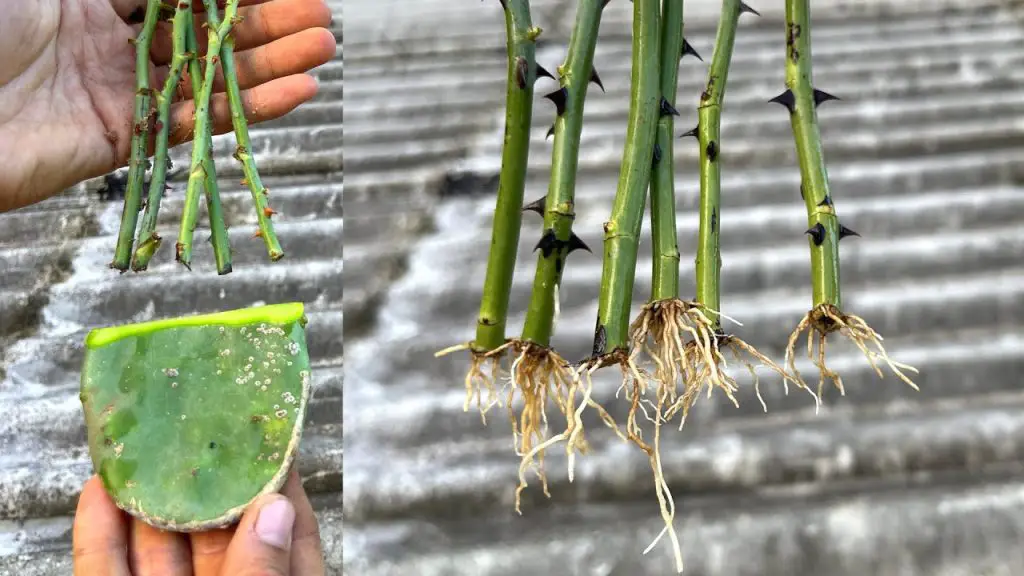
Whether you choose the traditional cutting method or the sand method, you can expect similar results in terms of root development and growth. Both methods offer a high success rate when performed correctly. However, using sand has its benefits in terms of natural drainage, which can prevent the risk of rot that sometimes happens with overly moist conditions in traditional soil.
- Traditional Method: This method allows the cutting to root in a soil mixture, which offers a more nutrient-rich environment once the roots begin to form.
- Sand Method: This method offers better drainage, making it ideal for roses that require minimal moisture in the root zone. The sand also promotes stronger root systems by allowing air to reach the roots.
Conclusion
Both of these propagation techniques can help you grow new rose plants from cuttings quickly and easily. Whether you choose to use the traditional method with well-draining soil or the sand method for better root health, you’re sure to enjoy the beautiful blooms of your newly propagated roses. Try these methods, and soon you’ll have a flourishing rose garden filled with vibrant colors and sweet scents!