Grafting roses is a rewarding and useful technique for gardeners looking to propagate roses, improve plant quality, or even create unique hybrids. With proper grafting techniques, you can ensure your roses grow healthier, bloom more abundantly, and resist pests or diseases. In this guide, we’ll provide you with detailed instructions for grafting roses, offering step-by-step tips to help you master this technique and get the best results.
Why Graft Roses?
Grafting roses is a common practice for several reasons:
- Enhance Quality: Grafting can help combine the best characteristics of two different rose varieties. For example, you can graft a hardy rootstock with a beautiful flower variety, giving you the strength of one and the aesthetic of the other.
- Increase Disease Resistance: The rootstock can be chosen for its resistance to diseases, such as root rot, or pests like aphids and nematodes.
- Faster Growth: Grafting can result in faster growth and earlier flowering as the grafted rose combines the vigor of the rootstock with the beauty of the scion (the top part of the graft).
- Create New Varieties: If you’re interested in developing unique hybrids, grafting allows you to experiment by combining different rose species and varieties.
Materials Needed for Grafting Roses
Before you begin, make sure you have the following materials on hand:
- Rootstock: A healthy, strong rose plant that will serve as the base of your graft.
- Scion: A cutting from the rose variety you want to propagate.
- Sharp, clean knife or grafting tool: Essential for making precise cuts.
- Grafting tape or rubber bands: To secure the scion to the rootstock.
- Sealant: A grafting compound or wax to seal the cuts and protect them from infection.
- Pruning shears: For trimming excess branches and leaves.
- Garden gloves: To protect your hands.
Step-by-Step Instructions for Grafting Roses
Step 1: Choose the Right Time to Graft
The best time to graft roses is in late winter or early spring, just before the new growth begins. This is when both the rootstock and the scion are dormant, which allows for better success rates when grafting.
- Grafting during this time reduces stress on the plant and gives it a head start when the growing season begins.
Step 2: Prepare the Rootstock
Start by selecting a healthy rootstock that has a strong root system. A dormant rose plant with a stem thickness of about 1/4 to 1/2 inch is ideal. The rootstock should be free of diseases and pests.
- Trim the rootstock down to about 6-8 inches tall using pruning shears. Ensure the cut is clean and flat to create a smooth surface for the graft.
Step 3: Prepare the Scion
Next, select a healthy scion from the variety of rose you want to propagate. The scion should be taken from a young, disease-free stem that is about the same diameter as the rootstock. Ideally, the scion should have at least 2-3 buds.
- Cut the scion using a sharp knife, ensuring a clean and smooth cut. Make the cut at a 45-degree angle, which will allow the scion to fit properly with the rootstock.
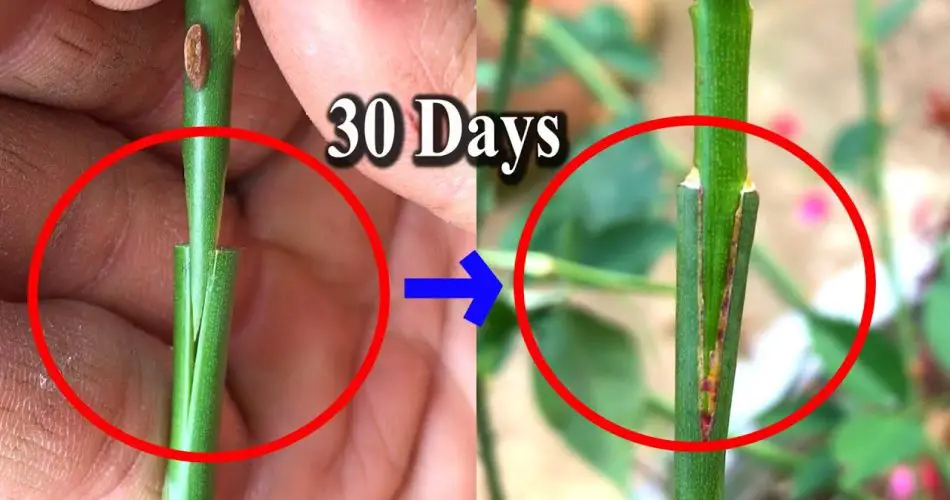
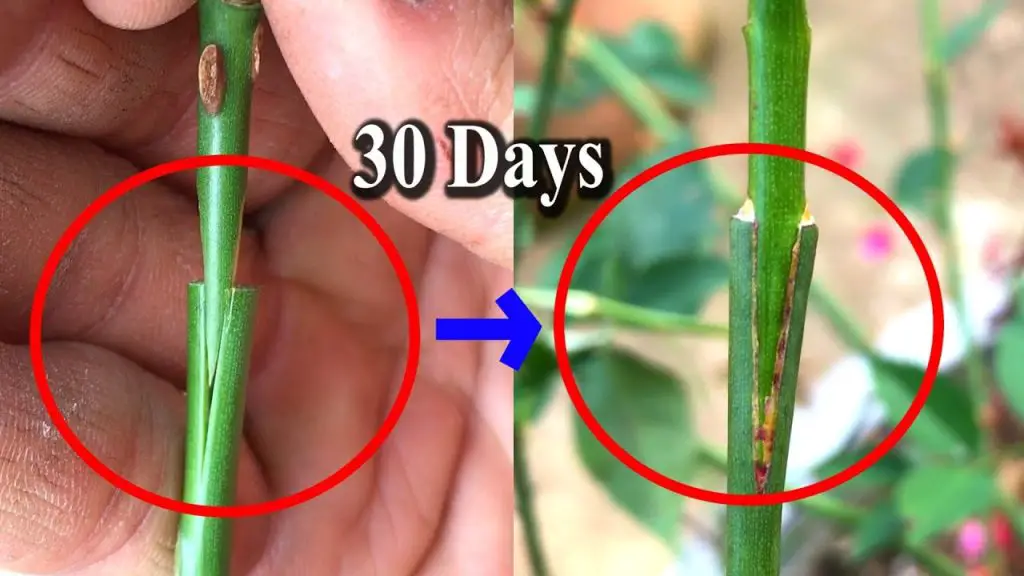
Step 4: Make the Graft
There are several methods of grafting, but the whip-and-tongue graft and the cleft graft are the most commonly used for roses.
Whip-and-Tongue Graft:
- Make a diagonal cut on both the rootstock and the scion, so they match in size and angle.
- Create a small tongue on each piece by making a vertical slit in the middle of the cut surface. This allows the two parts to lock together.
- Join the scion to the rootstock by aligning the tongues, ensuring the cambium (the green tissue just beneath the bark) of the rootstock and scion are in contact.
Cleft Graft:
- Make a vertical cut down the center of the rootstock about 2-3 inches deep.
- Trim the bottom of the scion into a wedge shape, so it fits snugly into the cleft of the rootstock.
- Insert the scion into the cleft, ensuring the cambium layers are aligned.
Step 5: Secure the Graft
Once the scion is in place, secure it with grafting tape or a rubber band. Wrap the graft site firmly but not too tight, as you don’t want to constrict the plant’s growth.
- Cover the graft with a layer of grafting sealant or wax to protect it from water, disease, and pests. This will also help prevent the scion from drying out.
Step 6: Protect the Grafted Rose
After grafting, place the rose in a sheltered location with indirect sunlight. Keep the grafted rose moist but not soggy. Mist it lightly every few days to encourage healing. You can also cover the graft with a plastic bag to maintain humidity, but make sure to remove it periodically to prevent mold growth.
Step 7: Monitor Growth
It can take several weeks to months for the graft to successfully take root. During this time, avoid disturbing the graft. Once the scion starts growing and producing new shoots, you can remove the grafting tape or rubber bands.
- As the rose plant begins to sprout, you’ll notice new growth emerging from the scion while the rootstock supports its nourishment and water intake.
Additional Tips for Grafting Roses
- Use the right rootstock: Certain rootstocks are better suited for specific types of roses. For example, Rosa multiflora is often used for its vigorous growth, while Rosa canina is preferred for its disease resistance.
- Graft in a clean environment: Ensure all tools are sterilized to prevent the spread of diseases.
- Practice patience: Grafting is an art that requires practice. Not every attempt will be successful, but each try improves your technique.
Conclusion
Grafting roses is a fantastic way to propagate new plants, create hybrids, or enhance the strength of your roses. By following these detailed grafting instructions and keeping a few essential tips in mind, you can easily graft beautiful roses and enjoy flourishing blooms for years to come.
Whether you’re a beginner or a seasoned gardener, grafting can provide you with a rewarding way to expand your rose collection and improve your garden’s aesthetic. Happy grafting! 🌹


