Did you know you can regrow celery from kitchen scraps? With the right technique, you can grow fresh, organic celery at home without spending much. This method is cost-effective, simple, and highly productive, making it perfect for small spaces like balconies, patios, or even windowsills.
Follow these proven tips to grow healthy, high-yielding celery using just the roots!
🌱 Why Grow Celery at Home?
✅ Saves Money – Regrow celery from leftover roots, reducing grocery costs.
✅ Fast Growth – With proper care, celery grows quickly and abundantly.
✅ Eco-Friendly – Reduce waste by reusing kitchen scraps for planting.
✅ Always Fresh – Enjoy crisp, homegrown celery free from chemicals.
💡 Tip: Choose organic celery from the store for regrowing, as non-organic varieties may have treated roots that prevent sprouting.
🛠️ Materials Needed
✔ Celery root base (about 2 inches long)
✔ A shallow bowl or container
✔ Fresh water
✔ A pot or garden bed with rich soil
✔ Compost or organic fertilizer
✔ Sunlight (at least 6 hours per day)
💡 Tip: Soaking the celery root in warm water for a few hours before planting can speed up sprouting!
🌿 Step-by-Step Guide to Growing Celery from Roots
Step 1: Prepare the Celery Base
🔹 Cut the celery stalks, leaving about 2 inches of the base intact.
🔹 Place the root end in a shallow bowl filled with clean water.
🔹 Keep the bowl in a sunny spot, such as a windowsill or balcony.
💡 Tip: Change the water every 2 days to prevent bacteria growth and keep roots healthy.
Step 2: Watch for New Growth
🌱 After 5-7 days, you’ll see small green shoots emerging from the center of the root.
🌱 Once the roots grow at least 1 inch long, it’s time to transfer the celery into soil.
💡 Tip: If roots take longer to appear, make sure the bowl is placed in a warm, well-lit area.
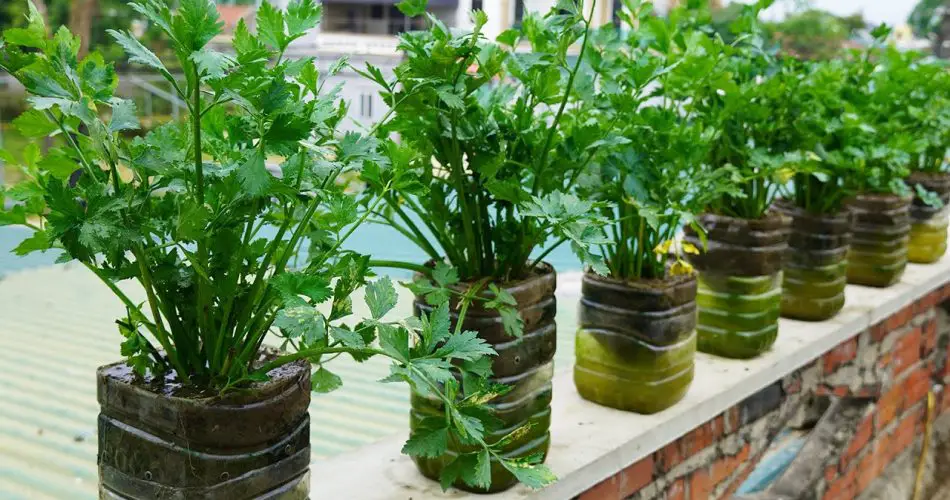
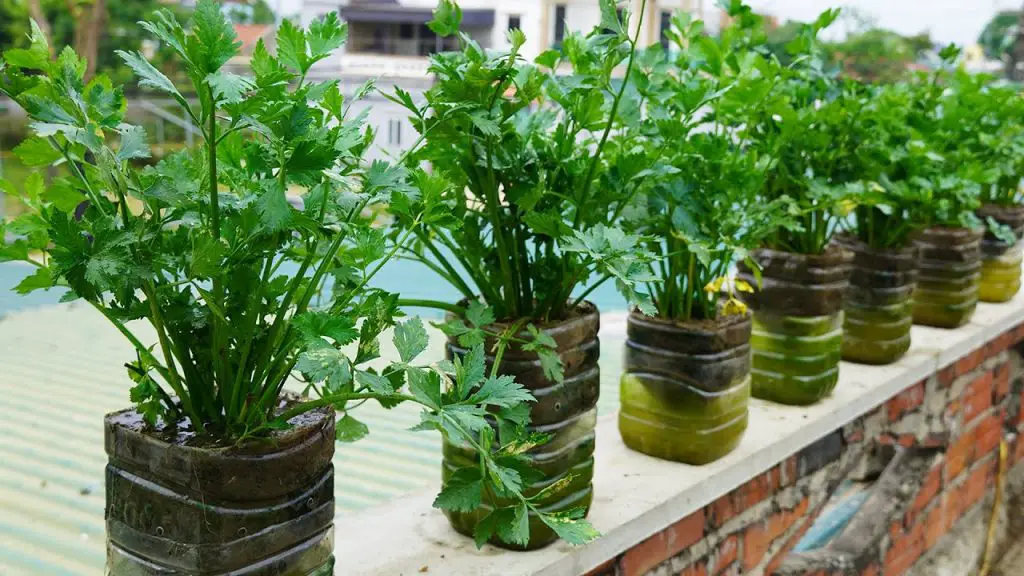
Step 3: Transplant into Soil
🌿 Fill a pot or garden bed with rich, well-draining soil.
🌿 Dig a small hole and plant the rooted celery base, covering only the roots with soil.
🌿 Water thoroughly and place the pot in a sunny location.
💡 Tip: Add compost or aged manure to enrich the soil and boost growth.
Step 4: Caring for Your Celery Plants
💦 Water regularly – Celery loves moist soil, so don’t let it dry out.
☀ Provide plenty of sunlight – At least 6 hours of direct sun daily is ideal.
🌿 Fertilize every 2 weeks – Use organic fertilizer or compost tea for nutrient-rich growth.
💡 Tip: Sprinkling crushed eggshells around the base adds calcium, strengthening the stems.
🍽️ Harvesting Your Celery
🥬 Harvest in 3-4 weeks once stalks reach 6 inches tall.
🥬 Cut only a few outer stalks at a time to encourage continuous growth.
🥬 Fresh celery is crisp, flavorful, and perfect for soups, salads, and snacks!
💡 Tip: After harvesting, leave the root in the soil—it will regrow multiple times!
❌ Common Mistakes & How to Avoid Them
🚫 Overwatering – Too much water can cause root rot. Keep the soil moist but not soggy.
🚫 Lack of Sunlight – If stalks grow thin and weak, move them to a brighter location.
🚫 Planting Too Deep – The celery base should be just above the soil to encourage healthy sprouting.
🌟 Final Thoughts
Growing celery from roots is a simple, budget-friendly way to enjoy fresh, homegrown celery all year round. With minimal effort and space, you can have a continuous harvest while reducing waste.
🌿 Try this method today and enjoy endless homegrown celery! 🥬✨


