Growing roses from cuttings is an exciting and rewarding endeavor that can surprise you with its simplicity and effectiveness. With just a few steps, you can propagate beautiful roses and fill your garden with vibrant blooms. Here’s how to successfully plant rose cuttings and watch them thrive!

Why Choose Rose Cuttings?
1. Cost-Effective
Using cuttings to propagate roses is a budget-friendly option. Instead of purchasing new plants, you can create new ones from existing roses, saving money while expanding your garden.
2. Preserve Desired Varieties
If you have a favorite rose bush with unique characteristics, taking cuttings allows you to preserve its traits. Each cutting will grow into a plant that is genetically identical to the parent.
3. Surprising Growth Potential
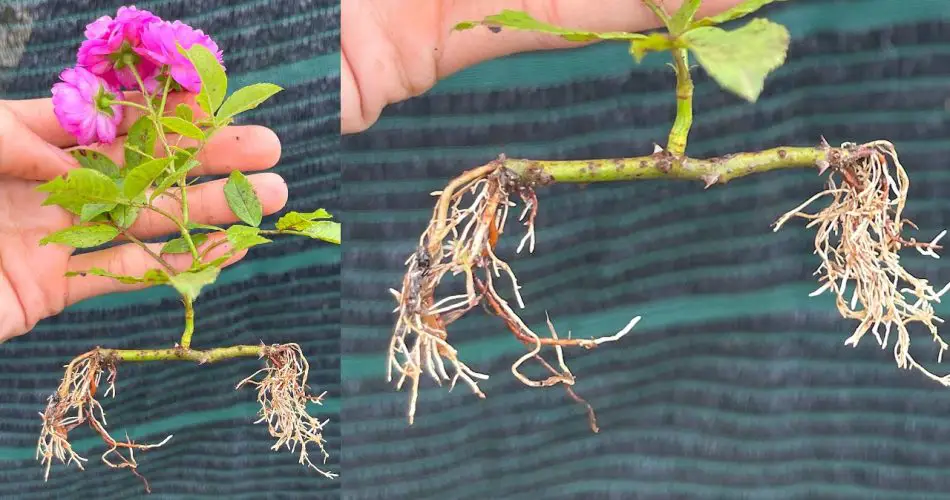
Many gardeners are pleasantly surprised by how quickly rose cuttings can root and grow into healthy plants, given the right conditions.
How to Take and Plant Rose Cuttings
Step 1: Choose the Right Time
The best time to take rose cuttings is during the growing season, typically in late spring or early summer when the plants are actively growing.
Step 2: Select Healthy Cuttings
- Look for healthy stems that are about 6-8 inches long with several leaf nodes.
- Choose cuttings from disease-free plants to ensure healthy growth.
Step 3: Prepare the Cuttings
- Make the Cut: Use clean, sharp pruning shears to make a diagonal cut just below a leaf node.
- Remove Lower Leaves: Strip off the lower leaves, leaving only a couple at the top. This reduces moisture loss and helps direct energy to root development.
Step 4: Use Rooting Hormone (Optional)
For best results, dip the cut end of the stem in rooting hormone to encourage faster root development.
Step 5: Plant the Cuttings
- Prepare Containers: Fill small pots or seed trays with a well-draining potting mix. A mix of perlite and peat moss works well.
- Make Holes: Use a pencil or your finger to create holes in the soil.
- Insert Cuttings: Place the cuttings in the holes, ensuring that at least one leaf node is buried in the soil.
- Water Gently: Water the soil lightly to settle it around the cuttings.
Step 6: Create a Humid Environment
Cover the pots with a clear plastic bag or a mini greenhouse to maintain humidity. Ensure there is some airflow to prevent mold.
Step 7: Provide Proper Care
- Place the pots in a location with indirect sunlight.
- Check the soil regularly, keeping it moist but not soggy.
- Remove the plastic cover once roots have developed (usually in 4-6 weeks).
Transplanting Your New Roses
Once the cuttings have rooted, you can transplant them into larger pots or directly into your garden. Here’s how:
- Choose a Sunny Location: Select a spot with at least 6 hours of sunlight per day.
- Prepare the Soil: Amend the garden soil with compost to enhance nutrient content.
- Transplant Carefully: Dig a hole slightly larger than the root ball and place the new plant inside, covering the roots with soil.
- Water Well: Water the newly transplanted roses thoroughly to help them settle in.
Conclusion
Planting rose cuttings is a delightful way to expand your garden and enjoy the beauty of roses. With just a little effort and care, you’ll be surprised by how quickly these cuttings take root and flourish. Embrace the joy of gardening and watch as your rose cuttings transform into stunning blooms! Happy planting!


