Roses are a classic addition to any garden, with their beauty, fragrance, and vibrant colors. The good news is, you don’t have to purchase a new plant every time you want to add roses to your garden. Extracting rose branches and propagating them at home is a simple, cost-effective way to grow your own roses, and you can do it in any season. Whether it’s spring, summer, fall, or winter, the process remains the same, and with a little patience, you can enjoy a new rose bush in your garden in no time.
In this guide, we will walk you through the process of extracting rose branches at home for propagation, ensuring that the method is easy and accessible no matter the time of year.
Why Propagate Roses from Cuttings?
Propagating roses from cuttings is a reliable and rewarding way to grow new plants. Some benefits include:
- Genetic consistency: The new plant will be identical to the parent rose, ensuring that you get the same colors, fragrance, and qualities as the original.
- Cost-effective: Instead of buying new roses, you can propagate your existing plants at no cost.
- Customized variety: You can propagate a variety of roses from your favorite plants, creating a personalized garden.
Materials You’ll Need:
- Healthy rose branch (cutting)
- Sharp scissors or pruning shears
- Rooting hormone (optional, but recommended for faster results)
- Water (for soaking the cutting)
- Pot with drainage (for planting)
- Well-draining soil (preferably a mixture for roses or general garden use)
- Plastic bag or plastic wrap (to create a humid environment)
- Clear plastic bottle or container (optional, for creating a mini greenhouse)
Step-by-Step Guide: How to Extract Rose Branches at Home
Step 1: Choose the Right Rose Branch
- Select a healthy rose stem: Look for a young, semi-ripe branch from the parent plant. It should not be too old or too young. A semi-hardwood cutting (a stem that is not too soft or too woody) is ideal.
- Cut the stem: Using sharp scissors or pruning shears, cut the rose stem to about 6-8 inches long. Make sure that the cutting has at least one node (the small bump on the stem where leaves and roots emerge).
Step 2: Prepare the Cutting
- Remove leaves: Strip off the lower leaves from the cutting, leaving only a couple of leaves at the top. This will help the cutting focus its energy on root growth instead of sustaining extra leaves.
- Trim the cutting: Trim the cutting at the bottom just below a node (the point where leaves were attached). Make a clean cut to prevent infection.
Step 3: Apply Rooting Hormone (Optional)
- Dip the cutting: For quicker rooting, dip the cut end of the rose branch into rooting hormone. This hormone helps stimulate root development and increases the chances of a successful cutting.
- Tap off excess: After dipping, gently tap the cutting to remove any excess rooting hormone.
Step 4: Plant the Cutting
- Prepare the soil: Fill a small pot or container with well-draining soil. A mixture of peat, perlite, and sand works well for roses, as it allows water to drain freely while keeping the cutting moist.
- Insert the cutting: Place the cutting into the soil about 2-3 inches deep, ensuring the node is below the surface. Lightly press the soil around the base of the cutting to keep it stable.
- Water lightly: Water the cutting gently to settle the soil and ensure good contact between the cutting and the soil. Be careful not to soak the soil too much.
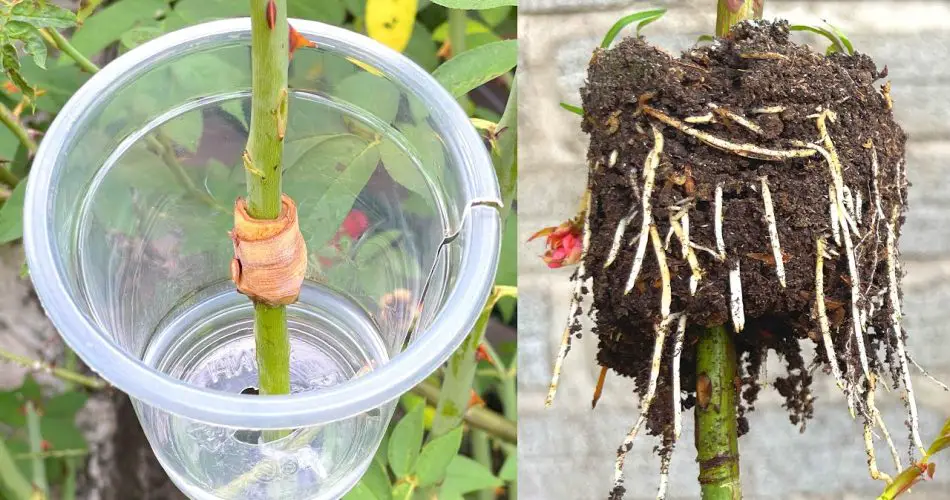
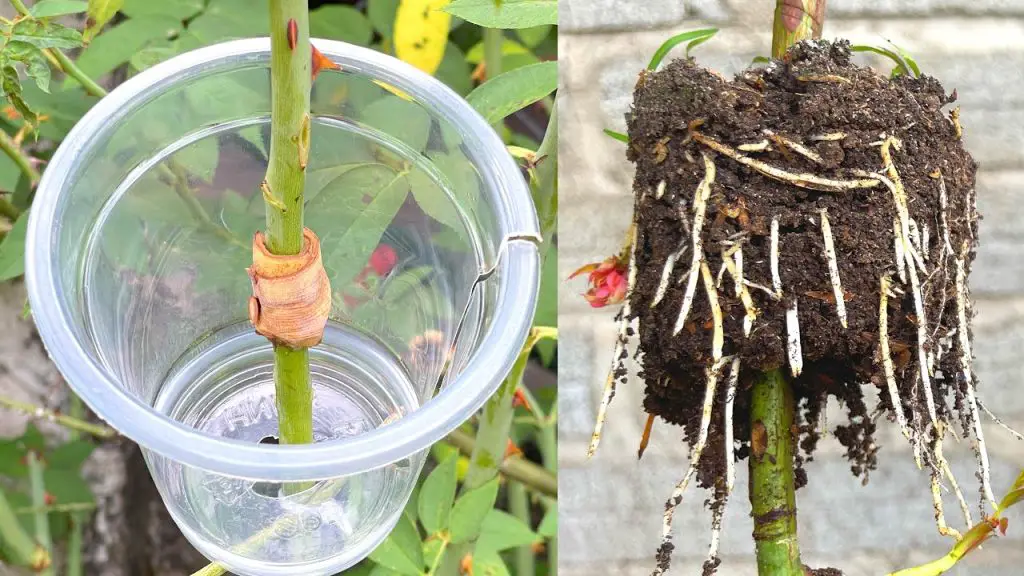
Step 5: Create a Humid Environment
- Cover the cutting: To promote root growth, create a humid environment around the cutting. Cover it with a plastic bag or clear plastic container to trap moisture. This will help retain humidity and prevent the cutting from drying out.
- Place in indirect sunlight: Place the pot in a bright area with indirect sunlight, avoiding direct sunlight, which can scorch the cutting. A warm, well-lit spot works best for rooting.
Step 6: Monitor and Care for the Cutting
- Check regularly: Over the next few weeks, check the cutting for any signs of rooting. Gently tug on the cutting to see if it resists, indicating the development of roots.
- Water when needed: Keep the soil moist, but be careful not to overwater. Roots will develop better in slightly damp soil rather than soggy conditions.
Step 7: Transplant the New Rose
- Transplant when roots are visible: Once the cutting has developed a strong root system (usually within 4-6 weeks), you can transplant it into a larger pot or directly into your garden.
- Acclimate to the outside: If you are planting the new rose outdoors, gradually introduce the young plant to outdoor conditions by placing it outside for a few hours a day, gradually increasing the exposure over several days.
Tips for Successful Rose Propagation
- Best time to take cuttings: Although you can propagate roses in any season, spring and summer are the best times to take cuttings since the plant is actively growing.
- Use clean tools: Always sterilize your scissors or pruning shears before cutting to prevent spreading any diseases to your rose plant.
- Be patient: Roses take time to establish roots. Don’t rush the process; give the cuttings several weeks to grow new roots and adapt to their new environment.
Why Propagating Roses at Home Works in Any Season
- Adaptability of roses: Roses are resilient plants that can be propagated in any season as long as the conditions are right. Even in colder months, providing a controlled indoor environment with adequate humidity and warmth can promote successful rooting.
- Ease of propagation: The process of extracting rose branches for propagation is straightforward and does not require specialized equipment. Whether it’s winter or summer, you can grow roses from cuttings at home with basic materials.
- Indoor propagation: During colder months, you can propagate roses indoors, providing a warmer environment for rooting without worrying about frost or harsh outdoor conditions.
Conclusion
Extracting rose branches at home is a simple and rewarding process that anyone can do, no matter the season. By following the steps outlined above and being patient, you can easily propagate roses and enjoy a new collection of beautiful blooms in your garden. Whether it’s spring, summer, fall, or winter, you can successfully propagate roses year-round, making it a great gardening project for all seasons. So, gather your materials and start extracting rose branches today—your new roses are just a cutting away!


