Grafting is a fascinating technique that allows gardeners to combine two plants into one, resulting in a unique and productive specimen. If you’ve ever wondered how to graft two flowers together or even graft two trees into one, you’re in the right place. This process can create beautiful hybrid plants, enhance flower production, or even improve the growth and hardiness of your trees.
In this article, we’ll walk you through the step-by-step process of tip grafting, a common and effective technique used to combine two plants. You’ll learn how to graft flowers or trees successfully, the tools you need, and the best tips for a successful graft.
What is Tip Grafting?
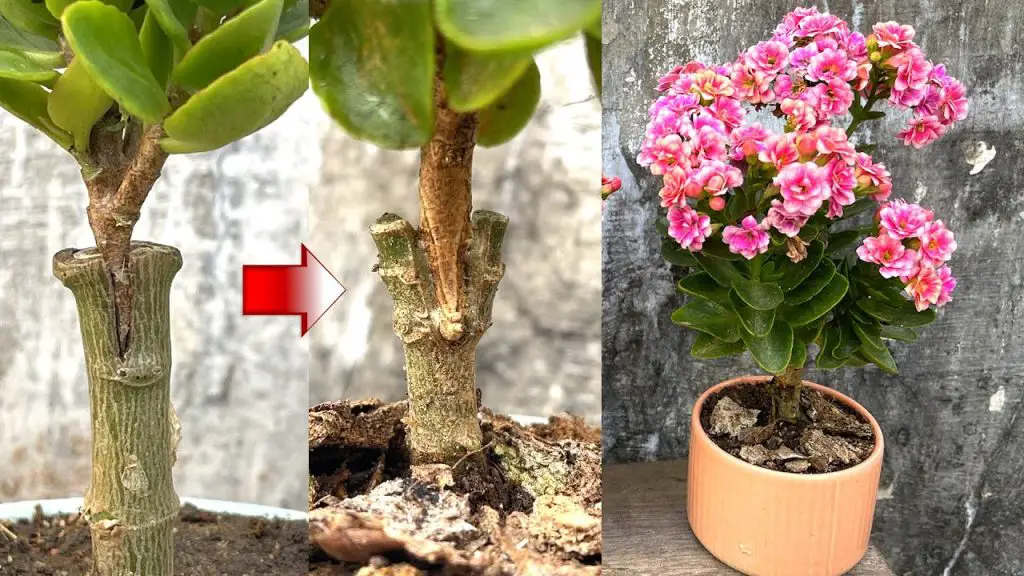
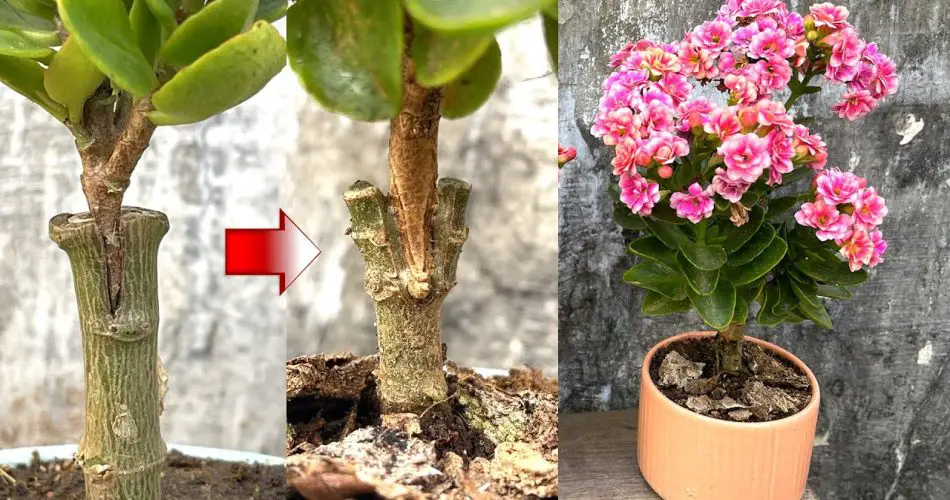
Tip grafting is a form of plant grafting where the tip of a shoot or branch (the scion) from one plant is joined to the rootstock or stem of another plant. The goal is to ensure that the vascular systems of the two plants are connected, allowing nutrients and water to flow between them. This method is often used for flowering plants and trees to combine desirable traits from both plants, such as a specific flower color or tree size.
Tip grafting is commonly used with fruit trees and ornamental plants, as it helps improve growth, disease resistance, and flower production.
Materials You’ll Need
Before you begin, make sure you have all the necessary tools for grafting two flowers together or trees into one:
- Sharp pruning knife or grafting knife
- Rootstock (the plant you will graft onto)
- Scion (the branch or stem you want to graft)
- Grafting tape or grafting clips
- Grafting wax (optional, to seal the grafting site)
- Scissors for trimming
- A clean surface for working
Step-by-Step Guide: How to Graft Two Flowers or Trees Together
Follow these simple steps to graft two plants together successfully:
1. Choose the Right Plants
Start by selecting two plants that you want to graft. For this example, we’ll focus on flowering plants or fruit trees, but the process is similar for other types of plants. The key is to ensure that the rootstock and scion are compatible and belong to the same plant family or genus. For instance, you can graft a citrus tree onto a similar citrus rootstock or combine two different types of flowers.
2. Prepare the Rootstock
The rootstock is the plant that will provide the root system for the graft. Choose a healthy, vigorous rootstock, and cut the top part of the stem or branch cleanly with your sharp knife. The cut should be as smooth as possible to ensure a strong connection with the scion.
3. Prepare the Scion
The scion is the plant material you want to graft onto the rootstock. Cut a healthy, young shoot from your desired flower or tree, ensuring that it has at least two or three buds. The cutting should be about 4 to 6 inches long, and you should make a diagonal cut at the base of the scion. This cut will allow it to fit snugly onto the rootstock.
4. Make the Grafting Cut
Now, you’ll need to create a matching cut on the rootstock where the scion will be placed. This is where tip grafting comes into play. Make a diagonal cut on the rootstock, similar in size and angle to the cut on the scion. The goal is to create a surface that will allow both the rootstock and scion to join together and form a seamless connection.
5. Join the Scion and Rootstock
Carefully match the cut end of the scion to the cut on the rootstock. Ensure that the cambium layer (the thin layer just under the bark) of both the rootstock and scion are aligned. This is essential for the success of the graft, as it allows the plants to fuse together.
6. Secure the Graft
Once the scion and rootstock are aligned, use grafting tape or grafting clips to tightly secure the grafted area. This helps keep the plants together and prevents them from moving during the healing process. You can also apply a layer of grafting wax around the graft site to seal the area and prevent moisture loss.
7. Wait for the Graft to Heal
Place the grafted plant in a sheltered area with indirect sunlight and keep the soil moist but not soggy. The graft will take a few weeks to heal and for the scion to begin growing. Check regularly to ensure that the graft is not drying out and that the scion is not moving too much.
8. Remove the Grafting Tape
After about 2 to 3 weeks, the graft should have healed, and you should begin to see new growth on the scion. At this point, you can carefully remove the grafting tape or clips. Make sure not to disturb the graft too much during this time, as it could hinder the healing process.
9. Caring for the Newly Grafted Plant
Once the graft has successfully healed, continue to care for your new plant by providing it with regular water, sunlight, and nutrients. As the grafted plant matures, you’ll notice the scion growing and eventually producing flowers or fruit, depending on the plants you’ve grafted together.
Benefits of Grafting Two Flowers or Trees Together
Grafting offers numerous benefits, including:
- Combining Desirable Traits: You can select the best traits of each plant, such as a particular flower color or tree shape.
- Increased Disease Resistance: The rootstock may provide better resistance to diseases and pests, while the scion produces the desired flowers or fruit.
- Faster Growth: Grafting can speed up the growth of certain plants, allowing them to mature faster than if grown from seeds.
- Improved Flowering and Fruit Production: Grafting can help plants produce more flowers or fruit, depending on the rootstock and scion combination.
Conclusion
Grafting is a powerful technique that allows you to combine the best features of two plants, creating a unique and productive hybrid. Whether you’re looking to graft two flowers together for a colorful garden display or combine fruit trees into one specimen, tip grafting is a simple yet effective method to try.
With the right tools, patience, and care, you can enjoy the fruits (and flowers) of your labor in no time! Happy grafting!


