Growing an orchid from a leaf can be a rewarding and fascinating process. While it’s not as straightforward as propagating some other plants, with the right steps, you can succeed. Here’s how you can do it.
1. Choose the Right Orchid and Leaf
Type of Orchid:
- Not all orchids can be propagated from a leaf. The most common orchids for leaf propagation are those from the Dendrobium and Phalaenopsis genera.
Selecting the Leaf:
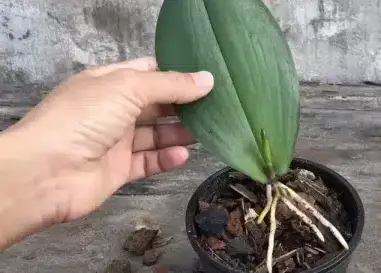
- Choose a healthy, mature leaf. It should be green, firm, and free of any diseases or pests.
2. Prepare Your Tools and Workspace
Tools Needed:
- Sterile scissors or a sharp knife
- Rooting hormone (optional)
- Clean pots or trays
- Orchid potting mix or sphagnum moss
- Transparent plastic bag or humidity dome
Sterilize Your Tools:
- Ensure all your tools are clean and sterilized to prevent any infections. You can sterilize them using rubbing alcohol.
3. Cutting the Leaf
- Carefully cut the leaf from the orchid plant with sterilized scissors or a knife. Make sure to get a clean cut.
4. Apply Rooting Hormone (Optional)
- Dip the cut end of the leaf into a rooting hormone. This can help stimulate root growth, although it’s not strictly necessary.
5. Prepare the Potting Medium
Choose the Medium:
- Use a well-draining orchid potting mix or moistened sphagnum moss.
Potting:
- Fill a small pot or tray with the potting medium. Make a small hole in the medium where you’ll place the leaf.
6. Planting the Leaf
- Insert the cut end of the leaf into the prepared hole in the potting medium. Ensure that the leaf is upright and stable.
7. Create a Humid Environment
Covering:
- Place the pot or tray in a transparent plastic bag or under a humidity dome to create a humid environment. This helps to retain moisture and promote root development.
Air Circulation:
- Make sure to open the bag or dome occasionally to allow for air circulation and prevent mold growth.
8. Provide Proper Care
Light:
- Place the setup in a location with bright, indirect light. Avoid direct sunlight, which can be too harsh.
Temperature:
- Maintain a consistent temperature between 65°F and 75°F (18°C to 24°C).
Moisture:
- Keep the potting medium moist but not soggy. Mist the leaf regularly to maintain humidity.
9. Patience and Monitoring
- Rooting can take several weeks to a few months. Be patient and monitor the leaf regularly for signs of growth.
10. Transplanting
When to Transplant:
- Once the leaf develops sufficient roots (typically 1-2 inches long), it’s time to transplant it to a larger pot with a more permanent orchid mix.
Transplanting:
- Gently remove the rooted leaf and plant it in a new pot filled with orchid potting mix. Continue to provide the same care as mentioned above.
Tips for Success
- Avoid Overwatering: Too much water can lead to root rot. Ensure good drainage.
- Maintain Humidity: Orchids thrive in humid conditions. Using a humidity tray or a humidifier can help.
- Watch for Pests and Diseases: Regularly check your orchid for any signs of pests or diseases and address them promptly.
By following these steps and providing the right care, you can successfully grow an orchid from a leaf. It requires patience and attention, but the reward of watching your new orchid thrive is worth the effort.
Copy
Show Comments


