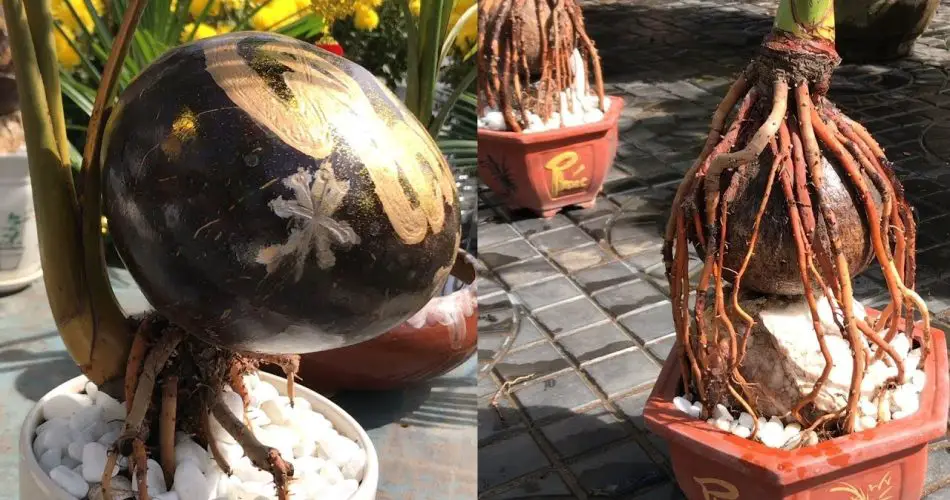
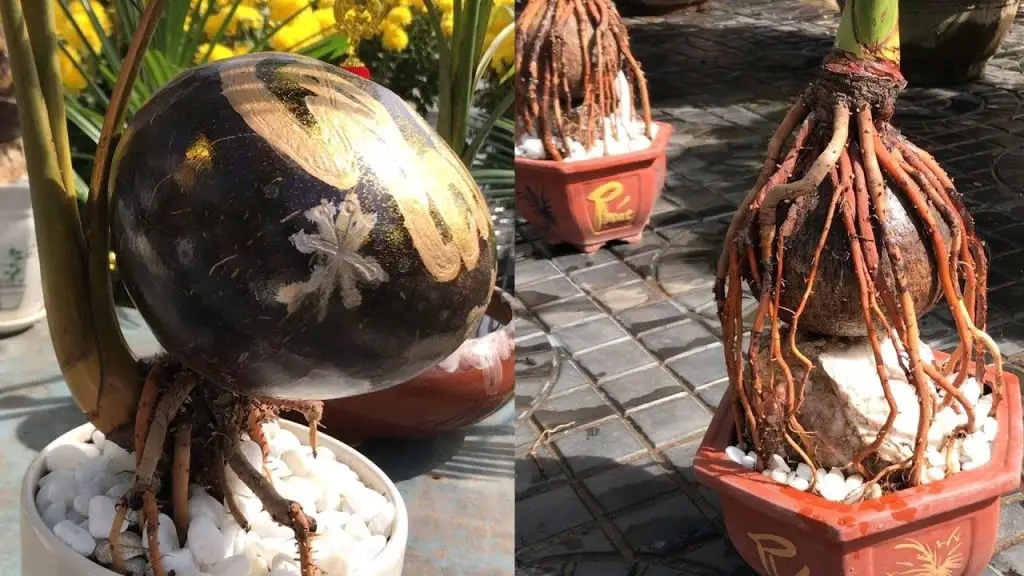
Transforming a coconut into a striking bonsai is a unique and rewarding gardening project that combines the charm of traditional bonsai with the exotic allure of tropical plants. Here’s a step-by-step guide on how to grow a coconut bonsai and create a captivating scene in your garden or home.
Why Choose a Coconut Bonsai?
- Unique Aesthetic: A coconut bonsai offers a distinct look with its palm-like appearance and elegant foliage. It brings a touch of the tropics to any space, making it a standout feature.
- Versatility: Coconut bonsai can be grown both indoors and outdoors, depending on your climate and care preferences.
- Educational: Growing a coconut bonsai provides insight into the art of bonsai and the specific needs of tropical plants.
Steps to Grow a Coconut Bonsai
- Selecting the Coconut:
- Choose a Fresh Coconut: Use a mature coconut with a hard shell and three “eyes” (brown spots). Opt for a coconut that is still filled with coconut water.
- Prepare the Coconut: Drain the coconut water and remove the outer husk to expose the inner shell. This can be done by carefully peeling away the outer layer or soaking it in water to loosen the husk.
- Germinating the Coconut:
- Soaking: Soak the coconut in water for 2-3 days to encourage sprouting. Ensure it is kept in a warm, humid environment during this period.
- Planting: Place the soaked coconut in a pot with well-draining potting mix. A mix of peat moss, sand, and perlite works well. Plant the coconut with the pointed end facing upwards.
- Caring for the Coconut:
- Light: Position the pot in a spot with bright, indirect light. Coconut trees need ample light to thrive but should be protected from direct, harsh sunlight.
- Watering: Keep the soil consistently moist but not waterlogged. Water when the top inch of soil feels dry.
- Humidity: Maintain a humid environment to mimic the coconut’s natural tropical habitat. Regular misting or placing a humidity tray near the plant can help.
- Training the Bonsai:
- Pruning: Once the coconut begins to grow, start shaping it by pruning the leaves and removing unwanted shoots. This will help in creating the desired bonsai shape.
- Wiring: Use bonsai wire to gently guide the growth of the trunk and branches. Be cautious not to damage the plant while wiring.
- Repotting:
- Timing: Repot your coconut bonsai every 1-2 years to refresh the soil and manage root growth. Choose a slightly larger pot if needed to accommodate the growing roots.
- Technique: Carefully remove the bonsai from its pot, trim the roots if necessary, and replant it in fresh potting mix.
Creating a Bonsai Scene
- Design: Think about the overall scene you want to create. You might choose to place your coconut bonsai in a decorative pot or on a display stand to highlight its unique shape.
- Complementary Plants: Add small moss or ground covers around the base of the bonsai to enhance the scene and give it a more natural appearance.
- Decorative Elements: Consider incorporating small figurines, stones, or driftwood to create a miniature landscape around your coconut bonsai.
Additional Tips
- Pests: Keep an eye out for pests like spider mites or scale insects, and treat them promptly if detected.
- Seasonal Care: Adjust care routines according to the season. For instance, reduce watering during cooler months when growth slows down.
By following these steps, you can cultivate a stunning coconut bonsai that brings a piece of tropical elegance to your space. The combination of artful shaping and careful cultivation will result in a remarkable living scene that reflects both the beauty of bonsai and the exotic charm of the coconut. 🌴🌺
Copy
Show Comments


