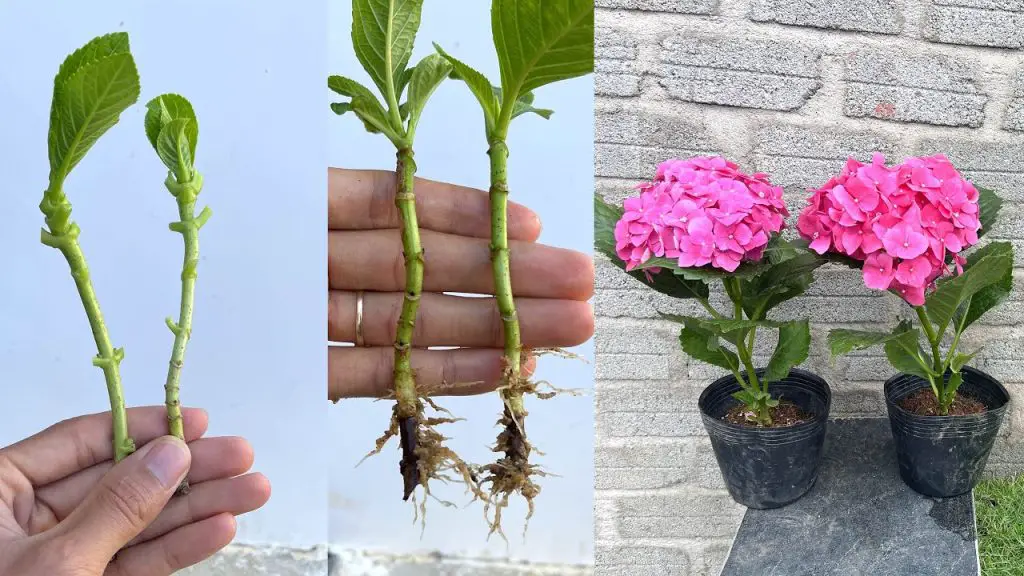
Hydrangea paniculata, commonly known as Panicle Hydrangea, is a stunning shrub that adds elegance and color to any garden. Growing Hydrangeas from branches is a rewarding way to expand your collection or propagate new plants. Here’s a comprehensive guide on how to successfully grow Hydrangeas using branches, ensuring vibrant blooms and healthy plants.
Why Grow Hydrangeas from Branches?
- Cost-Effective: Propagating from branches is a budget-friendly method compared to purchasing new plants.
- Genetic Consistency: Branch propagation ensures that the new plants have the same genetic traits as the parent plant, including flower color and growth habits.
- Personal Satisfaction: Successfully growing plants from branches provides a sense of accomplishment and a deeper connection to your garden.
How to Grow Hydrangeas from Branches
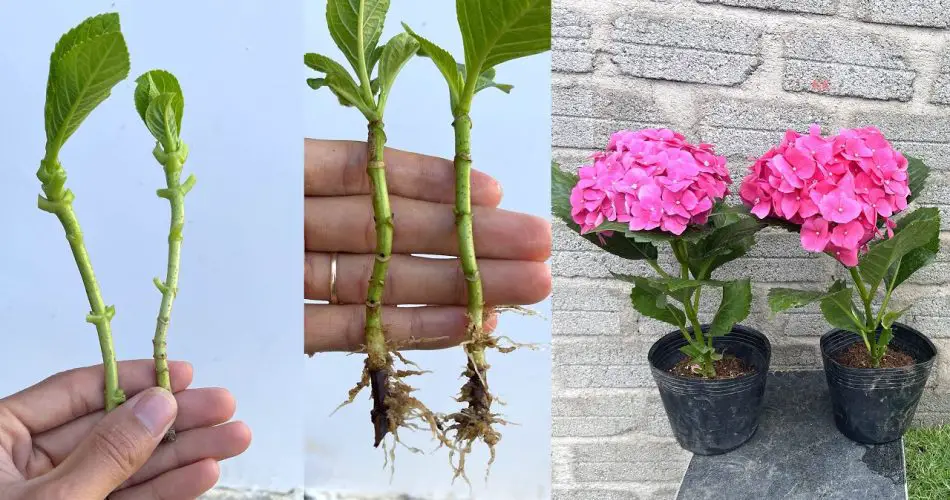
- Select Healthy Branches: Choose healthy, mature Hydrangea paniculata branches from the parent plant. Look for branches that are about 4-6 inches long and free from diseases or pests.
- Prepare the Cuttings: Using a clean, sharp knife or pruners, make a clean cut just below a leaf node (the point where leaves attach to the stem). Remove the lower leaves, leaving a few leaves at the top. If the cuttings are too long, you can cut them down to a manageable size.
- Use Rooting Hormone: Dip the cut ends of the branches into a rooting hormone powder or gel. This helps stimulate root growth and increases the chances of successful propagation.
- Plant the Cuttings: Fill a pot with a well-draining potting mix or a mixture of sand and perlite. Insert the treated cuttings into the soil, making sure the leaf nodes are buried and the leaves are above the soil surface.
- Provide Optimal Conditions: Place the pot in a bright, indirect light location. Keep the soil consistently moist but not waterlogged. Covering the pot with a clear plastic bag or using a propagation dome can help maintain humidity and improve rooting success.
- Monitor and Care: Regularly check the cuttings for root development. This can take several weeks to a few months. Ensure that the soil remains moist and that the cuttings are not exposed to direct sunlight, which can cause stress.
- Transplanting: Once the cuttings have developed a strong root system, they can be transplanted into larger pots or directly into the garden. Choose a location with well-draining soil and adequate sunlight.
Why This Method Works
- Rooting Hormone: Encourages faster and more robust root development, increasing the likelihood of successful propagation.
- Consistent Moisture: Maintains the ideal environment for roots to form without the risk of drying out or becoming waterlogged.
- Controlled Environment: Covering the pot helps create a mini-greenhouse effect, providing a stable environment for rooting.
What to Expect
With proper care and attention, you can expect:
- Healthy New Plants: Vigorous Hydrangea paniculata plants with a strong root system.
- Abundant Blooms: Beautiful and vibrant blooms characteristic of Hydrangea paniculata.
- Garden Expansion: An expanded garden with new Hydrangeas grown from your existing plants.
Additional Tips
- Avoid Overcrowding: Space out cuttings to ensure adequate room for root development.
- Use Sterile Tools: Prevent disease and contamination by using clean, sterilized tools when handling cuttings.
By following these steps to grow Hydrangeas from branches, you can successfully propagate Hydrangea paniculata and enjoy a flourishing garden filled with stunning blooms. This method not only enhances your garden but also provides a fulfilling gardening experience. Start propagating today and watch your Hydrangeas thrive!
Copy
Show Comments