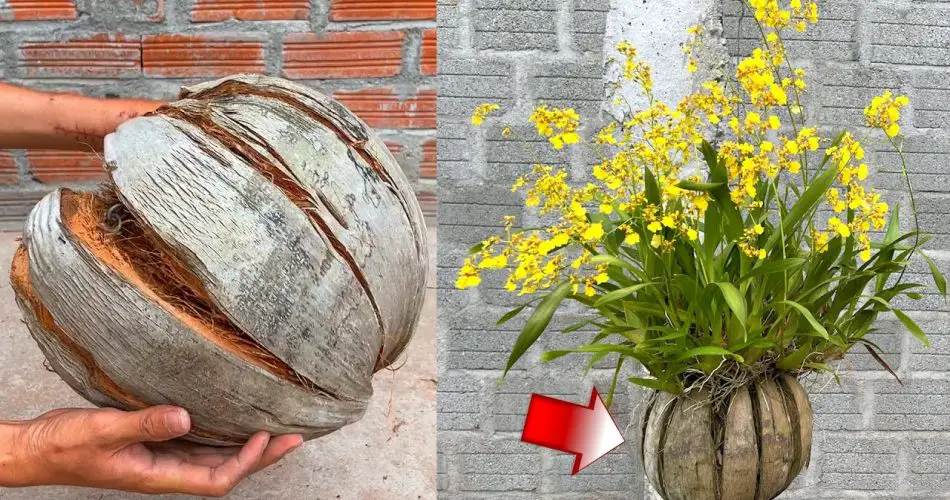
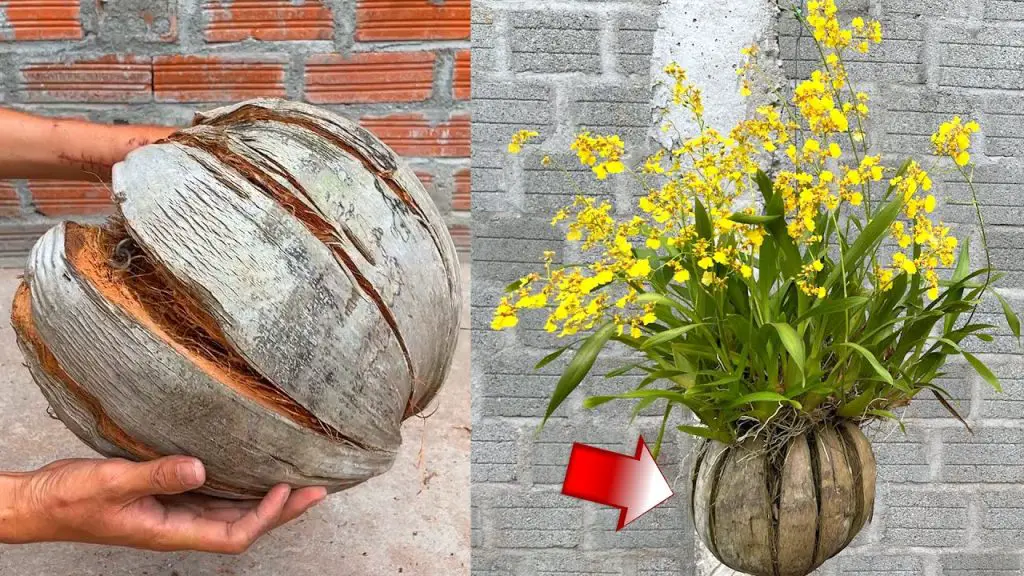
Orchids are one of the most beautiful and elegant plants you can grow, but they can sometimes be tricky to care for. If you want to take your orchid-growing skills to the next level, try making your own orchid flower pots using coconuts! This method not only provides an attractive and natural way to display your orchids but also offers several benefits to help your orchids thrive.
In this article, we’ll show you how to create your own coconut orchid pots, explain why they’re great for orchids, and provide helpful tips for taking care of your orchids in these unique pots.
Why Use Coconuts for Orchid Pots?
Using coconuts as orchid pots offers several advantages that can benefit both your orchids and your home:
- Natural Air Circulation: Coconuts have a natural structure that promotes excellent air circulation, which is crucial for orchid roots. Orchids thrive in environments with well-drained, airy conditions, and coconuts provide this by allowing air to flow freely around the roots.
- Moisture Retention: Coconuts are also great at retaining moisture while preventing the roots from staying too wet. Orchids don’t like to sit in water, and coconut pots help maintain the perfect balance between moisture and drainage.
- Eco-Friendly: Coconuts are a sustainable and biodegradable option for your orchid pots, making them an environmentally friendly choice for plant lovers.
Materials You’ll Need
To create your own orchid flower pots from coconuts, gather the following materials:
- 1 Coconut (fresh or dried, with the husk still intact)
- A sharp knife or saw (to cut the coconut)
- A spoon or scoop (to remove the coconut flesh)
- Orchid potting mix (preferably made for orchids, including bark, perlite, or sphagnum moss)
- A drill or small awl (for making drainage holes)
- A small plate or saucer (to catch any excess water)
Step-by-Step Guide: How to Make Coconut Orchid Pots
- Prepare the Coconut: Begin by choosing a fresh or dried coconut. If you’re using a fresh coconut, you’ll need to pierce the eyes (the three soft spots on the coconut) to drain the water inside. Once the water is drained, use a sharp knife or saw to cut the coconut in half. If you’re using a dried coconut, you’ll need to carefully peel off the husk to expose the shell.
- Remove the Coconut Flesh: Using a spoon or scoop, gently remove the inner coconut flesh from the shell. You’ll want the shell to be hollow so that it can hold the orchid potting mix. Make sure to leave enough space for the orchid’s roots to grow comfortably.
- Create Drainage Holes: Orchids need good drainage to avoid root rot, so it’s important to make drainage holes in the bottom of the coconut. Use a drill or small awl to create several small holes in the bottom to allow excess water to escape.
- Prepare the Orchid Potting Mix: While coconuts provide excellent natural drainage, you’ll still need a good orchid-specific potting mix to fill the pot. Orchid mix typically includes materials like bark, perlite, and sphagnum moss to provide the right balance of moisture retention and air circulation. Fill the coconut shell with the orchid mix, leaving enough room for the orchid’s roots to grow.
- Plant Your Orchid: Gently place your orchid into the coconut shell, making sure the roots are spread out and positioned in a way that allows them to grow comfortably. Add more potting mix around the roots to hold the orchid in place.
- Place the Coconut Pot in a Saucer: To catch any excess water, place your coconut pot on a small plate or saucer. This will help protect your surfaces from water damage and make it easier to move the plant around.
Taking Care of Orchids in Coconut Pots
Now that you’ve created your unique coconut orchid pot, it’s time to take care of your orchids. Here are some important care tips:
- Watering: Orchids generally require watering once a week or when the potting mix feels dry to the touch. When watering, be sure not to overwater—ensure that excess water can drain freely through the coconut pot’s holes.
- Humidity: Orchids love humidity, so if you live in a dry climate, consider placing your coconut pot in a humidity tray or misting the air around the plant. Just be careful not to let the roots sit in water for long periods.
- Light: Orchids prefer indirect sunlight. Place your coconut pot in a location where it receives bright, but not direct, sunlight. A spot near a window with sheer curtains is ideal.
- Fertilizing: Orchids need regular feeding to thrive. Use an orchid-specific liquid fertilizer once a month during the growing season to encourage healthy blooms.
Benefits of Coconut Orchid Pots
- Great Drainage: The natural holes and porous texture of coconuts provide excellent drainage, which is essential for healthy orchid roots.
- Aesthetic Appeal: Coconut orchid pots add a tropical and rustic charm to your home décor, enhancing the beauty of your orchids.
- Sustainable Option: Using coconuts as pots is an eco-friendly choice, helping reduce waste by repurposing the coconut shell.
Conclusion
Making orchid flower pots with coconuts is a fun, easy, and sustainable way to grow and care for your orchids. Not only does it create an attractive display, but it also offers great benefits for your plants by providing natural drainage, moisture retention, and air circulation. Follow the simple steps outlined in this guide, and you’ll have your orchids flourishing in no time!
By using coconut pots, you’re not only caring for your orchids but also supporting the environment with a biodegradable and eco-friendly solution. So, give it a try and watch your orchids thrive in their beautiful, natural coconut homes!


