
Creating new orchid plants from old orchid branches is a fun and rewarding process. If you have a healthy orchid that has outgrown its pot or has a few old branches, you can easily propagate these into new plants using just water. In this article, we will guide you through the simple steps of how to grow orchids from old branches in water, resulting in beautiful new orchids for your collection. Let’s get started!
Why Propagate Orchids in Water?
Propagating orchids in water offers several advantages:
- Simple and cost-effective method to create new plants.
- No soil required, making it a clean and easy process.
- Allows you to monitor root growth easily, giving you a clear view of the progress.
- Fast rooting compared to other propagation methods.
By placing orchid branches in water, you can grow new roots without the mess and hassle of soil. It’s an ideal method for beginners or anyone looking to expand their orchid collection.
What You Need to Propagate Orchids in Water
Before you start, gather the following materials:
- Old orchid branches (healthy and mature).
- A clean glass jar or container to hold the water.
- Distilled water (to avoid harmful minerals found in tap water).
- A sharp knife or pruning shears.
- Optional: A few drops of liquid orchid fertilizer to boost growth.
Steps to Propagate Orchids in Water
Step 1: Select a Healthy Orchid Branch
- Choose a healthy orchid branch (also called a stem or cane) from an orchid plant that is no longer producing flowers or has become overgrown. The branch should be free of disease, pests, or damage.
- It’s best to use a branch that has at least one node, the point where leaves or roots can grow. This node will be key to rooting.
Step 2: Cut the Orchid Branch
- Using a sharp knife or pruning shears, carefully cut the orchid branch just below a node. Ensure that the cut is clean and precise, as jagged cuts can lead to infection or poor root development.
- The cutting should be about 4-6 inches long. It’s important that the cutting has at least one node visible.
Step 3: Prepare the Water Container
- Choose a clean glass jar or a container with a wide opening to hold the branch. The container should be tall enough to allow the bottom of the branch to be submerged in water but should not cover the entire stem.
- Fill the container with distilled water. Avoid tap water as it may contain chemicals and minerals that could harm the plant.
Step 4: Place the Orchid Branch in Water
- Carefully place the orchid branch into the water, ensuring that only the bottom part with the node is submerged. The rest of the branch should stay above the water line to avoid rot.
- Make sure the branch is supported and doesn’t tip over in the container.
Step 5: Provide Proper Lighting and Temperature
- Place the container in a bright, indirect sunlight location. Orchids require light to grow, but direct sunlight can scorch the leaves. A south or east-facing window is ideal.
- Keep the water at room temperature (about 65-75°F or 18-24°C). Avoid placing the container in areas with drafts or extreme temperature fluctuations.
Step 6: Change the Water Regularly
- To ensure the water stays clean and the plant remains healthy, change the water every few days. Rinse the jar thoroughly and refill with fresh distilled water.
- Optional: Add a few drops of liquid orchid fertilizer to the water to provide nutrients and encourage faster growth.
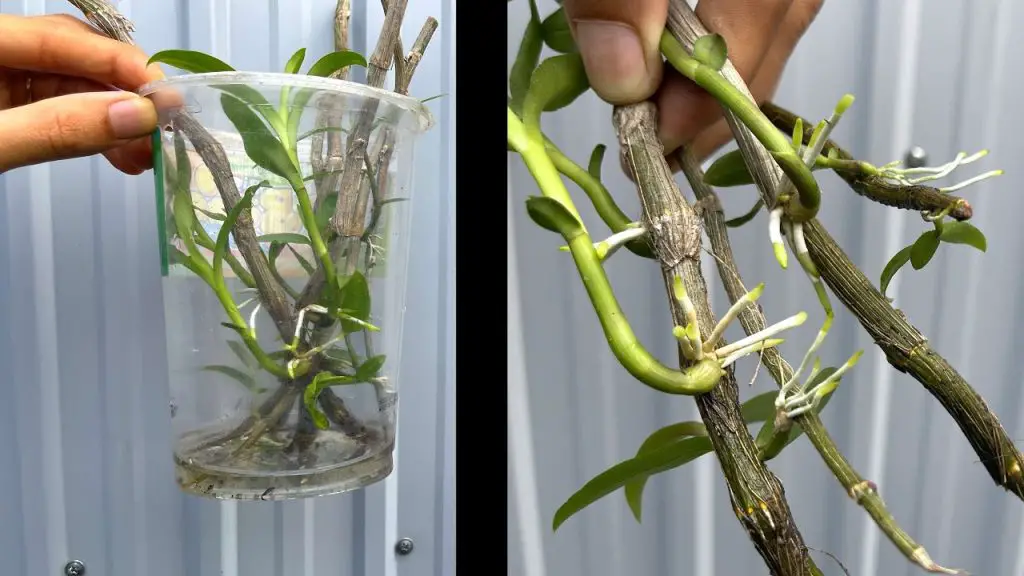
Step 7: Watch for Root Growth
- Over the next 2-6 weeks, you should see small roots start to form at the node. The roots will grow towards the water, and once they reach a length of around 2-3 inches, your orchid cutting will be ready for planting.
Transplanting the Orchid Cutting
Once your orchid cutting has developed enough roots, it’s time to transplant it into a pot with orchid potting mix. Follow these steps:
- Prepare the Pot: Choose a pot with drainage holes and fill it with orchid potting mix. The mix should be well-draining and airy to mimic the orchid’s natural growing conditions.
- Plant the Orchid Cutting: Gently place the rooted orchid cutting into the pot, ensuring the roots are well-distributed in the mix. Fill around the roots with more potting mix, but don’t bury the stem too deep.
- Water and Care: Water the newly potted orchid lightly, ensuring the mix is moist but not soggy. Keep the plant in a bright, indirect light location and provide the right temperature and humidity.
Benefits of Growing Orchids in Water
- Visible Root Growth: One of the biggest benefits of growing orchids in water is being able to see the roots developing clearly. This allows you to monitor the health of the cutting.
- Easier Maintenance: There’s less risk of overwatering or root rot when propagating orchids in water, as you can easily spot when the water level is low or needs to be changed.
- Great for Beginners: This method is easy to follow and requires minimal tools, making it perfect for anyone new to orchid propagation.
Conclusion
Growing orchids from old branches in water is an easy, fun, and cost-effective way to propagate these beautiful plants. By following the simple steps outlined above, you can create new orchids from your old plant cuttings and enjoy stunning blooms in the future. Whether you’re an experienced gardener or a beginner, this method is a fantastic way to expand your orchid collection while keeping your plants healthy and thriving.


