The garden croton (Codiaeum variegatum) is renowned for its vibrant and striking foliage, making it a favorite in many gardens and indoor spaces. While propagating croton plants typically involves using stem cuttings, you might be surprised to learn that it’s also possible to propagate crotons using just their leaves. Here’s how you can successfully root croton leaves and grow new plants from them.
Understanding Leaf Propagation
Leaf propagation involves using a leaf cutting to grow a new plant. This method can be particularly useful for plants like the garden croton, which have thick, sturdy leaves. While not all plants can be propagated this way, crotons are known to respond well to this technique.
Why Propagate Croton Leaves?
- Cost-Effective: Using leaves for propagation can be a more economical way to increase your plant collection.
- Simple Method: It’s a straightforward approach that doesn’t require complex tools or techniques.
- Healthy Plants: Propagating from healthy leaves ensures that the new plants will have the same vibrant colors and patterns as the parent plant.
How to Propagate Garden Croton with Leaves
- Select Healthy Leaves:
- Choose mature, healthy leaves from a well-established croton plant. Avoid leaves that are yellowed, damaged, or diseased.
- Prepare the Leaves:
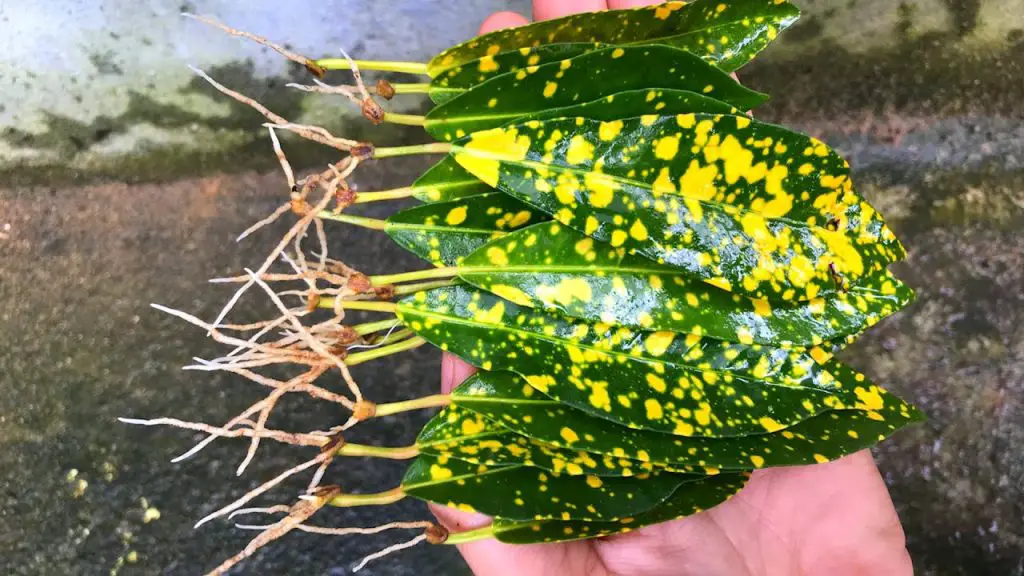
- Using a sterilized knife or scissors, cut the leaf from the stem, ensuring you have a clean, angled cut. For best results, include a small portion of the stem (petiole) attached to the leaf.
- Allow to Callus:
- Place the cut leaves in a dry, shaded area for about 24 hours. This allows the cut ends to form a callus, which helps prevent rot when placed in a rooting medium.
- Prepare the Propagation Medium:
- Use a well-draining rooting medium such as a mix of perlite, sand, and peat moss. Alternatively, you can use vermiculite or a commercial seed-starting mix.
- Moisten the medium slightly before planting the leaves.
- Plant the Leaves:
- Insert the cut end of each leaf into the propagation medium, burying it about 1-2 inches deep. Ensure that the leaf is upright and not overcrowded.
- Create a Humid Environment:
- Cover the propagation container with a plastic dome or clear plastic bag to maintain high humidity. This helps keep the leaves moist and encourages root formation.
- Place the container in a warm, indirect light location. Avoid direct sunlight, which can cause excessive heat and drying.
- Monitor and Water:
- Keep the soil consistently moist but not waterlogged. Check the medium regularly to ensure it doesn’t dry out.
- Remove the plastic cover periodically to allow for air circulation and prevent mold growth.
- Check for Roots:
- After 4-6 weeks, gently tug on the leaves to check for root development. Once the roots are well-established and visible, the new plants are ready to be transplanted.
- Transplanting:
- Carefully remove the rooted leaves from the propagation medium and transplant them into small pots with a regular potting mix.
- Continue to care for the new plants as you would for mature crotons, providing them with bright, indirect light and regular watering.
Additional Tips for Success
- Maintain Cleanliness: Use sterilized tools and clean containers to reduce the risk of disease.
- Provide Adequate Light: Ensure your croton plants receive bright, indirect light to encourage healthy growth and vibrant foliage.
- Avoid Overwatering: Ensure proper drainage to prevent root rot.
Propagating the garden croton plant with leaves is an effective and straightforward method to grow new, vibrant plants. By following these steps, you can successfully root croton leaves and expand your collection with minimal effort. Embrace this simple propagation technique and enjoy the beautiful, colorful foliage that crotons are known for. Whether you’re a seasoned gardener or a beginner, leaf propagation offers a rewarding way to grow and enjoy your croton plants.