Chrysanthemums, also known as mums, are beloved flowers that bring a burst of color to gardens in fall with their vibrant hues of yellow, orange, red, white, and even purple. They’re easy to propagate from cuttings, and one of the simplest methods is using water rooting in a recycled plastic bottle. This method not only provides an eco-friendly way to propagate your plants, but it’s also a fun and cost-effective way to multiply your chrysanthemums without needing a lot of space or gardening tools.
In this guide, we’ll show you how to propagate chrysanthemum cuttings using a plastic bottle filled with water to create a new generation of beautiful blooms for your garden.
1. Why Use Water for Chrysanthemum Cuttings?
Water propagation is an easy and low-maintenance method for rooting plant cuttings. It works especially well for chrysanthemums because they root quickly in water and don’t require soil until they’ve developed strong roots. Plus, using a plastic bottle as a container is a sustainable option, making it an eco-friendly way to grow more plants from a single mother plant.
2. Materials You’ll Need
Before you get started, gather the following materials:
- Chrysanthemum plant (a healthy, established plant to take cuttings from)
- Plastic bottle (a 2-liter soda bottle or similar size works well)
- Sharp scissors or pruning shears
- Water (room temperature)
- Rooting hormone (optional but can help speed up the rooting process)
- Clear tape or plastic wrap (optional, for covering the cutting if needed)
3. Steps to Propagate Chrysanthemums from Cuttings in Water
1. Choose a Healthy Chrysanthemum Plant
- Select a healthy, mature chrysanthemum plant that is free from pests or diseases. Look for a plant that has strong, healthy stems, as these will produce the best cuttings.
2. Prepare the Cutting
- Use sharp scissors or pruning shears to cut a 4-6 inch section from the tip of a healthy stem. Choose a stem that’s not too woody or too young. The cutting should be a non-flowering stem with several leaves attached.
- Remove the lower leaves from the cutting, leaving just a few at the top to minimize moisture loss. You want to expose about 2-3 inches of the stem to the water.
3. Optional: Apply Rooting Hormone
- If you have rooting hormone, dip the cut end of the stem into the hormone powder. This can help encourage faster root development, although chrysanthemums will often root without it. Shake off any excess powder.
4. Prepare the Plastic Bottle
- Take a recycled plastic bottle (a 2-liter soda bottle works great for this purpose) and cut off the top part. You want a bottle that’s at least 6-8 inches tall to give the cutting plenty of room to grow roots.
- Fill the bottle with room temperature water until it’s about 3-4 inches deep. Ensure that the water level is high enough to submerge the cut end of the chrysanthemum cutting without touching the leaves.
5. Place the Cutting in Water
- Place the prepared chrysanthemum cutting into the bottle of water, making sure the cut end is submerged but the leaves aren’t touching the water. This prevents the leaves from rotting in the water.
6. Create a Humid Environment (Optional)
- To increase the chances of successful rooting, you can cover the top of the plastic bottle with plastic wrap or a clear plastic bag to create a humid environment. This is especially helpful in dry conditions, as it helps retain moisture around the cutting.
7. Place the Bottle in a Bright Location
- Place the plastic bottle in a bright location with indirect sunlight. Avoid direct sunlight, as it can overheat the cutting or cause algae to form in the water. A windowsill with filtered light is ideal.
8. Change the Water Regularly
- To keep the cutting healthy, change the water every few days. This helps prevent the growth of mold or bacteria, which can harm the cutting.
- Ensure the water level remains consistent so that the cutting’s base is always submerged.
4. Monitoring Root Development
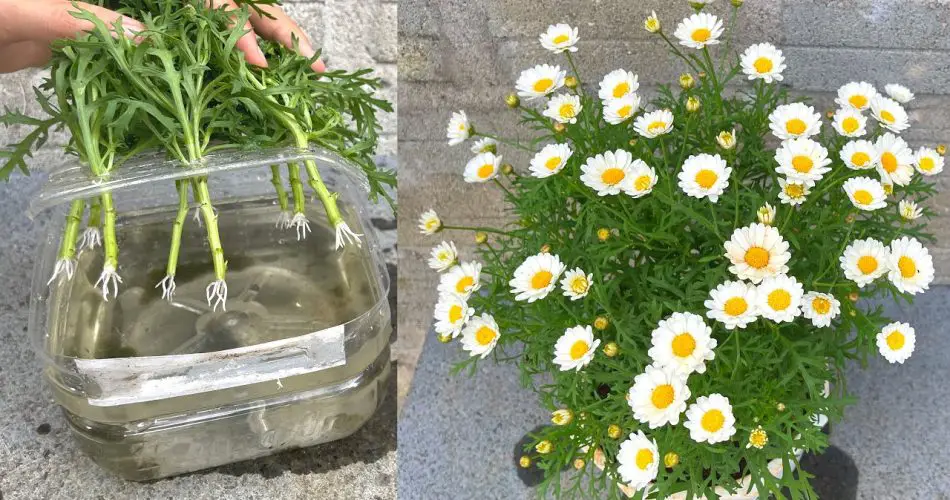
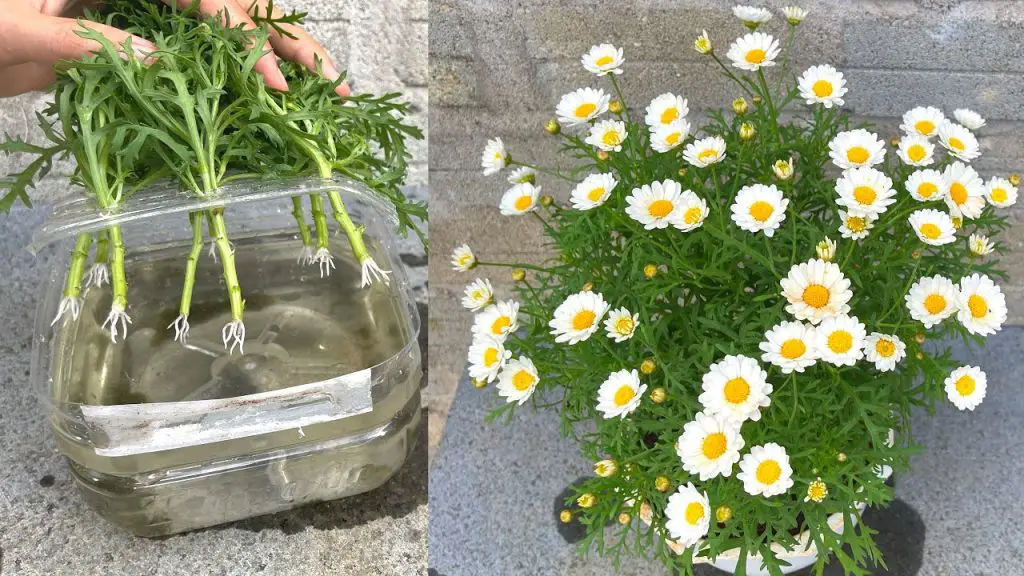
- Roots should begin to form within 1-3 weeks. You’ll start to see tiny white roots emerging from the base of the cutting. As the roots grow, continue to keep the cutting in water.
- After 2-3 weeks, you should have visible roots that are at least 1-2 inches long. At this point, your cutting is ready to be transplanted into soil.
5. Transplanting the Cutting
- Once your chrysanthemum cutting has developed a healthy root system, it’s time to transplant it into a pot with well-draining potting soil.
- Gently remove the cutting from the water, being careful not to damage the delicate roots.
- Plant the rooted cutting into a pot that is at least 4-6 inches deep, with a good-quality potting mix designed for flowers or general-purpose use.
- Water the soil gently and keep the plant in a bright location with indirect sunlight while it acclimates to its new growing environment.
6. Caring for Your New Chrysanthemum Plant
- After transplanting, your new chrysanthemum plant will need some time to settle in and continue growing.
- Water the plant regularly, keeping the soil moist but not soggy. Chrysanthemums do not like to sit in wet soil, so ensure the pot has proper drainage.
- Fertilize your new plant every 4-6 weeks with a balanced fertilizer to encourage healthy growth and vibrant blooms.
- Once the plant is established, you can either keep it in a pot or transplant it into your garden.
7. Troubleshooting and Tips
- No Roots After Several Weeks: If your cutting hasn’t developed roots after 3-4 weeks, it could be due to insufficient light, water quality, or the cutting was taken from a weaker stem. Try moving the bottle to a sunnier spot and change the water more frequently.
- Algae Growth: If you notice green algae growing in the water, it’s a sign that the bottle is exposed to too much direct sunlight. Move the bottle to a more shaded location, or use a piece of aluminum foil to cover the outside of the bottle, leaving the cutting inside in the light.
- Water Level: Always make sure the water level is high enough to cover the cut end of the stem. Top up the water if it evaporates.
8. Benefits of Using a Plastic Bottle for Chrysanthemum Cuttings
- Sustainability: Reusing plastic bottles helps reduce waste, making this method eco-friendly.
- Visibility: Since you’re rooting the cutting in clear water, you can easily monitor the development of roots and avoid disturbing the cutting too often.
- Low-Cost and Easy: This is a low-cost, simple method that doesn’t require special gardening tools or soil to get started.
9. In Summary:
Propagating chrysanthemums from cuttings in water using a plastic bottle is an easy, sustainable, and effective way to grow new plants. By following a few simple steps—taking healthy cuttings, rooting them in water, and transplanting them into soil once they’re established—you can grow vibrant new mums for your garden or indoor space without much hassle.
With patience and care, you’ll soon have a healthy, thriving chrysanthemum plant that will reward you with stunning fall blooms for years to come! 🌼🌸


