The ZZ plant (Zamioculcas zamiifolia) is a popular houseplant known for its toughness, low maintenance, and ability to thrive in a variety of conditions. It is especially admired for its glossy, dark green leaves and its resilience, making it an excellent choice for beginners or anyone looking for a plant that is easy to care for. One of the most rewarding aspects of owning a ZZ plant is its ability to propagate easily, allowing you to grow new plants from the original one. In this article, we will explain how to propagate a ZZ plant with water, step by step, so you can enjoy even more of these beautiful plants in your home.
Why Propagate the ZZ Plant?
The ZZ plant is not only a stunning addition to any space, but it is also very easy to propagate. By propagating your plant, you can create new plants to expand your collection, give them as gifts, or simply enjoy watching them grow from the same plant. Propagating the ZZ plant through water propagation is a straightforward process that requires minimal effort and materials.
How to Propagate ZZ Plant in Water
Propagating the ZZ plant in water is a simple method that allows you to see the development of the new roots, making it an ideal technique for beginners. Here is a step-by-step guide to help you propagate your ZZ plant successfully:
Materials Needed:
- A healthy ZZ plant (a stem or leaf cutting)
- A clean glass container or jar
- Water (filtered or tap water, but avoid using water with too many chemicals)
- A sharp, clean pair of scissors or pruning shears
- Optional: A small amount of liquid fertilizer (for feeding the new plant)
Step-by-Step Instructions for Water Propagation:
- Choose a Healthy Stem or Leaf Cutting: The first step in propagating your ZZ plant is to choose a healthy stem or leaf for cutting. You can use a leaf cutting or a stem with a node, which is the small bump or root that will eventually grow into a new plant. A healthy, mature leaf is the best choice because it has the highest chance of producing roots and growing into a strong plant.
- Make the Cut: Using your clean scissors or pruning shears, cut the stem or leaf just below the node. Be sure to cut at a 45-degree angle for the best rooting results. If you are using a leaf cutting, ensure you cut it near the base of the plant where the leaf attaches to the stem.
- Prepare the Cutting: After making the cut, allow the cut end of the cutting to dry out for 24-48 hours. This process helps to prevent rotting by allowing the cut surface to callus over, which will promote root development once the cutting is placed in water.
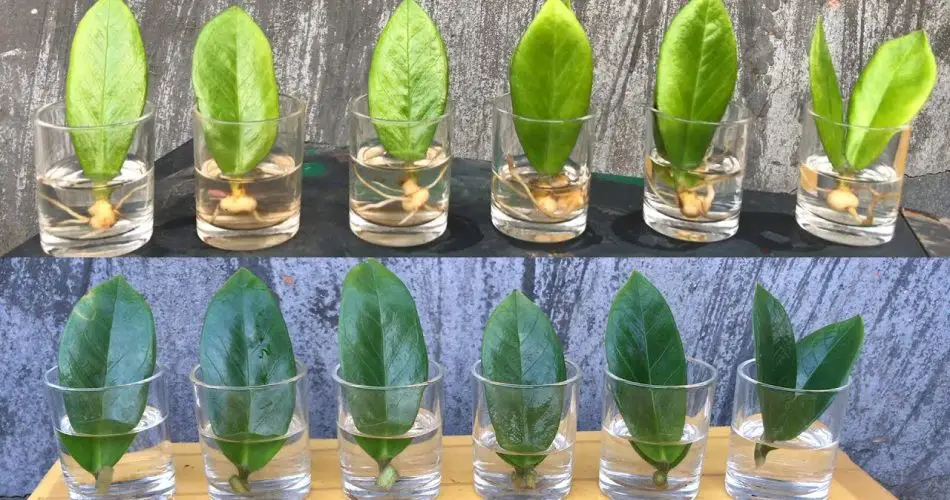
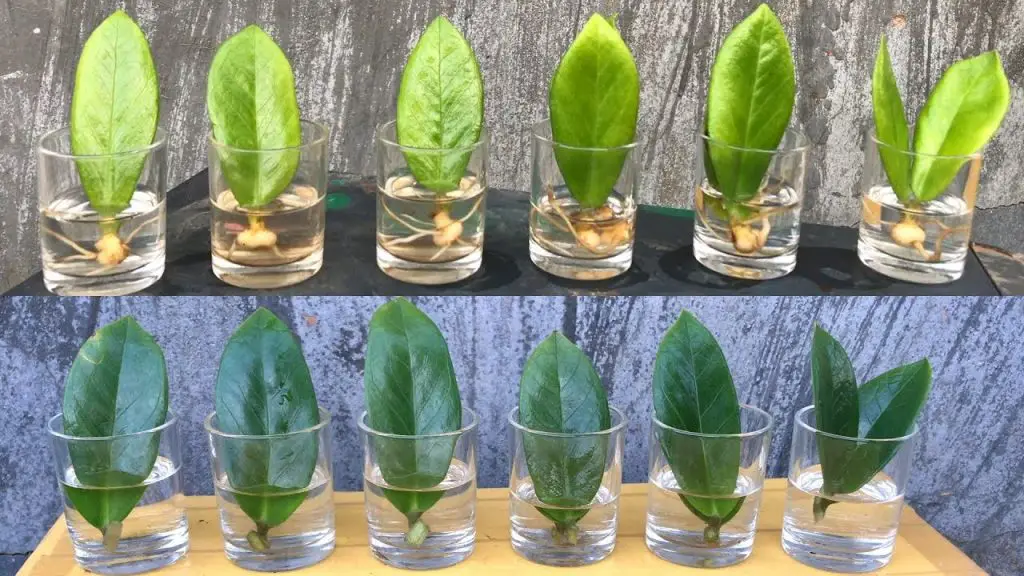
- Place the Cutting in Water: Fill a clean glass container or jar with water and place the cut end of the ZZ plant in the water. Make sure that the node (the small bump or area where roots will develop) is submerged in the water, but the leaf or stem itself is not fully submerged. You can use a small piece of tape or a rubber band to keep the cutting in place if needed.
- Change the Water Regularly: To ensure healthy root growth, it is important to change the water regularly, about every 3-5 days. This prevents the water from becoming stagnant and helps avoid any potential issues with rot. Be sure to use filtered or room-temperature water to encourage healthy root growth.
- Wait for Roots to Develop: Over time, you will begin to see roots developing from the node of the cutting. This can take anywhere from 2 to 6 weeks, depending on the conditions and the size of the cutting. During this period, make sure the cutting receives indirect sunlight and is kept in a warm location. Keep an eye on the cutting to make sure it doesn’t dry out or rot.
- Plant the New ZZ Plant: Once the cutting has developed a sufficient root system (typically around 2-3 inches of roots), it is time to plant your new ZZ plant in soil. Prepare a small pot with well-draining soil (a mix of potting soil and perlite or sand works well) and plant the cutting in the soil. Water it lightly to settle the roots in the new pot.
- Care for the New Plant: After planting your propagated ZZ plant in soil, continue to care for it as you would for any mature ZZ plant. Place it in a location with indirect light, and water it when the top inch of soil feels dry. Be sure to avoid overwatering, as the ZZ plant is highly drought-tolerant.
Benefits of Propagating ZZ Plant in Water
- Easy to Monitor: With water propagation, you can clearly see the roots developing, which is satisfying and provides peace of mind that your cutting is progressing.
- Minimal Equipment: All you need is a clean jar of water, scissors, and a healthy cutting, making this one of the most cost-effective and simple methods of propagation.
- Faster Root Development: Water propagation often results in faster root growth compared to soil propagation, as the cutting is submerged in water where it can absorb moisture directly.
Tips for Success
- Avoid Direct Sunlight: While propagating in water, avoid placing the jar in direct sunlight. Indirect sunlight is ideal for encouraging root growth without the risk of overheating or drying out the cutting.
- Use Clean Containers: Make sure the jar or glass container you use is thoroughly clean to prevent contamination and the growth of bacteria or fungi.
- Be Patient: Root development can take time. If you don’t see roots immediately, don’t worry. Just continue changing the water and waiting for the roots to appear.
Conclusion
Propagating the ZZ plant (Zamioculcas zamiifolia) in water is an incredibly simple and effective method to expand your collection or share this beautiful plant with others. By following these easy steps, you can successfully propagate your ZZ plant, giving it a new lease on life and creating a healthy, thriving new plant. With minimal effort and the right care, you can enjoy the satisfaction of watching your ZZ plant grow strong roots and flourish in your home.


