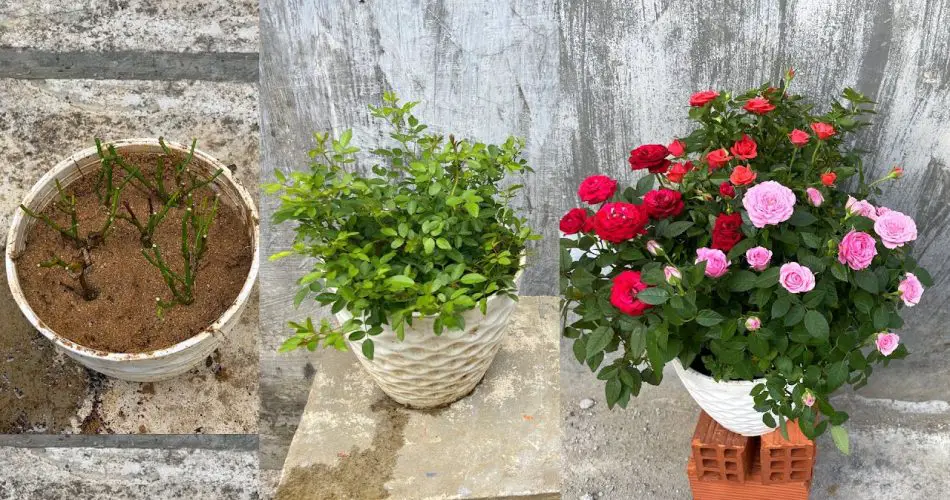
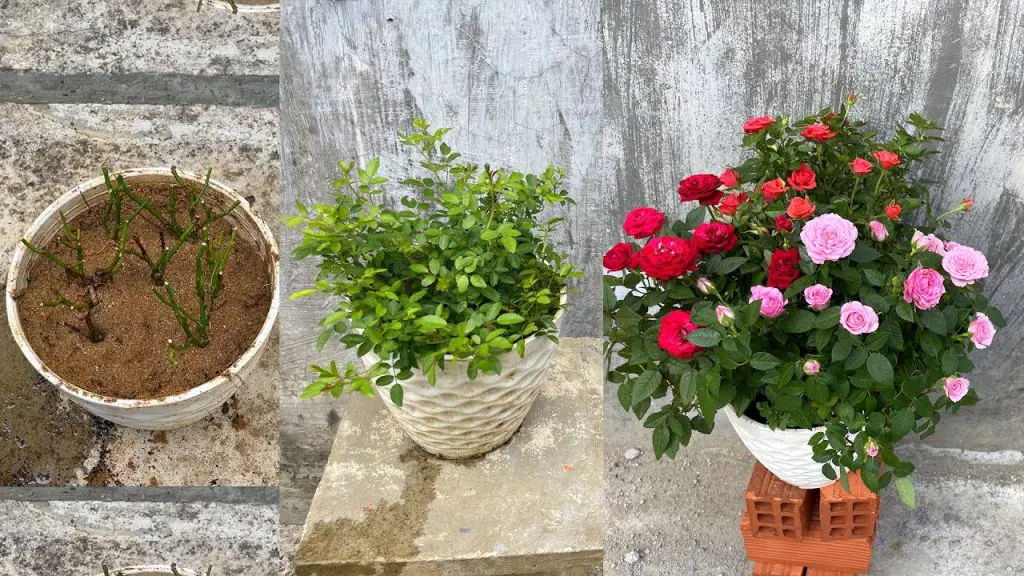
Roses are known for their elegance and beauty, but sometimes they can be left neglected in abandoned pots, losing their vibrancy and health. If you’ve come across roses that have been abandoned or left in poorly maintained pots, don’t worry—reviving them is possible with the right care. Changing the pot can give your roses a fresh start and help them thrive once again. Here’s how to properly take care of abandoned rose pots and successfully change the pots for a healthier, happier plant.
Why Changing Pots is Essential for Abandoned Roses
Roses can suffer when they’re left in overcrowded, old, or poorly-draining pots. Over time, their roots may become restricted or suffocated, and the soil can lose its nutrients, causing the plant to weaken. Changing pots is a simple yet highly effective way to provide your roses with fresh soil, more room to grow, and better drainage. Here’s how to approach it:
- Check the Condition of the Pot and Rose: Before you change the pot, assess the condition of the rose. If the plant has wilted leaves, discolored stems, or seems to be root-bound, these are signs that it’s time for a new pot. A rose that has been sitting in an abandoned pot may have stunted growth due to lack of proper nutrients or water.
- Choose the Right New Pot: When selecting a new pot, make sure it’s about 2 inches larger in diameter than the current one. This will give the rose enough space to grow without overwhelming the root system. Ensure the pot has good drainage holes to prevent water from accumulating at the bottom, which can lead to root rot.
- Use Fresh, Well-Draining Soil: For the best results, use fresh, high-quality potting soil that’s specifically designed for roses or other flowering plants. Look for a mix that includes organic matter like compost or peat moss for improved moisture retention and drainage. The fresh soil will provide the nutrients the rose needs to thrive in its new home.
How to Change Pots for Roses
Now that you’ve selected the right pot and soil, it’s time to carefully change the pot for your rose. Follow these steps for a successful transplant:
- Prepare the New Pot: Before removing the rose from its old pot, add a small layer of soil to the bottom of the new pot. This will give the roots something to settle into once the rose is placed inside.
- Gently Remove the Rose from Its Old Pot: Carefully tilt the old pot to one side and gently slide the rose out, supporting the base of the plant. If the roots are stuck to the sides of the pot, you may need to tap the sides or use a knife to loosen the soil around the edges. Be careful not to damage the roots.
- Examine the Roots: Once the rose is out of the pot, check the roots for any signs of rot or damage. Trim away any blackened or mushy roots with clean pruning shears. If the plant is root-bound (with roots circling around the base), gently tease the roots apart to encourage them to grow outward.
- Place the Rose in the New Pot: Position the rose in the center of the new pot, ensuring the roots are spread out evenly. The top of the root ball should be about an inch below the rim of the pot to allow for proper watering.
- Fill with Fresh Soil: Add fresh soil around the roots, gently pressing it down to remove air pockets. Make sure the rose is stable and centered in the pot. Leave a small gap between the top of the soil and the rim of the pot for watering.
- Water Thoroughly: After planting, water the rose generously to help settle the soil and establish the roots in their new environment. Ensure the excess water drains out of the bottom of the pot.
- Place in an Ideal Location: Find a spot for the newly potted rose that gets plenty of sunlight, ideally 6 hours a day. Roses need full sun to thrive, so this is crucial for their recovery.
Caring for Your Revived Rose
After changing the pot, your rose will need some extra attention to help it adjust and start growing again:
- Water Regularly: Roses in pots tend to dry out faster than those in the ground, so it’s important to water them consistently. Check the soil every few days, and water when the top inch feels dry. Be careful not to overwater, as this can cause root rot.
- Fertilize for New Growth: After the transplant, your rose will benefit from a dose of balanced fertilizer to encourage new growth. Choose a fertilizer designed for roses and follow the instructions on the package. Feed your rose every 4-6 weeks during the growing season.
- Monitor for Pests and Diseases: Keep an eye out for common pests like aphids or spider mites, and treat them promptly if they appear. You should also look out for disease signs, such as black spots on leaves or powdery mildew. Regularly inspect the plant and remove any affected leaves.
- Prune as Needed: If there are any dead or damaged stems, prune them away to encourage healthier growth. Also, consider deadheading spent flowers to promote new blooms.
Conclusion
Reviving abandoned rose pots by changing pots is a simple yet powerful way to give your roses a second chance at thriving. By selecting the right pot, using fresh soil, and providing the proper care, you can help your roses regain their health and continue to flourish. With a little attention and love, your roses will bloom beautifully once again!


