
Growing roses from cuttings is one of the most rewarding and economical ways to propagate these beautiful plants. Instead of purchasing new plants, you can grow roses from branches you already have. Whether you’re a beginner or an experienced gardener, this method is surprisingly simple and highly effective. In this guide, we’ll walk you through the process of planting rose branches to create new rose bushes with healthy roots.
Why Grow Roses from Branches?
There are several reasons why growing roses from cuttings is a great idea:
- Cost-effective: You can propagate roses for free, without having to buy new plants.
- Preserve special varieties: If you have a favorite rose bush, taking cuttings ensures you can grow clones of it.
- Fast results: Rooting rose cuttings can happen quickly, and you’ll often have new plants in just a few weeks.
- Enjoy more roses: Planting more roses means more blooms for your garden, and the process is surprisingly easy!
What You’ll Need to Grow Roses from Branches
Before you begin, gather the following tools and materials:
- Healthy rose branches (cuttings) from a mature rose plant
- Sharp pruning shears or scissors
- Rooting hormone (optional, but helpful for faster rooting)
- Small pots or containers with drainage holes
- Well-draining potting soil or a soil-less rooting medium (like perlite and peat)
- Plastic bags or plastic wrap for creating humidity
- Water (for soaking the cuttings)
- A sunny spot or indoor space with bright indirect light
Step-by-Step Guide to Growing Roses from Branches
Follow these simple steps to successfully propagate roses from cuttings:
Step 1: Take the Cuttings
- Choose a healthy, mature rose from your garden or from a friend’s garden. Look for a branch that is about 6-8 inches long, preferably from a young, non-flowering stem. This part of the branch is best for rooting.
- Use a sharp, clean pair of scissors or pruning shears to make a clean cut just below a node (the part of the stem where leaves are attached).
- Remove the leaves from the lower half of the cutting, leaving just a few leaves at the top.
Step 2: Optional – Dip the Cutting in Rooting Hormone
- To encourage faster root development, you can dip the cut end of the rose cutting into rooting hormone. This is an optional step, but it can increase your chances of success, especially with tougher rose varieties.
Step 3: Prepare the Planting Medium
- Prepare small pots or containers filled with well-draining potting soil. You can use a mix of perlite and peat for an even lighter medium that promotes quick root growth.
- Water the soil before planting the cuttings to ensure it’s moist but not waterlogged.
Step 4: Insert the Cuttings into the Soil
- Create a small hole in the soil with a stick or your finger, and insert the cut end of the rose cutting about 2-3 inches deep into the soil.
- Gently firm the soil around the cutting to ensure it stays in place.
Step 5: Create a Humid Environment
- To help the cutting develop roots, you need to maintain high humidity around it. One easy way to do this is to cover the pot with a plastic bag or plastic wrap. This will trap moisture and create a mini greenhouse effect.
- Ensure that the plastic is not touching the cutting directly, and allow for some ventilation to prevent mold growth.
Step 6: Place the Cutting in a Bright Spot
- Place your pot in a bright, warm area with indirect sunlight. Too much direct sunlight can scorch the cutting, so aim for a spot with filtered light or light shade.
- Keep the temperature around 65-75°F (18-24°C) for optimal growth.
Step 7: Water Regularly
- Keep the soil moist but not soggy. Water the cutting whenever the soil feels dry, but make sure it doesn’t stay waterlogged, as this can cause the cutting to rot.
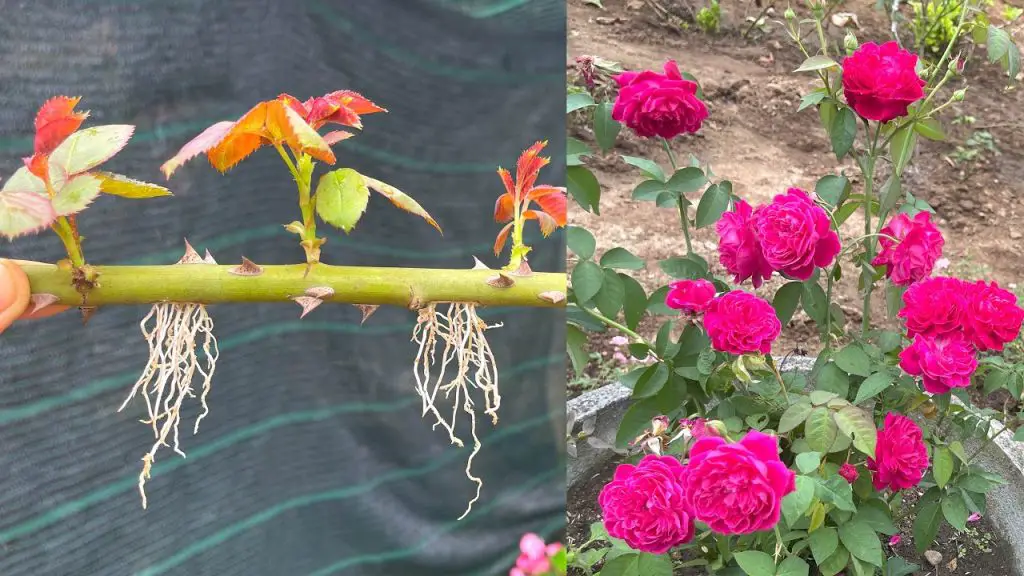
Step 8: Wait for Roots to Develop
- Within about 2-4 weeks, you should start to see roots developing. You can gently tug on the cutting to feel if it has rooted. If you feel resistance, that means it has developed roots.
- If you don’t see any roots after a few weeks, it might help to trim the cutting and try again.
Step 9: Transplant the New Rose Plant
- Once the cutting has established roots that are about 2 inches long, it’s time to transplant it into a larger pot or directly into the ground.
- Harden off the new plant by gradually exposing it to outdoor conditions for a few hours each day for about a week before planting it outside permanently.
Tips for Success When Planting Rose Branches
- Choose the right time: The best time to take rose cuttings is during the late summer or early fall, when the plant is actively growing.
- Use healthy plants: Make sure the parent rose plant is healthy and free from diseases to ensure strong, vigorous cuttings.
- Avoid direct sun: Newly rooted rose cuttings are sensitive to direct sunlight. Keep them in a location with indirect light.
- Use clean tools: Sterilize your scissors or pruning shears to avoid spreading disease or bacteria.
Why Planting Roses from Branches Works So Well
- Easier than you think: Growing roses from branches is an easy, accessible way for anyone to propagate their favorite varieties. It doesn’t require special equipment or difficult techniques.
- Success rate: With the right care, many rose varieties will root easily from cuttings, and you’ll have new plants ready to be transplanted in no time.
- Free roses: Once you master this technique, you’ll never need to buy rose bushes again. You can grow as many as you like from your existing plants.
Common Mistakes to Avoid When Planting Rose Branches
- Too much water: Overwatering is a common mistake that leads to rot. Make sure the soil is just slightly moist, not soggy.
- Not enough humidity: Roses need high humidity to root properly. Using plastic to cover the cutting will help maintain moisture.
- Too much sun: Direct sunlight can be harmful to newly rooted cuttings. Keep them in a bright, shaded area.
Conclusion
Planting rose branches and growing new roses from cuttings is an incredibly simple and rewarding process. By following these steps and tips, you can propagate healthy, vibrant roses at home, saving money and enjoying the beauty of fresh blooms year after year. Whether you want to expand your rose garden or preserve a beloved variety, growing roses from cuttings is a great solution. Start today and watch your garden flourish with new rose plants!


