Propagating roses by cuttings is a tried-and-true method for expanding your rose garden. Whether you’re looking to grow more of your favorite varieties or start a new collection, propagating roses by cuttings is both practical and rewarding. Here are 2 effective methods for rose propagation, including the innovative technique of planting roses in the sand. Discover the steps and results of each approach to help you cultivate beautiful new roses.
1. Traditional Rose Cutting Method
The traditional method of propagating roses by cuttings involves a few straightforward steps that have been used for generations:
- Select the Right Time: The best time to take rose cuttings is during the late summer or early fall, when the stems are mature but still soft enough to root.
- Choose Healthy Cuttings: Look for healthy, disease-free stems on a mature rose bush. Cuttings should be about 6 to 8 inches long with at least 3-4 nodes. Make the cut just below a node using a sharp, sterilized knife.
- Prepare the Cuttings:
- Remove Lower Leaves: Trim off the lower leaves and any flowers or buds to reduce moisture loss.
- Dip in Rooting Hormone: For faster rooting, dip the cut end in rooting hormone powder.
- Plant the Cuttings:
- Use a Well-Draining Medium: Plant the cuttings in a potting mix that is a blend of perlite, peat moss, and sand.
- Water and Cover: Water the cuttings thoroughly and cover them with a plastic bag or cloche to maintain humidity.
- Care and Transplant:
- Light: Place the cuttings in a bright, indirect light.
- Water: Keep the soil moist but not soggy.
- Transplant: After 4-6 weeks, check for root development. Once roots are established, transplant the new roses into larger pots or directly into your garden.
Results: This method typically yields strong, healthy roses that closely resemble the parent plant. It’s a reliable technique but may require patience and consistent care.
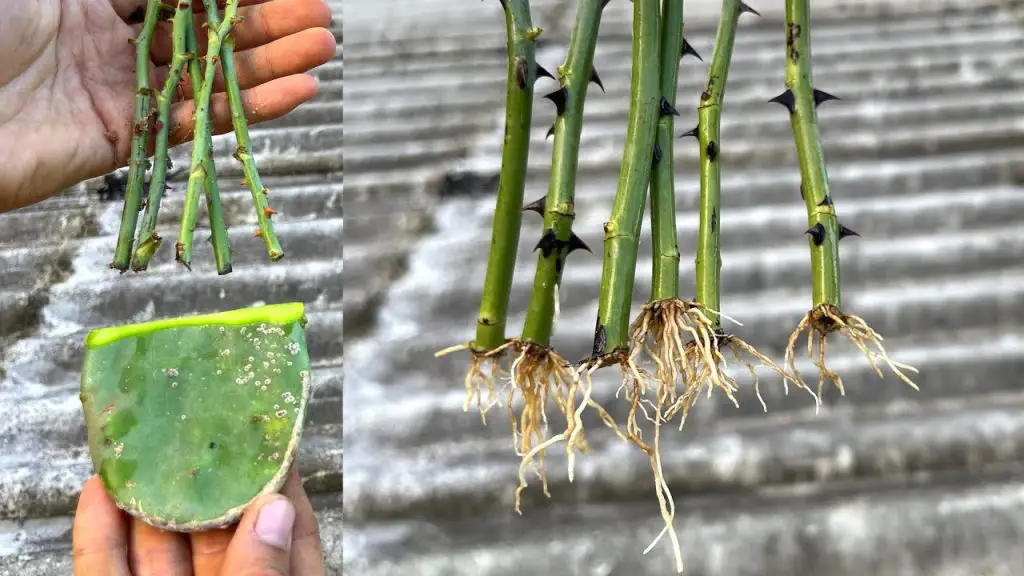
2. Planting Roses in the Sand
Planting roses in the sand is a less conventional method but can be highly effective. Sand offers excellent drainage and helps prevent root rot, making it an ideal medium for root development. Here’s how to use this method:
- Prepare the Sand Bed: Choose a fine, clean sand and ensure it is well-draining. You can use a mixture of sand with a small amount of potting soil to improve nutrient content.
- Take and Prepare Cuttings:
- Select Healthy Stems: As with the traditional method, choose 6 to 8-inch cuttings with at least 3 nodes. Ensure the stems are healthy and free from disease.
- Dip in Rooting Hormone: Dip the cut end of each cutting in rooting hormone powder.
- Plant the Cuttings:
- Insert into Sand: Stick the cuttings into the sand, ensuring that the nodes are buried. Space the cuttings about 2-3 inches apart.
- Water and Cover: Water the sand lightly to moisten it. Cover the cuttings with a clear plastic dome or plastic wrap to create a humid environment.
- Care and Transplant:
- Light: Place the cuttings in bright, indirect light.
- Water: Maintain light moisture without waterlogging the sand.
- Transplant: After 6-8 weeks, check for root growth. Once roots are established, transfer the cuttings to pots or directly into the garden.
Results: Roses propagated in sand often develop vigorous root systems due to the excellent drainage and minimal risk of rot. This method is particularly useful in climates with high humidity or where drainage is a concern.
Both methods of propagating roses by cuttings—traditional and planting in sand—offer effective ways to grow new roses. The traditional method is well-established and reliable, while planting roses in the sand provides excellent drainage and root health. By choosing the method that best suits your conditions and following these steps, you can enjoy a thriving rose garden with beautiful, healthy blooms all year round. Happy gardening!