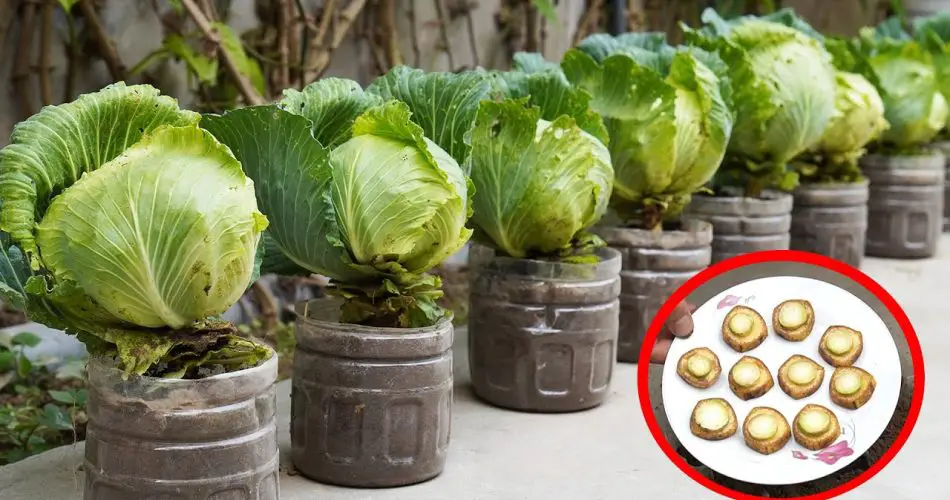
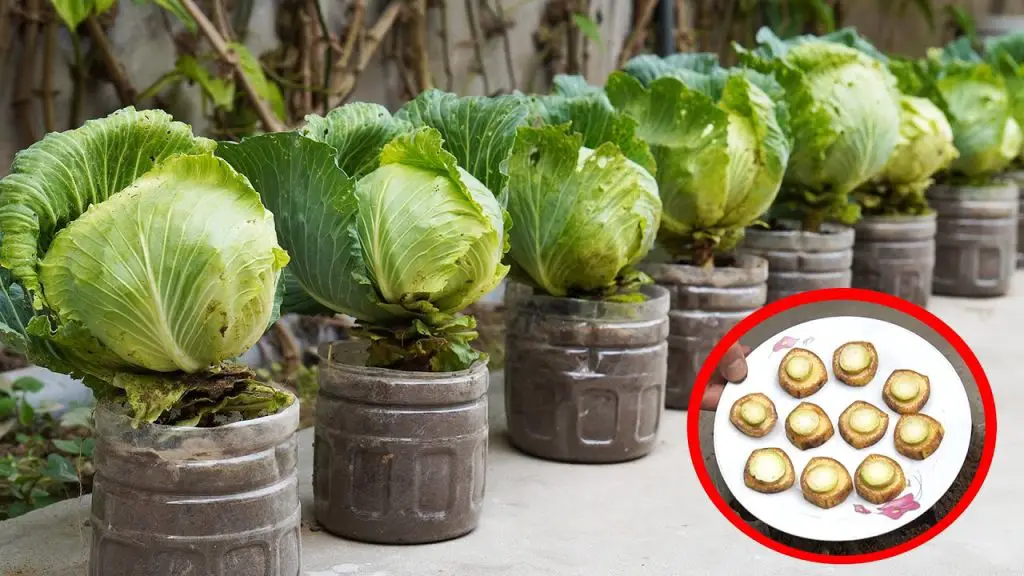
Growing your own vegetables at home has become an increasingly popular and rewarding activity. But what if you don’t have a lot of space for a garden? Or perhaps you’re looking for an innovative, eco-friendly way to grow nutritious vegetables? The answer might be simpler than you think! Growing cabbage in plastic bottles is a transformative gardening method that allows you to grow healthy cabbage in a small space while also recycling plastic bottles. This method not only saves space but also provides an easy way to enjoy fresh, homegrown cabbage year-round.
🌿 Why Grow Cabbage in Plastic Bottles?
Growing cabbage in plastic bottles offers a variety of benefits:
✔ Space-efficient – Perfect for apartments, balconies, or patios.
✔ Cost-effective – Recycles plastic bottles and uses minimal resources.
✔ Sustainable – Reduces waste while providing fresh produce.
✔ Easy to manage – Suitable for beginner gardeners with limited space.
✔ High yields – With the right care, you can harvest a substantial amount of cabbage.
🛠️ Materials Needed for Growing Cabbage in Plastic Bottles
Before you get started, here’s what you’ll need to create your plastic bottle cabbage garden:
1️⃣ Plastic bottles – 2-liter soda bottles work well.
2️⃣ Sharp scissors or knife – To cut the bottles.
3️⃣ Potting soil – Choose a high-quality soil mix for best results.
4️⃣ Cabbage seeds or seedlings – You can choose from various cabbage varieties like green cabbage, red cabbage, or savoy cabbage.
5️⃣ Watering can or spray bottle – To keep the soil moist.
6️⃣ Drill or nail – To make drainage holes in the bottles.
🌱 Step-by-Step Guide to Growing Cabbage in Plastic Bottles
Follow these easy steps to transform your plastic bottles into a thriving cabbage garden:
1. Prepare the Plastic Bottles
Take your plastic bottles and cut them in half or leave them intact with a hole in the bottom for drainage. Drilling small holes or cutting the bottom of the bottle ensures proper water drainage, preventing root rot. You can also cut a slit along the side for easier access to the cabbage as it grows.
2. Add Soil
Fill the bottom half of the plastic bottle with potting soil, leaving about an inch from the top. The soil should be light, well-draining, and rich in nutrients. Add some compost to enrich the soil for better growth.
3. Plant the Cabbage Seedlings
You can either plant cabbage seeds directly into the soil or use young seedlings for quicker results. Space the seedlings about 6-8 inches apart, depending on the size of the bottle and the cabbage variety. If you’re starting from seeds, gently press the seeds into the soil, and cover them with a thin layer of soil.
4. Water Regularly
Water the cabbage regularly using a watering can or a spray bottle. Be sure the soil stays moist but not soaked. Cabbages prefer evenly moist soil, and over-watering can lead to issues like mold or root rot.
5. Place in a Sunny Spot
Cabbage requires full sunlight to thrive. Ensure that your plastic bottle planters are placed in a sunny spot where they will get at least 6 hours of sunlight per day. You can place them on a windowsill, balcony, or any outdoor space that receives ample sunlight.
🌿 Care and Maintenance for Growing Cabbage in Plastic Bottles
While cabbage is a relatively low-maintenance vegetable, it still requires a little attention. Here’s how to keep your cabbage plants healthy and productive:
1. Monitor Growth
As your cabbage grows, remove any yellow or damaged leaves to encourage healthy new growth. Check for any signs of pests such as aphids, caterpillars, or slugs. You can remove pests manually or use natural pest control methods like neem oil or diatomaceous earth.
2. Fertilize Regularly
Cabbage benefits from regular feeding. Every few weeks, apply a balanced fertilizer or organic compost to keep the soil rich in nutrients. Ensure the soil remains slightly acidic with a pH between 6.0 and 7.0 for optimal cabbage growth.
3. Ensure Proper Spacing
Even in a small space, make sure each cabbage plant has enough room to grow. If you see overcrowding in the plastic bottles, consider thinning out the plants or transplanting them into bigger containers.
4. Harvesting
Once your cabbage reaches a mature size, it’s time to harvest! The head should feel firm when pressed. To harvest, simply cut the cabbage at the base, leaving a few outer leaves for continued growth if needed.
🌿 Tips for Maximizing Your Cabbage Harvest
✔ Rotate crops – Growing different plants in the same bottles year-round can help avoid soil depletion.
✔ Mulch the soil – Applying a layer of mulch around your cabbage can help retain moisture and keep the roots cool.
✔ Plant in batches – For a continuous harvest, plant cabbage every few weeks in different bottles.
🍅 Final Thoughts
Growing cabbage in plastic bottles is an innovative and space-saving method that not only recycles waste but also provides you with fresh, homegrown cabbage all year long. Whether you’re an urban gardener or a beginner, this cost-effective and high-yield method is a fantastic way to grow nutritious vegetables at home. By following these simple steps and offering a little care, you can easily turn your plastic bottles into productive mini-gardens, providing your family with delicious, homegrown cabbage without the need for a traditional garden.
So, why not give it a try and transform your garden (or balcony) into a thriving cabbage paradise today? 🌿💚


