Propagating roses from cuttings is a rewarding and cost-effective way to grow new plants, and with a little creativity, you can even use a recycled milk box as your propagation container! This eco-friendly method not only gives your rose branches a new life but also helps reduce waste. By following the right steps, you can successfully grow healthy rose plants from cuttings in a recycled milk box. Let’s explore how to propagate rose branches and turn your milk box into a mini greenhouse.
1. Why Propagate Roses from Branches?
Propagating roses from branches is a great way to clone your favorite rose plants. Unlike starting from seeds, cuttings allow you to replicate a rose with the same color, fragrance, and characteristics as the parent plant. There are several benefits to propagating roses from cuttings:
- Cost-Effective: Rather than purchasing new rose plants, you can grow them for free from your existing plants.
- Maintain Rose Variety: You can propagate specific rose varieties you love, ensuring the new plants have the same traits.
- Fun and Rewarding: Watching your rose cutting grow into a full-fledged plant is a fulfilling gardening experience.
2. Gathering Rose Branches for Propagation
The first step to propagating roses by branch is selecting the right rose cuttings. Here’s how to choose and prepare them:
1. Choose Healthy Rose Stems
- Select a healthy, non-flowering stem from your rose bush. Ideally, you want a stem that is 6 to 8 inches long, taken from a mature part of the plant, but not too old.
- Make sure the stem has several leaf nodes, as this is where roots will form.
2. Cut the Stem
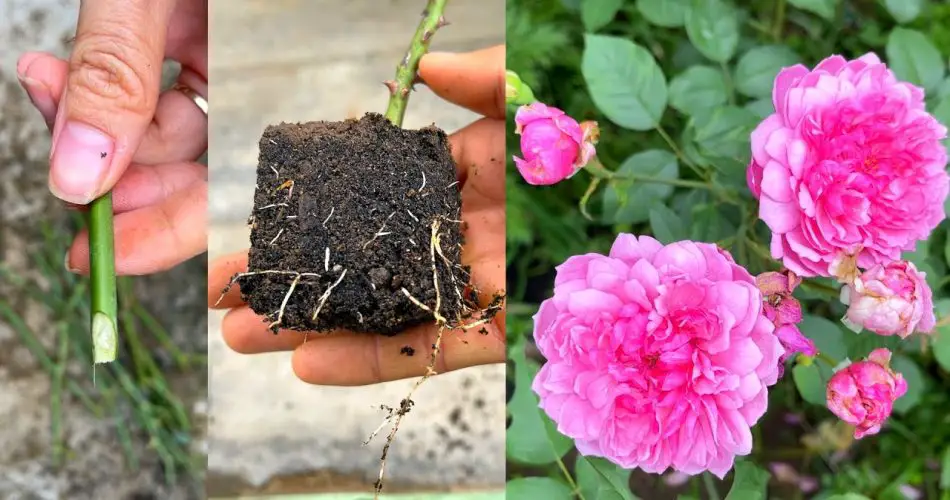
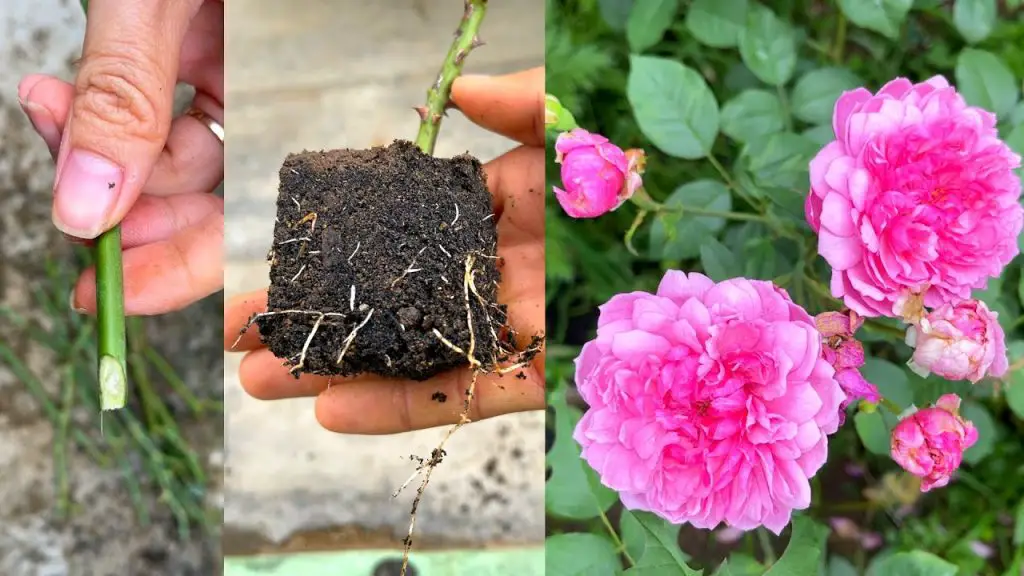
- Use a sharp, sterilized knife or pruning shears to make a clean cut just below a leaf node (the small bump where leaves emerge). This will give the cutting the best chance to develop roots.
- Remove any leaves or flowers from the lower half of the cutting to ensure the energy goes into root development rather than sustaining leaves.
3. Optional: Use Rooting Hormone
While not always necessary, dipping the base of the rose cutting into rooting hormone can help promote faster root growth. The hormone encourages the cutting to form roots at the site where it was snipped.
3. Setting Up the Recycled Milk Box for Propagation
Now that you have your rose cuttings ready, it’s time to create an ideal environment for rooting using your recycled milk box. Here’s how to set it up:
1. Prepare the Milk Box
- Clean the box thoroughly to remove any remnants of milk and prevent bacterial growth. You can rinse it with warm, soapy water and let it dry completely.
- Make drainage holes at the bottom of the milk box. Drill small holes or use a knife to create several drainage holes to allow excess water to escape, preventing the cuttings from rotting.
2. Add Potting Mix
- Fill the milk box with a well-draining potting mix. A mix designed for seed starting or succulent soil works well, as it retains enough moisture without becoming waterlogged. You can also mix in some sand or perlite to improve drainage.
- Moisten the soil lightly, but don’t make it soggy. The cutting needs a consistently moist environment to root, but excess water can lead to rot.
3. Insert the Rose Cuttings
- Insert the base of each rose cutting into the potting mix, burying about 2 inches of the stem. Ensure that at least one leaf node is buried in the soil, as this is where the roots will grow.
- Space the cuttings a few inches apart to allow for air circulation and prevent them from overcrowding as they grow.
4. Create a Humid Environment
- One of the keys to successful rose propagation is maintaining high humidity around the cuttings. You can create a mini greenhouse by covering the milk box with a clear plastic bag, plastic wrap, or placing a clear plastic lid (if the milk box has one).
- Make sure the covering does not touch the cuttings directly. If needed, you can place small sticks or wooden skewers to elevate the plastic above the cuttings.
5. Place the Box in a Warm, Bright Spot
- Place the milk box in a location that gets bright, indirect light. Avoid direct sunlight, as this can overheat the cuttings and dry them out.
- Maintain a consistent temperature around 65-75°F (18-24°C). If the room is too cold, you can use a seed heat mat to help keep the soil warm, which will encourage faster rooting.
4. Caring for Rose Cuttings in the Milk Box
Once the cuttings are set up, proper care is essential for successful propagation:
1. Watering
- Keep the soil moist but not soggy. Check the moisture level by sticking your finger into the soil. If it feels dry, water the cuttings lightly. Mist the cuttings every few days to maintain humidity.
- Be careful not to overwater, as standing water can cause the cuttings to rot.
2. Ventilation
- While maintaining humidity is important, too much moisture can lead to mold. Ventilate the box by opening the plastic cover for a few minutes each day to allow fresh air circulation.
- If you notice condensation inside the plastic, it’s a sign that the humidity is high enough.
3. Checking for Roots
- After 3 to 6 weeks, your rose cuttings should begin to root. Gently tug on the cuttings to see if there’s resistance. If you feel resistance, this is a sign that roots are forming.
- You can also check for new growth or green buds appearing on the cutting, which indicates that the plant is starting to thrive.
5. Transplanting the Rose Cuttings
Once the rose cuttings have established a good root system (usually after about 6-8 weeks), it’s time to transplant them into individual pots or directly into your garden.
1. Transplant to Larger Pots
- If you’re growing the roses in pots, carefully lift each rooted cutting and plant it in a larger container with fresh potting mix. Make sure the new pot has drainage holes to avoid waterlogging.
- Continue to water the plants regularly, ensuring they don’t dry out.
2. Plant in the Garden
- Once the roots are well-established and the plants have grown large enough to handle, you can transplant them into your garden. Choose a spot with full sun and well-draining soil.
- Dig a hole large enough to accommodate the roots, place the rose cutting in the hole, and cover with soil.
6. Troubleshooting Common Issues
Sometimes, things don’t go as planned, and you may encounter some challenges during the propagation process. Here are a few common issues and solutions:
- Wilting or Yellowing Leaves: This could be due to excessive watering or poor drainage. Make sure the soil is not too wet and check for drainage holes in the milk box.
- No Root Growth: If roots aren’t forming, the cuttings might not be receiving enough heat or humidity. Try increasing the temperature or misting the cuttings more frequently.
- Rotting Cuttings: If you notice signs of rot, such as a soft, mushy base or a foul smell, the cutting may be too wet or in a spot with poor air circulation. Remove any rotten cuttings and ensure proper care for the remaining ones.
7. In Summary:
Growing roses by branches in a recycled milk box is a simple, sustainable, and rewarding way to propagate your favorite roses. By selecting healthy cuttings, preparing the right environment, and providing consistent care, you can successfully grow new rose plants that you can enjoy in your garden for years to come. Plus, using a milk box as your propagation container helps reduce waste and gives your garden a more eco-friendly twist. Happy gardening!


