
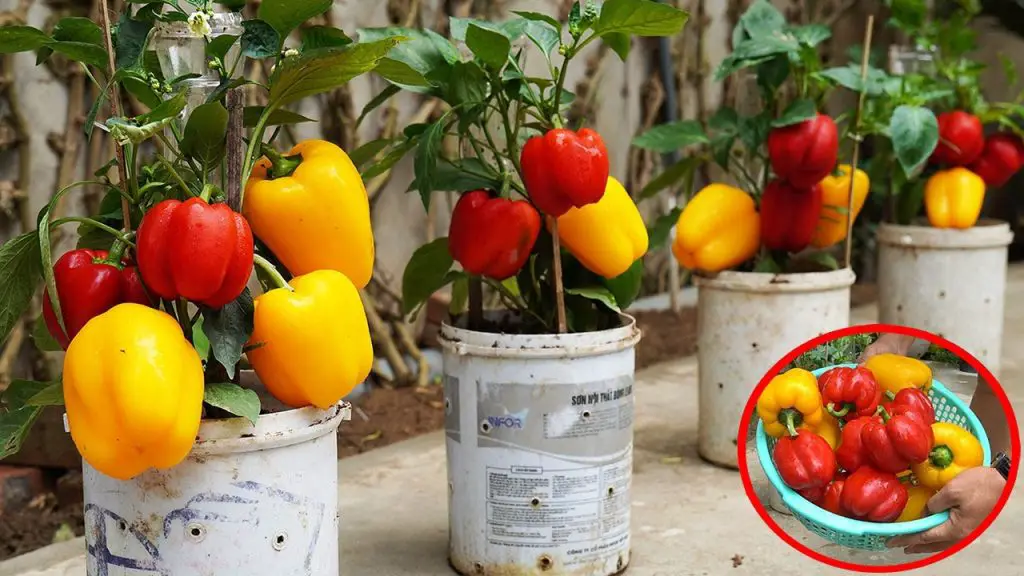
If you love fresh, homegrown vegetables, then colorful bell peppers are a fantastic choice! These vibrant, nutrient-packed peppers are easy to grow in plastic containers, making them perfect for small spaces, balconies, and patios. With the right techniques, you can achieve a high yield of delicious, juicy peppers in a cost-effective and space-saving way.
🌱 Why Grow Bell Peppers in Plastic Containers?
✔ Saves Space – Ideal for urban gardens, balconies, or patios.
✔ Cost-Effective – Recycle plastic containers instead of buying expensive pots.
✔ Highly Nutritious – Bell peppers are packed with vitamin C, antioxidants, and fiber.
✔ Better Control – Easier to manage soil quality, moisture, and pests.
💡 Tip: Choose a large plastic container (at least 5 gallons) with drainage holes for the best results.
🛠️ Materials Needed
🔹 Plastic container (minimum 12 inches deep and 5 gallons in size)
🔹 Well-draining potting mix rich in organic matter
🔹 Bell pepper seeds or seedlings
🔹 Organic fertilizer for strong, healthy growth
🔹 Mulch to retain moisture and prevent weeds
💡 Tip: Recycled buckets, tubs, or bins work great as long as they have proper drainage holes.
🌿 Step-by-Step Guide to Growing Bell Peppers in Plastic Containers
Step 1: Prepare the Container
🛠️ Drill drainage holes in the bottom to prevent waterlogging.
🛠️ Fill with nutrient-rich potting soil mixed with organic compost.
🛠️ Place the container in a warm, sunny location.
💡 Tip: Adding small stones at the bottom improves drainage and prevents root rot.
Step 2: Planting the Bell Peppers
🌱 If using seeds, plant them ¼ inch deep and keep the soil moist.
🌱 If using seedlings, plant them 12-18 inches apart to allow proper root development.
🌱 Water lightly and keep the soil slightly damp.
💡 Tip: Bell peppers thrive in temperatures between 70-85°F (21-29°C), so keep them in a warm spot.
Step 3: Caring for Your Bell Peppers
💦 Water Regularly – Keep soil moist but not soggy. Water in the morning for best absorption.
☀ Provide Plenty of Sunlight – Bell peppers need 6-8 hours of direct sunlight daily.
🌿 Feed Your Plants – Use organic fertilizer every 2-3 weeks to boost growth and fruit production.
🛑 Support the Plant – Use stakes or cages to prevent the plant from bending under the weight of the peppers.
💡 Tip: Mix eggshells into the soil for an extra calcium boost, preventing blossom-end rot.
Step 4: Harvesting Your Bell Peppers
🌶️ Peppers are ready for harvest 60-90 days after planting.
🌶️ Pick when they turn fully red, yellow, orange, or green, depending on the variety.
🌶️ Use sharp scissors or garden shears to cut the peppers without damaging the plant.
💡 Tip: Regular harvesting encourages continuous fruit production, so don’t let peppers overripe on the plant.
🚫 Common Mistakes & How to Avoid Them
❌ Overwatering – Leads to root rot; ensure good drainage.
❌ Insufficient Sunlight – Results in slow growth and fewer peppers.
❌ Not Enough Space – Crowded plants produce smaller yields.
🌟 Final Thoughts
Growing colorful bell peppers in nutrient-rich plastic containers is a simple, space-saving method that provides a high yield of delicious, homegrown produce. With just a little care, you can enjoy fresh, organic bell peppers straight from your balcony or patio!
🌱 Try this technique today and enjoy homegrown bell peppers all season long! 🌶️✨


