Mini roses are a wonderful addition to any home or garden, offering a burst of color and fragrance in a small, manageable size. Whether you want to create a charming display on your balcony, windowsill, or garden bed, transplanting mini roses into beautiful pots can elevate the look of your space. However, pairing mini roses with the right pot and ensuring they have optimal care during transplanting is essential for their health and blooming success.
In this guide, we’ll walk you through the rose transplant process, including how to choose the best pot for your mini roses, how to handle the transplanting process, and how to care for your newly potted roses to help them thrive.
Why Choose Mini Roses for Pots?
Miniature roses, also known as “patio roses” or “dwarf roses,” are perfect for container planting due to their compact size. Unlike traditional rose bushes, mini roses have smaller growth habits but still produce vibrant flowers that are just as stunning. They can be easily displayed in pots, hanging baskets, or window boxes, making them an ideal choice for those with limited space or for those wanting to create a mini rose garden.
1. Choosing the Right Pot for Mini Roses
The first step in transplanting mini roses is choosing the right pot. Here are a few things to consider when selecting your pot:
- Size: Choose a pot that is 2 to 3 inches larger in diameter than the root ball of your mini rose. A pot that is too large may retain excess moisture, while a pot that is too small will restrict the roots and hinder growth.
- Material: Pots come in various materials, including terra cotta, ceramic, plastic, and fiberglass. Plastic pots are lightweight and retain moisture well, making them a good option for mini roses. Terracotta pots are porous, allowing for better airflow to the roots, but they can dry out faster, so you’ll need to monitor watering carefully.
- Drainage: Good drainage is a must for mini roses. Ensure the pot has at least one drainage hole at the bottom to allow excess water to escape. Without proper drainage, the roots can become waterlogged, leading to root rot and other issues.
- Style: Since mini roses are often grown for their aesthetic appeal, choose a decorative pot that complements the look of your home or garden. You can opt for a rustic, modern, or elegant style depending on your personal taste.
2. Transplanting Mini Roses into Pots: A Step-by-Step Guide
Once you’ve chosen the perfect pot, it’s time to transplant your mini roses. Follow these steps for a successful transplant:
Step 1: Prepare Your Materials
Gather all the tools and materials you’ll need for the transplanting process:
- A well-draining pot (with a hole at the bottom)
- Potting mix suitable for roses or general-purpose soil
- A small shovel or trowel
- A watering can with water at room temperature
- Optional: fertilizer or compost for extra nutrition
Step 2: Prepare the Pot
- Place a layer of drainage material (such as gravel or broken clay pots) at the bottom of the pot. This will help prevent the drainage hole from getting clogged with soil and allow water to flow freely.
- Add a small amount of potting soil on top of the drainage layer. You want to create a base for your mini rose to rest on when you transplant it.
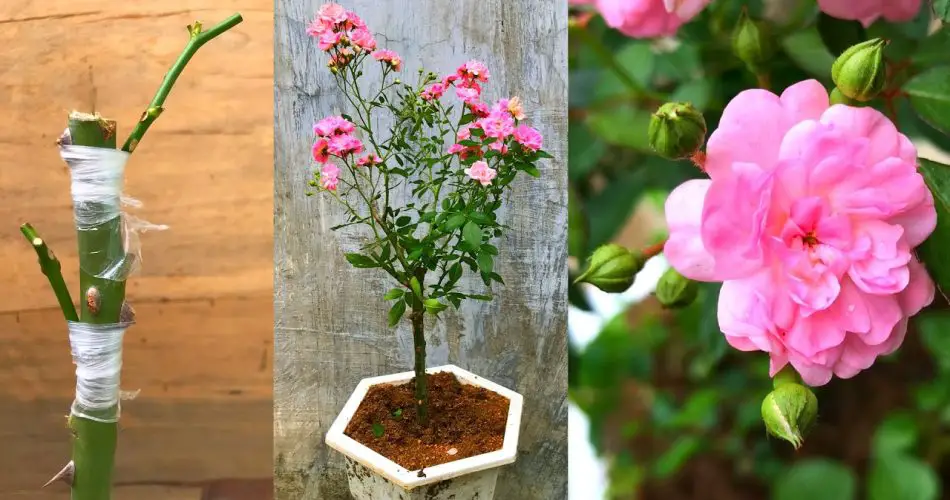
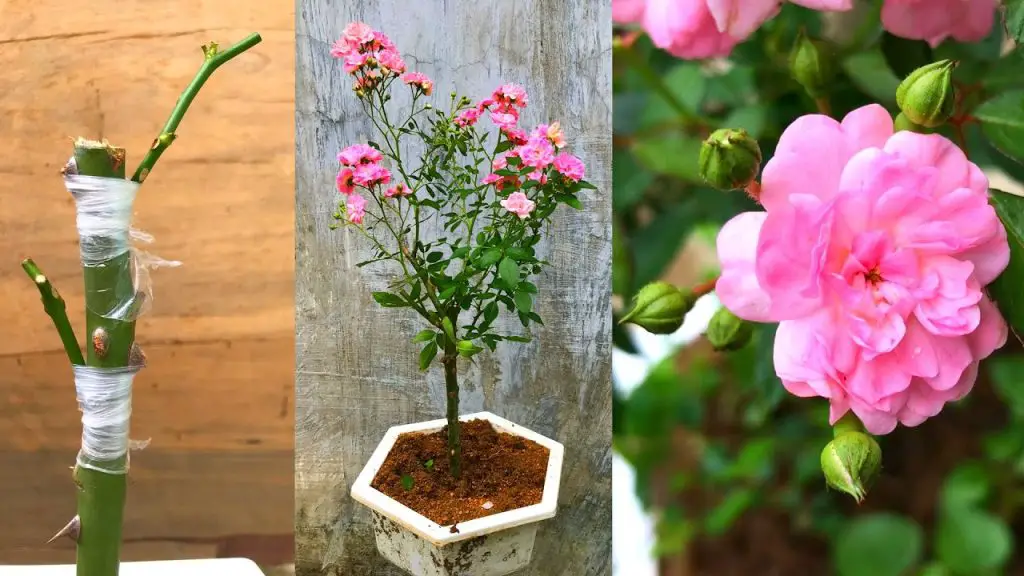
Step 3: Remove the Mini Rose from its Current Pot
- Gently remove the mini rose from its nursery pot or container. If the plant is root-bound (with roots circling the root ball), gently loosen the roots with your fingers. This will encourage the roots to spread out and grow into the new pot.
- Inspect the roots for any signs of rot or damage. If you notice any unhealthy roots, trim them off with clean, sharp scissors.
Step 4: Plant the Rose
- Place the mini rose in the new pot, ensuring that the top of the root ball is about 1 inch below the rim of the pot. This will allow space for watering and prevent the soil from spilling over the sides.
- Fill the pot with additional potting mix, gently pressing the soil around the roots to eliminate air pockets. Be careful not to bury the rose too deeply; the base of the plant should be level with the soil surface.
Step 5: Water the Plant
- Water the newly transplanted mini rose thoroughly to settle the soil around the roots. Ensure the water drains freely from the bottom of the pot. This will help the roots adjust to their new environment and encourage proper hydration.
- Avoid over-watering, as roses don’t like soggy soil. Allow the top inch of soil to dry before watering again.
3. Caring for Your Transplanted Mini Roses
After transplanting, your mini rose will need some extra attention to help it adjust to its new pot. Here are some care tips for ensuring healthy growth:
Light
- Mini roses love bright, indirect light. Place your potted mini rose in a location that receives several hours of light each day, but avoid placing it in direct sunlight, which can scorch the leaves. If you’re growing your roses indoors, a south or west-facing windowsill is ideal.
Temperature
- Mini roses thrive in moderate temperatures. Ideally, they should be kept between 60°F and 75°F (15°C and 24°C). Avoid placing them in areas with temperature fluctuations, such as near air conditioning units or heating vents.
Watering
- Water the mini rose regularly, but ensure the pot has proper drainage. As mentioned earlier, avoid letting the plant sit in standing water, as this can lead to root rot.
Fertilization
- To encourage strong growth and more blooms, fertilize your mini rose regularly during the growing season (spring through early fall). Use a balanced fertilizer or one specifically designed for roses. Apply the fertilizer once a month, but always follow the manufacturer’s instructions to avoid overfeeding.
4. How to Pair Mini Roses with Other Plants in a Pot
Pairing mini roses with other complementary plants in a pot can create a stunning display. Consider pairing your mini roses with:
- Trailing plants like lobelia or ivy, which will spill over the sides of the pot and create a cascading effect.
- Herbs such as lavender or thyme, which have a pleasant fragrance and will not compete with the roses for nutrients.
- Low-growing flowers like petunias, geraniums, or pansies, which add variety in color and texture without overshadowing the roses.
When pairing plants, make sure that all the chosen companions have similar light and water requirements to ensure they grow harmoniously.
Conclusion: Transform Your Space with Beautiful Mini Roses in Pots
Transplanting mini roses into beautiful pots is an easy and cost-effective way to enjoy their vibrant blooms year-round. By following these transplanting tips and pairing them with the right companions, you can create an eye-catching display on your balcony, windowsill, or garden. With the proper care, your mini roses will not only survive but thrive, adding beauty and fragrance to your space for months to come.
By selecting the right pot, following the transplant steps, and providing ongoing care, you can ensure your mini roses continue to bloom beautifully, making your home or garden a fragrant, colorful oasis.


