The Garlic Orchid, also known as the Purple Garlic Vine (Mansoa alliacea), is a stunning and fragrant flowering vine native to South America. It is admired for its vibrant purple flowers and the distinctive garlic scent emitted by its leaves. Propagating this beautiful plant through cuttings is an easy and effective way to grow new plants for your garden or home. If you want to learn how to propagate Garlic Orchids successfully, keep reading for a step-by-step guide!

Why Propagate Garlic Orchid by Cuttings?
Propagation by cuttings is one of the easiest methods for multiplying your Garlic Orchid plants. It is an affordable, quick, and reliable way to grow new plants without waiting for seeds to mature. By taking a cutting from a healthy plant, you can ensure that the new plant will have the same characteristics, including its gorgeous purple flowers and fragrant leaves.
Cuttings also allow you to preserve the quality of your plant without having to deal with the unpredictable nature of seed growth.
What You’ll Need to Propagate Garlic Orchid by Cuttings:
- Healthy Garlic Orchid plant (the parent plant)
- Sharp, clean pruning shears or scissors
- Small pot (for rooting the cutting)
- Well-draining potting mix (a mix of peat, perlite, and orchid bark is ideal)
- Plastic bag or a propagation dome (to maintain humidity)
- Rooting hormone (optional, but can help encourage root growth)
- Water (for soaking the cutting)
- A sunny spot (indirect light for the cutting to root)
Step-by-Step Guide: How to Propagate Garlic Orchid by Cuttings
1. Choose the Right Cutting
To begin, select a healthy stem from the parent Garlic Orchid. The ideal cutting should be around 4 to 6 inches long and should have several nodes (the areas on the stem where leaves grow). It’s best to cut a piece from the top half of the plant, as this will encourage faster rooting.
2. Make the Cut
Using your sharp pruning shears or scissors, make a clean, diagonal cut just below a node. Ensure that your cutting is healthy and free from disease or damage. This will increase the chances of successful rooting.
3. Prepare the Cutting
Remove any leaves or flowers from the bottom 2 inches of the cutting to expose the stem. This is where the roots will form. If you like, you can dip the cut end of the stem into rooting hormone to encourage quicker root development. Although not necessary, rooting hormone can be especially useful for stubborn cuttings.
4. Plant the Cutting
Prepare a small pot with a well-draining potting mix. The mix should be light and airy to prevent waterlogging. Make a small hole in the soil and gently place the cutting into it, ensuring that the bottom part of the cutting with the exposed nodes is buried in the soil.
5. Water the Cutting
Water the cutting lightly to moisten the soil, but don’t overwater it. The soil should be damp, not soaked, as too much moisture can cause the cutting to rot. Place the pot in a warm area that receives indirect sunlight. The ideal temperature for rooting is between 70°F (21°C) and 75°F (24°C).
6. Create a Humid Environment
Cover the cutting with a plastic bag or use a propagation dome to maintain high humidity around the cutting. This will create a mini greenhouse effect, which encourages the cutting to root more quickly. Make sure to ventilate the bag or dome occasionally to prevent mold buildup.
7. Monitor Root Growth
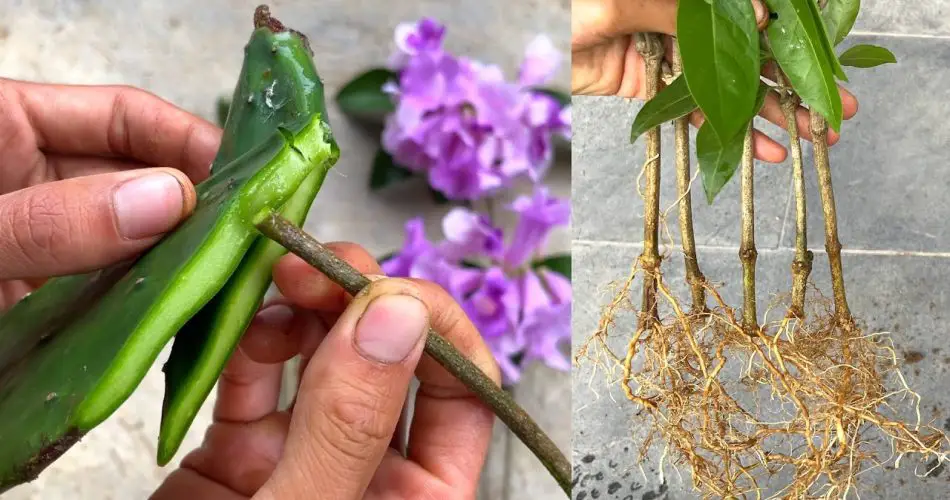
Check the cutting every few days to ensure the soil is still damp and the cutting is not rotting. After about 2 to 3 weeks, the cutting should start developing roots. You can gently tug on the cutting to see if there’s any resistance, which indicates that roots have formed.
8. Transplant the Rooted Cutting
Once the cutting has developed a healthy root system, typically after about 4 to 6 weeks, it is ready to be transplanted into a larger pot. Choose a pot that allows for further growth and make sure it has drainage holes. Continue to care for the new plant by watering it regularly and placing it in a location with indirect sunlight until it’s established.
Care Tips for Your Newly Propagated Garlic Orchid
- Watering: After transplantation, water the Garlic Orchid regularly but avoid waterlogging. The soil should be kept moist, but not soaking.
- Light: Garlic Orchids prefer bright, indirect light. Avoid placing them in direct sunlight, as it can scorch the leaves.
- Temperature: Keep the plant in a warm environment, as it thrives in temperatures between 65°F (18°C) and 85°F (29°C).
- Fertilizing: During the growing season, you can feed the plant with a balanced liquid fertilizer once a month to promote healthy growth and blooming.
- Support: As the plant grows, provide it with some support like a trellis or vine support to help it climb and stay upright.
Conclusion: Growing Your Own Garlic Orchid by Cuttings
Propagating the Garlic Orchid by cuttings is an enjoyable and rewarding experience that allows you to expand your collection of these stunning, fragrant plants. By following the simple steps outlined above, you can easily grow a new Garlic Orchid and enjoy its purple flowers and garlic scent in your garden or home.
This method of propagation is cost-effective, and it guarantees that your new plant will have the same desirable characteristics as the parent. Give it a try and enjoy the beauty of your very own Purple Garlic Vine!