Orchid propagation can be a rewarding and fulfilling process, and using aloe vera in plastic bottles is an innovative method to achieve successful results. Aloe vera not only promotes healthy root development but also creates a nurturing environment for your orchids. Here’s a step-by-step guide on how to propagate orchids with aloe vera using plastic bottles.
Why Use Aloe Vera for Orchid Propagation?
Aloe vera offers several benefits when propagating orchids:
- Natural Growth Hormones: Aloe vera contains growth hormones that stimulate root development and enhance plant vigor.
- Antimicrobial Properties: Its antimicrobial properties help prevent fungal and bacterial infections, which can be detrimental to young orchid roots.
- Moisture Retention: Aloe vera gel helps retain moisture around the roots, ensuring a stable and healthy growing environment.
Materials Needed
To propagate orchids using aloe vera in plastic bottles, you’ll need:
- Plastic Bottles: Clear or translucent bottles work best as they allow you to monitor root growth.
- Aloe Vera Gel: Fresh or store-bought gel.
- Orchid Cuttings: Healthy orchid stems with a few nodes.
- Sterilized Scissors or Pruners: For making clean cuts.
- Potting Medium: Orchid potting mix or sphagnum moss.
Steps to Propagate Orchids with Aloe Vera
- Prepare the Plastic Bottles:
- Clean and Sterilize: Thoroughly wash and sterilize the plastic bottles to prevent contamination.
- Create Drainage Holes: Use a drill or a heated tool to make small drainage holes in the bottom of each bottle to ensure excess water can escape.
- Prepare Aloe Vera Gel:
- Extract the Gel: Cut open an aloe vera leaf and scoop out the gel. You’ll need a small amount of gel for each bottle.
- Mix with Water: Optionally, you can dilute the aloe vera gel with a little water to create a more liquid consistency.
- Prepare Orchid Cuttings:
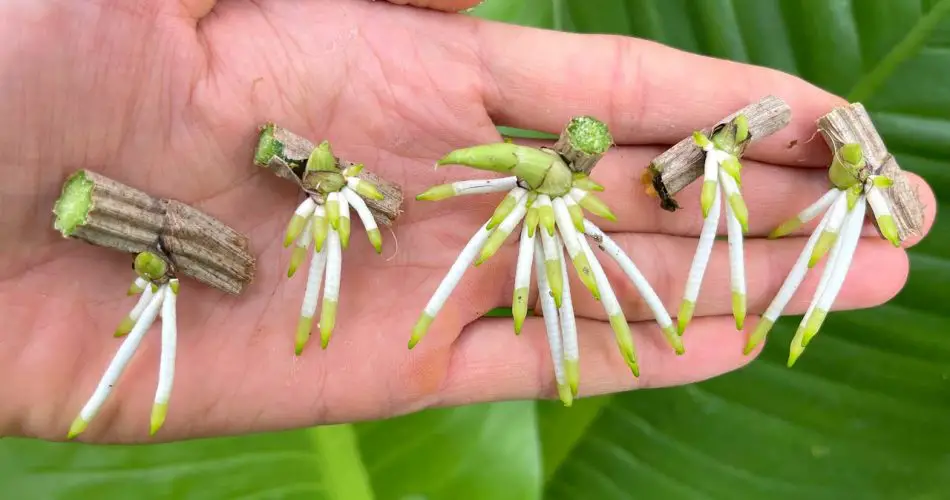
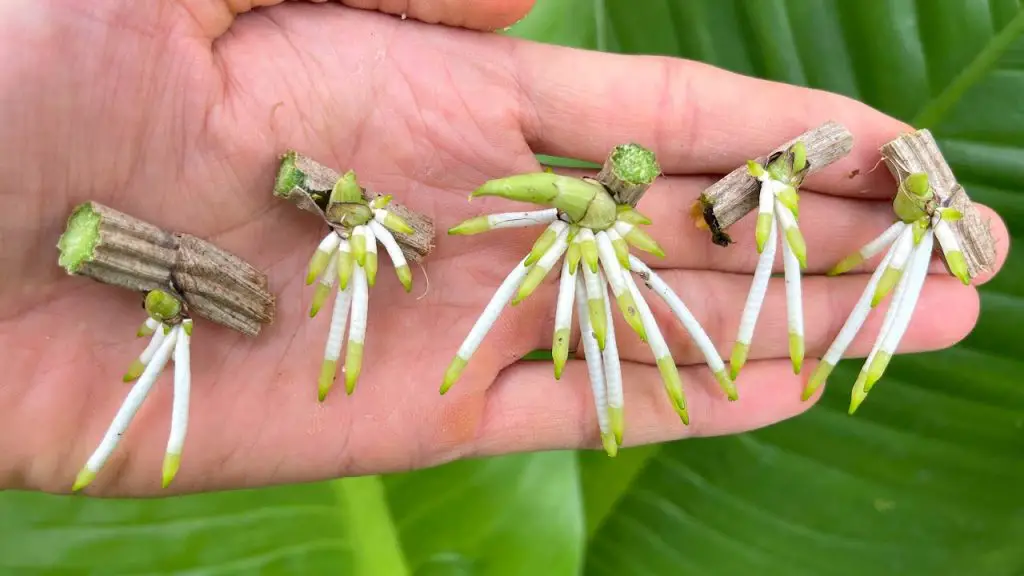
- Select Healthy Cuttings: Choose orchid stems with at least one or two nodes. These nodes are the potential points where new roots and shoots will develop.
- Cut and Prepare: Use sterilized scissors or pruners to make a clean cut just below a node. Allow the cut end to dry for a few hours to reduce the risk of rot.
- Planting the Cuttings:
- Apply Aloe Vera Gel: Dip the cut end of the orchid cutting into the aloe vera gel. This helps protect the cutting and promotes root growth.
- Insert into Plastic Bottle: Place the cutting into the prepared plastic bottle filled with a small amount of orchid potting mix or sphagnum moss. Ensure the node is in contact with the medium.
- Add Aloe Vera Solution: If you diluted the aloe vera gel, pour a small amount into the bottle to keep the medium moist.
- Create a Humid Environment:
- Cover the Bottle: To maintain high humidity, cover the bottle with a plastic bag or a clear plastic dome. This helps create a greenhouse-like environment for the orchid cutting.
- Place in Indirect Light: Position the bottle in a location with indirect light. Avoid direct sunlight, which can overheat the cutting.
- Monitor and Care:
- Check for Roots: After a few weeks, gently remove the bottle’s cover to check for root development. The cutting should start producing new roots.
- Water and Fertilize: Keep the potting medium moist but not soggy. Once roots are well-established, you can start applying a diluted orchid fertilizer.
Benefits of Using Plastic Bottles for Propagation
- Cost-Effective: Plastic bottles are an inexpensive option for creating a propagation environment.
- Easy Monitoring: Clear bottles allow you to easily observe root growth and overall health.
- Controlled Environment: Plastic bottles help maintain high humidity and a stable environment for young orchids.
In Summary
Propagating orchids with aloe vera in plastic bottles is a simple and effective method to grow new orchids. By leveraging the natural benefits of aloe vera and using clear plastic bottles, you can create an ideal environment for healthy root development and successful propagation. Follow these steps, and you’ll be well on your way to growing beautiful new orchids in no time.


