Growing roses can be a delightful and rewarding hobby, and using recycled plastic bottles as propagation pots is a fantastic way to practice sustainability. Not only does this method help reduce waste, but it also provides an effective way to start your rose cuttings. In this article, we’ll explore how to create propagation pots from plastic bottles and the steps to successfully grow roses.

Benefits of Using Plastic Bottles
- Eco-Friendly: Recycling plastic bottles reduces landfill waste and minimizes your carbon footprint. It’s a small step that contributes to a larger environmental impact.
- Cost-Effective: Instead of purchasing new pots, you can utilize materials you already have at home, saving money while helping the environment.
- Customizable: Plastic bottles can be easily modified to suit your gardening needs, allowing you to create pots of various sizes for different rose varieties.
How to Make Plastic Bottle Propagation Pots
Creating propagation pots from plastic bottles is simple. Follow these steps:
Materials Needed
- Plastic bottles (2-liter soda bottles work well)
- Scissors or a utility knife
- Potting soil or a well-draining mix
- Water
Step-by-Step Instructions
- Prepare the Bottle:
- Start by rinsing the plastic bottle to remove any residues. Remove the label to make it easier to see the moisture level.
- Cut the Bottle:
- Using scissors or a utility knife, carefully cut the bottle in half. You can choose to use either the top or bottom part as your propagation pot, but the top half usually works best for creating a mini greenhouse effect.
- Create Drainage Holes:
- Make several small holes in the bottom of the bottle to ensure proper drainage. This is crucial to prevent root rot.
- Add Potting Soil:
- Fill the bottom half of the bottle with potting soil. Leave about an inch of space at the top.
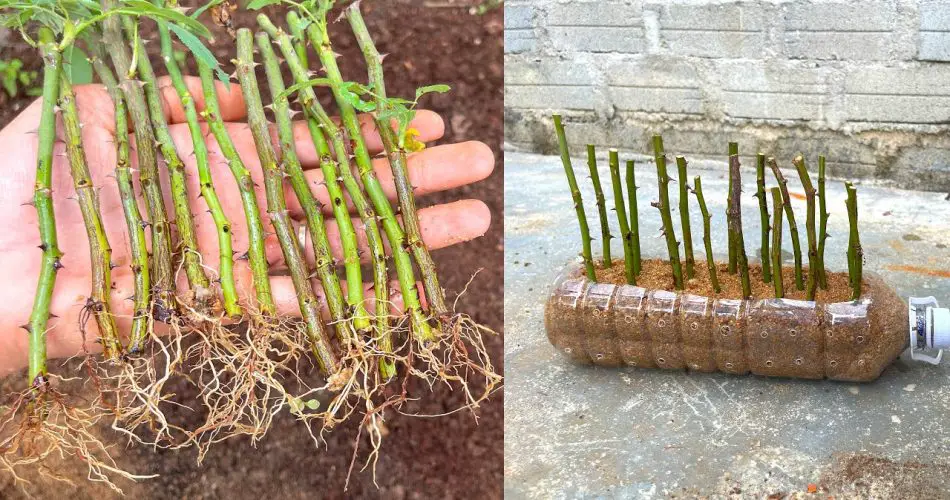
- Insert Your Rose Cuttings:
- Take healthy cuttings from your rose plants, about 6-8 inches long, and remove the lower leaves. Insert the cuttings into the soil, ensuring they are firmly in place.
- Water the Cuttings:
- Lightly water the soil to provide moisture without saturating it. The soil should be damp but not soggy.
- Cover for Humidity:
- If using the top half of the bottle, place it over the bottom half to create a mini greenhouse effect, which helps retain moisture and warmth.
Caring for Your Rose Cuttings
Once you have set up your propagation pots, follow these care tips to ensure successful growth:
- Light: Place the bottles in a location that receives bright, indirect sunlight. Avoid direct sunlight, as it can overheat the cuttings.
- Watering: Check the soil moisture regularly. Water when the top inch feels dry, ensuring not to let the soil dry out completely.
- Ventilation: If using the top half as a cover, occasionally remove it for ventilation to prevent mold growth and ensure air circulation.
Transplanting Your Roses
Once the cuttings have rooted and new growth appears (typically within 4-6 weeks), they can be transplanted into larger pots or directly into your garden:
- Prepare the New Location: Choose a spot with well-draining soil and plenty of sunlight.
- Transplant Carefully: Gently remove the rooted cuttings from the bottle and transplant them into their new home, being careful not to damage the roots.
- Water: Water the newly transplanted roses thoroughly to help them settle in.
Conclusion
Using recycled plastic bottles as propagation pots is a creative and eco-friendly way to grow roses. Not only do you contribute to environmental sustainability, but you also embark on a rewarding gardening journey. By following these steps, you can enjoy beautiful roses while minimizing waste. Happy gardening!


