Roses are among the most beloved flowers, known for their beauty, fragrance, and variety of colors. While growing roses from seeds can be a slow and challenging process, propagating roses from branches (often called cuttings) is a much faster and more effective way to grow your own roses at home. Whether you’re a beginner or an experienced gardener, learning how to propagate roses from cuttings is an easy and rewarding project.
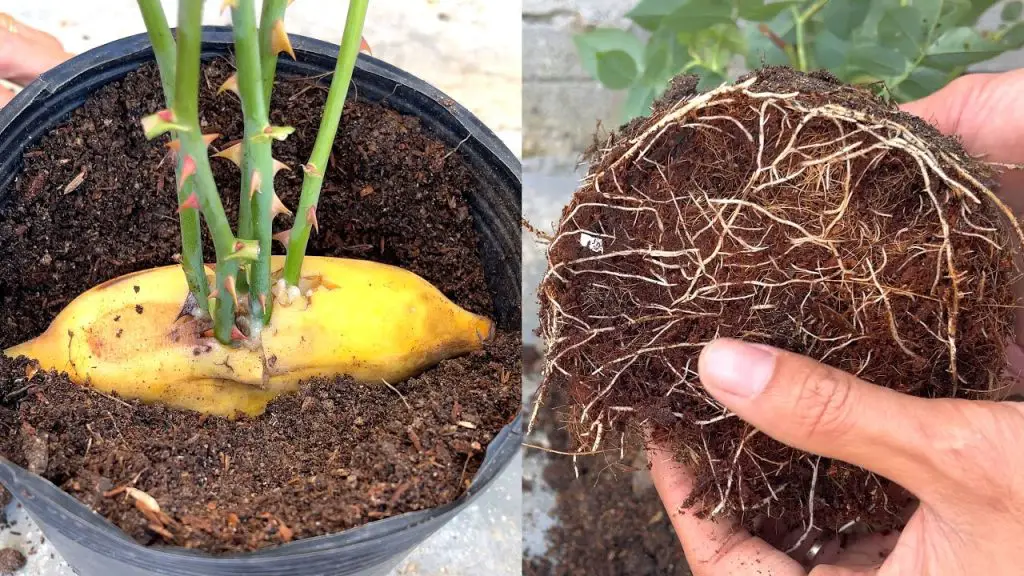
In this article, we’ll show you step-by-step how to grow your own roses from branches at home, using simple methods that anyone can follow.
Why Propagating Roses from Branches is a Great Idea
There are several reasons why propagating roses from branches is a fantastic way to grow your own roses:
- Cost-Effective: Instead of buying new plants, you can create multiple rose plants from one existing rose bush.
- Preserves Unique Varieties: If you have a special rose variety you love, propagating from the branches allows you to clone the exact same plant, ensuring the same color, fragrance, and characteristics.
- Simple and Fun: Rose propagation is a rewarding gardening project that’s both simple and enjoyable. With patience and care, you can watch your roses grow from cuttings to full plants.
Materials You’ll Need to Grow Roses from Branches
Before you begin, gather the following materials for successful rose propagation:
- Healthy Rose Branches (Cuttings): Choose a healthy, disease-free rose bush with strong branches.
- Sharp Pruning Shears: To cut the rose branches.
- Rooting Hormone (Optional): A powder or gel that encourages root growth. While optional, it can boost success rates.
- A Small Pot with Drainage Holes: For planting the rose cutting.
- Well-Draining Potting Mix: To give your cutting the right nutrients and drainage.
- Plastic Bag or Clear Plastic Bottle: To create a humidity dome for your cutting.
- Water: To keep the cutting hydrated during the rooting process.
Step-by-Step Guide to Growing Roses from Branches
1. Select the Right Rose Branch
Choosing the right branch is key to successful rose propagation. Follow these guidelines:
- Choose Semi-Hardwood: Select a semi-hardwood branch—this is a stem that has started to harden but is still flexible. The branch should be about 4-6 inches long.
- Healthy and Pest-Free: Make sure the cutting is healthy, without signs of disease or pests. Look for a branch with vibrant color and strong, healthy growth.
2. Take the Cutting
Using sharp pruning shears, cut a healthy, disease-free rose branch. Make the cut just below a leaf node (the point where leaves grow from the stem). The cutting should be about 4-6 inches long and have at least one or two leaves attached.
- Trim the Leaves: Remove any large leaves from the lower half of the cutting to prevent them from touching the soil and rotting. Leave the top leaves intact to help the cutting absorb sunlight.
- Cut at an Angle: Make a diagonal cut at the bottom of the stem, as this will help the cutting absorb more water and nutrients.
3. Apply Rooting Hormone (Optional)
Rooting hormone can help speed up the process of root development, though it’s not strictly necessary.
- Dip the End in Rooting Hormone: Gently dip the bottom end of the cutting into rooting hormone powder or gel, tapping off any excess.
- Benefits: Rooting hormone promotes faster and stronger root growth, giving your rose cutting the best chance of success.
4. Plant the Cutting
Now it’s time to plant your rose cutting in a pot:
- Prepare the Pot: Fill a small pot (around 4-6 inches in diameter) with a well-draining potting mix. You can use a mix of peat, perlite, and sand to ensure good drainage and aeration.
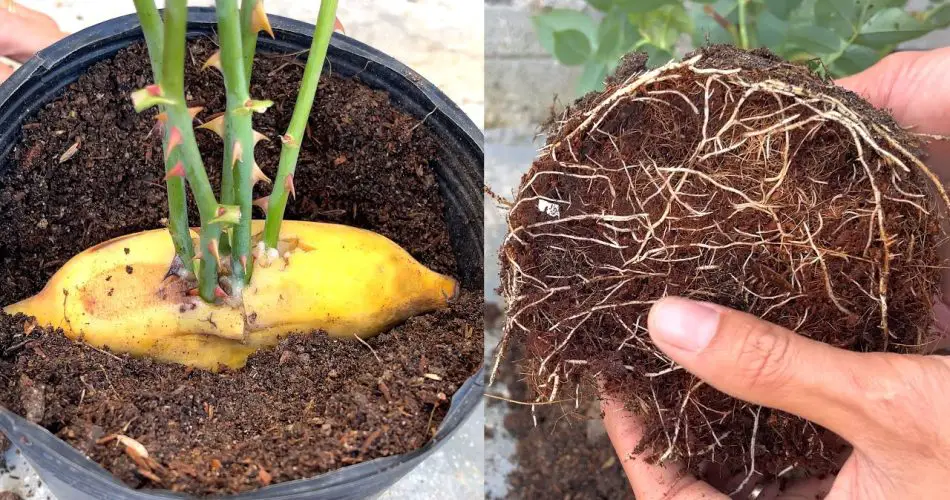
- Plant the Cutting: Insert the bottom end of the rose cutting into the soil, burying it about 2-3 inches deep. Gently press the soil around the base of the cutting to hold it in place.
5. Create a Humidity Dome
Rose cuttings need high humidity to root properly. You can create a humidity dome using either a plastic bag or a clear plastic bottle:
- Plastic Bag Method: Cover the pot with a clear plastic bag, making sure it doesn’t touch the cutting. Use a rubber band or twist tie to secure it around the base of the pot.
- Plastic Bottle Method: Cut the bottom off a plastic bottle and place it over the cutting. This creates a mini-greenhouse effect to keep the cutting warm and humid.
6. Place the Cutting in the Right Location
Roses need warmth and light to grow, but too much direct sunlight can harm the cutting. Place the pot in a location with indirect sunlight or bright but not direct light.
- Ideal Temperature: Keep the cutting in a room with a temperature of around 65-75°F (18-24°C). This is the ideal range for rooting.
7. Water and Monitor Progress
Keep the soil consistently moist but not soaking wet. Check the cutting daily to ensure the humidity inside the dome remains high.
- Watering: If the soil feels dry, water it gently. Be careful not to drown the cutting, as excess water can cause the cutting to rot.
- Monitor for Roots: In about 3-6 weeks, your cutting should begin to develop roots. You can test this by gently tugging on the cutting. If it resists, it’s rooted and ready for transplanting.
8. Transplanting the New Rose Plant
Once the rose cutting has developed strong roots and is starting to show new growth, it’s time to move it to a larger pot or directly into your garden.
- Gradual Acclimatization: Before transplanting your rooted cutting outside, gradually acclimate it to outdoor conditions by placing it in a shaded area for a few hours each day.
- Planting: Once acclimatized, you can plant the new rose bush in your garden or a larger pot.
Tips for Success
- Patience is Key: Rose propagation from cuttings can take some time. Be patient and give the cutting enough time to develop roots and establish itself.
- Maintain Humidity: Roses are sensitive to humidity, so it’s important to keep the cutting in a high-humidity environment until it has rooted.
- Avoid Overwatering: Too much water can cause the cutting to rot. Ensure the soil is moist but not waterlogged.
Conclusion: Growing Your Own Roses at Home is Easy!
Propagating roses from branches is a simple and rewarding process that allows you to grow beautiful roses at home with minimal effort. By following these easy steps and using the right techniques, you can create your own stunning rose garden without needing to buy new plants. With a little patience and care, you’ll soon have a thriving collection of homegrown roses—a perfect addition to your garden or home décor.
Start propagating your own roses today, and enjoy the satisfaction of watching your cuttings grow into beautiful, blooming rose bushes!